Magicbit is a feature-rich, easy-to-use, and cost-effective platform made for everyone. The inbuilt functionalities of Magicbit provide a unique advantage for users to learn and practice a wide range of application areas such as robotics, programming, Internet of Things(IoT) and electronics.
Magicbit is an innovation ecosystem with hardware, software, mobile app, content, community and partners. Integrated solutions can be developed more easily while exploring cross-platform options such as programming with any other software or connecting to any cloud IoT platform.
A frequently asked question about Magicbit is “How many innovations can I develop with Magicbit?” The answer to that would be “It has no limits”. Your creativity and innovative mindset have to decide the number of innovations you can do. After all, the world needs more solutions with technology to resolve some of the burning problems faced by mankind. Making technology accessible and available to everyone is the passion Magicbit team would like to share with everyone.
So, Welcome to the world of Magicbit !!! Let’s start your journey of innovation.
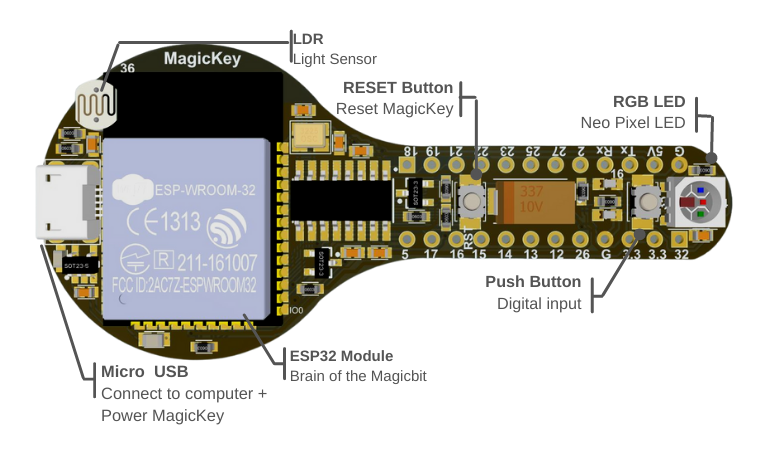
Magickey is a ESP32 based development board with on board LED, push button, LDR and RGB neo pixel. It’s bread board compatible. Support all software as same as Magicbit Core .
- Magic Key
- Computer or Laptop
- Wifi connection with internet
- USB cable
Plug your Magic key into Computer through the USB cable. it will automatically load the Magic os .
If you bought the magickey recently, magicbitOS is installed on your magickey from the factory. if not Install Magic OS manually click here
MagicbitOS is an all-in-one operating system that runs on magicbit. magicbitOS is an all-in-one operating system that runs on magicbit. You can switch between magicblocks , magiccode & test modes without a need for a computer to reprogram the board.
you have 2 options to choose from Magickey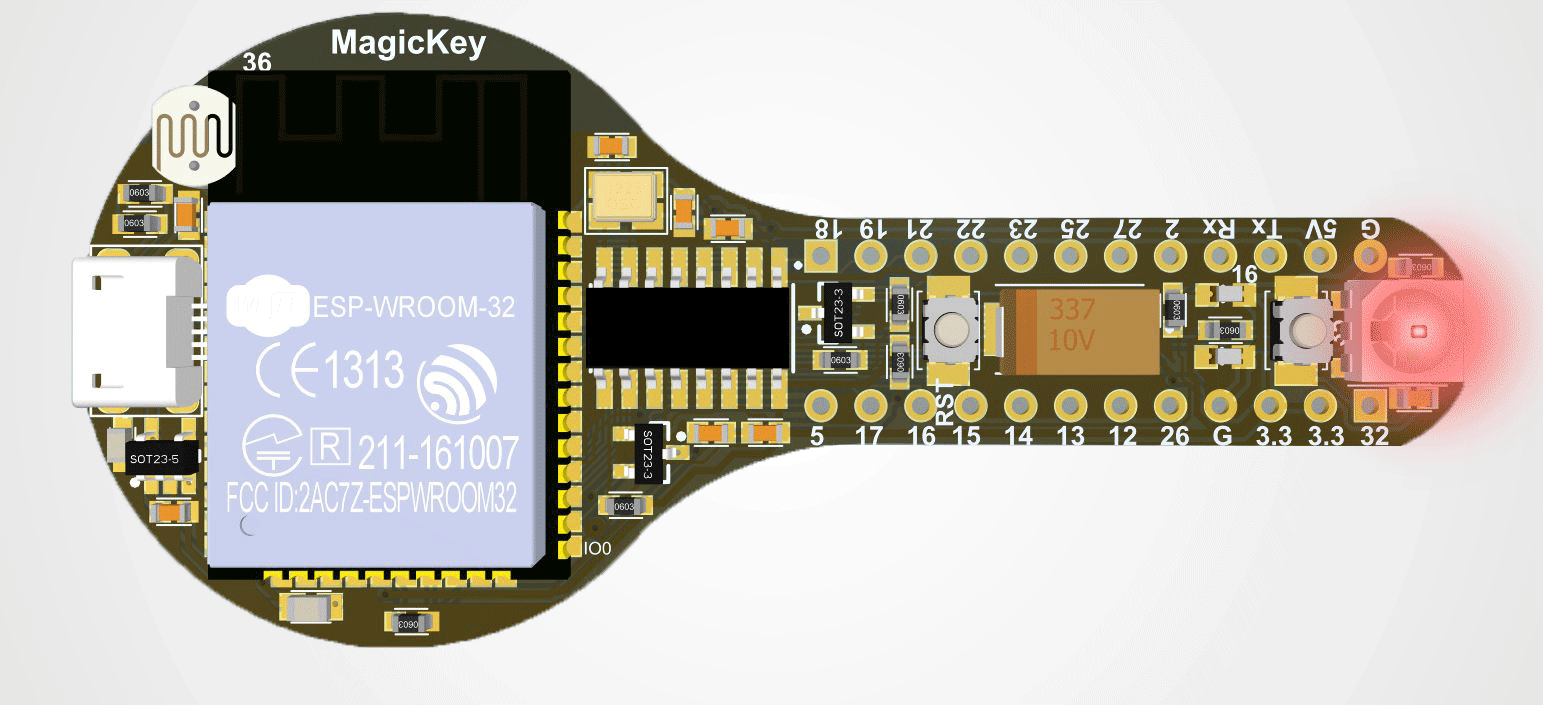
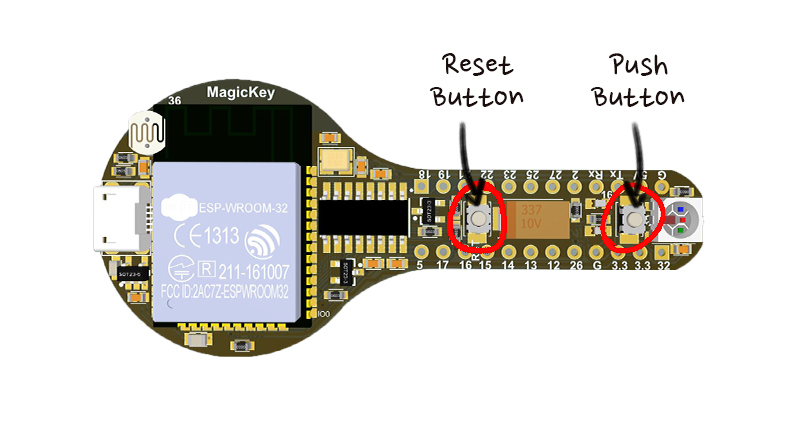
When you power up magicKey, you get 10 seconds to select mode. Else magickey will boot up to the mode you previously selected. Inside the boot menu you have 2 options to choose from. You can change the selection from the push button.
click on the below links to learn about modes.
if you want to select MagicBlock mode press the push button when the green light appears.
magicblocks IoT enables you to build IoT applications with magicblocks.io platform. Find more information from www.magicblocks.io.
.
if you want to select Magiccode mode press the push button when the red light appears.
magicode is the scratch based no-code programming platform from us.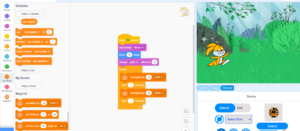 You can learn underlying theories of programming in a graphical manner using this. By enabling this mode, you enable magiccode WiFi version. You can connect the magicbit to the computer and program using magiccode, more info from here .
Magickey is powered by popular ESP32 modules which has thousands of free contents on internet.
Programming is the way of providing instructions for the computers to work. We can input instructions to computers using programs. Programming languages are used to create these instructions and we can write the programs to perform the tasks we need from a computer. There are many popular programming languages are C, C++. C#, Python, Java Script & etc. There are tools such as programming IDEs ( integrated development environment) which provides comprehensive facilities to develop computer programs.

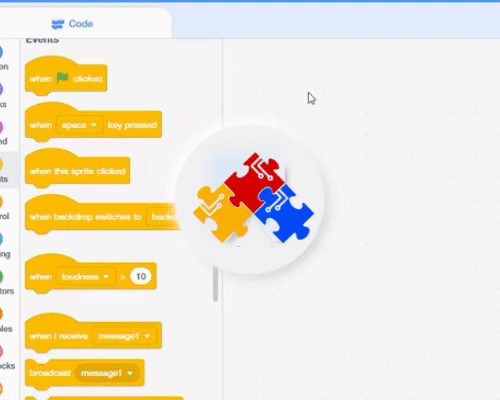
Normally programming languages have text-based interfaces. In order support beginners, there are visual code builders with block based programming. In these programming languages or IDEs, users can simply drag and drop different blocks to create a program. Scratch is popular visual code builder used by millions of users around the world.
Magicbit can be programmed with many text based and block based programming options. MagicCode is the Scratch version developed to support Magicbit environment. Mahgicblocks.io is another block based cloud platform developed to create IoT applications. This platform can be custom programmed using Java Script. Some of the other options available are micropython and Arduino IDE.
Although Magicbit can be programmed with multiple programming languages, it can be programmed with only one programming option at a given time.
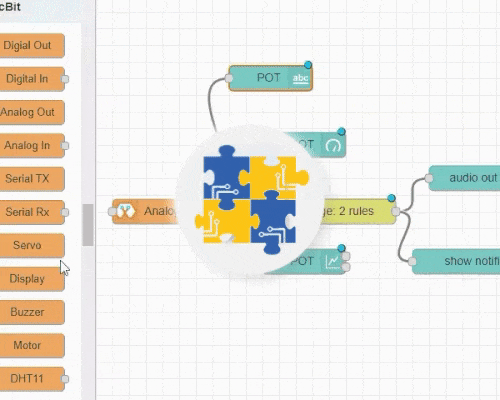
Magicblocks
It is an IoT(Internet of Things) platform to create IoT projects in minutes for both beginners and experts
MagicCode
Specially designed for kids to start learning programming with visual blocks based on Scratch3
Arduino
C/C++ based language with a large community all around the world with lot of free resources
MicroPython
Program microcontrollers and robots easily with world famous python programming language.
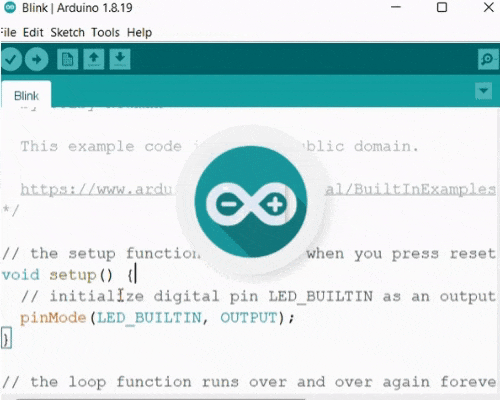
What is Arduino?
The Arduino Integrated Development Environment is a cross-platform application that is written in functions of C and C++.
 It is used to write and upload programs to Arduino compatible boards. But also, with the help of third-party cores, other vendor development boards.
Magicbit is based on ESP32 and Arduino core because Magicbit is forked from the espressif/arduino-esp32. Therefore, to program a Magicbit with the Arduino IDE, you will have to go through the following steps.
-
Release Link –https://github.com/magicbitlk/arduino-esp32/releases/download/Magicbit/package_magicbit_index.json
- Install the current Arduino IDE at the 1.8 level or later.
- Start Arduino and open the Preferences window.
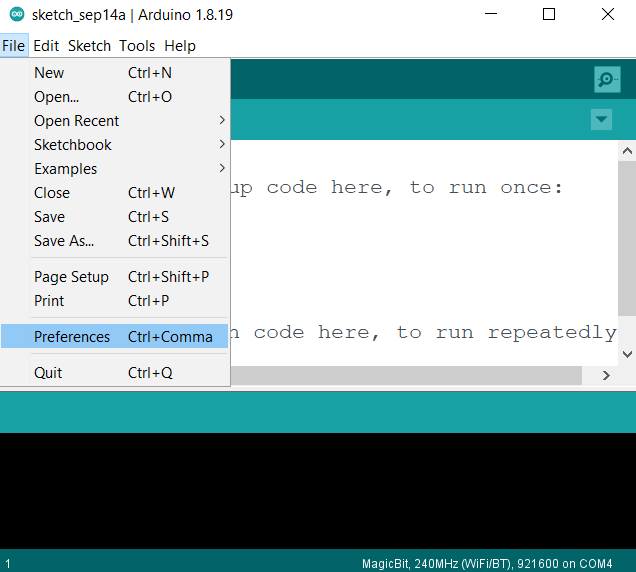 Enter the release link above into the Additional Board Manager URLs field. You can add multiple URLs, separating them with commas.
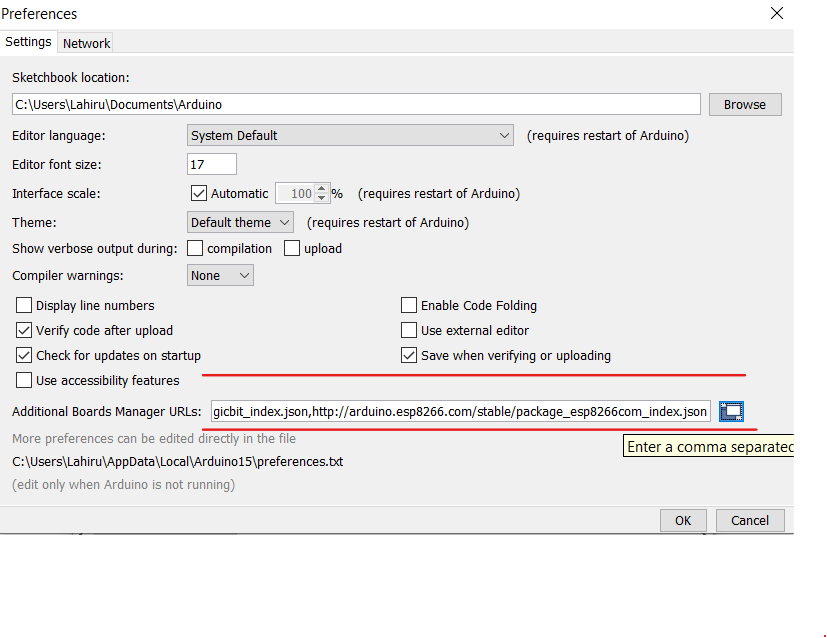
- Open Boards Manager from Tools > Board menu
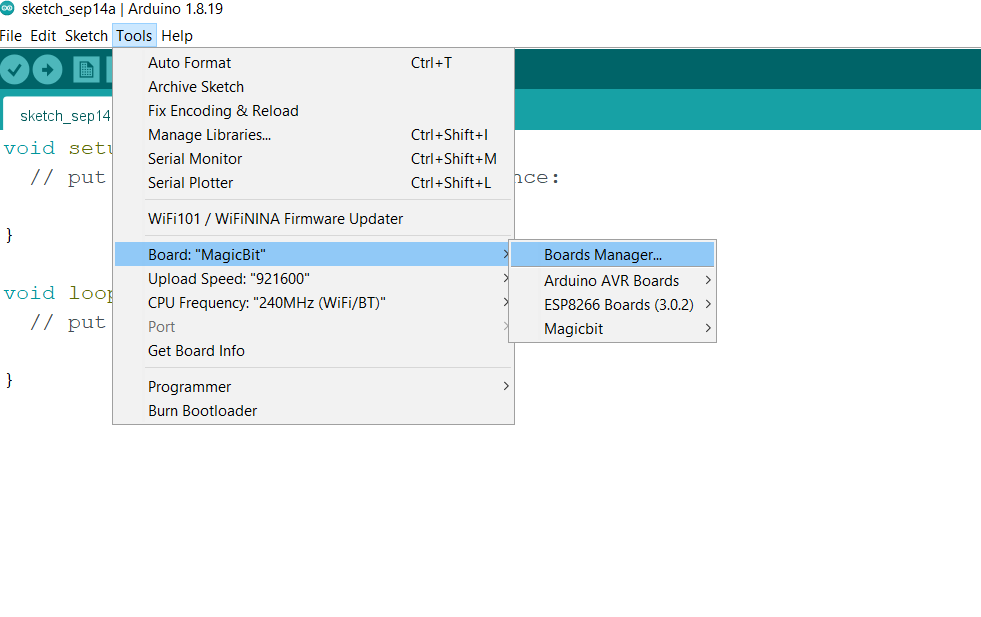 search “magicbit” and install Magicbit platform.
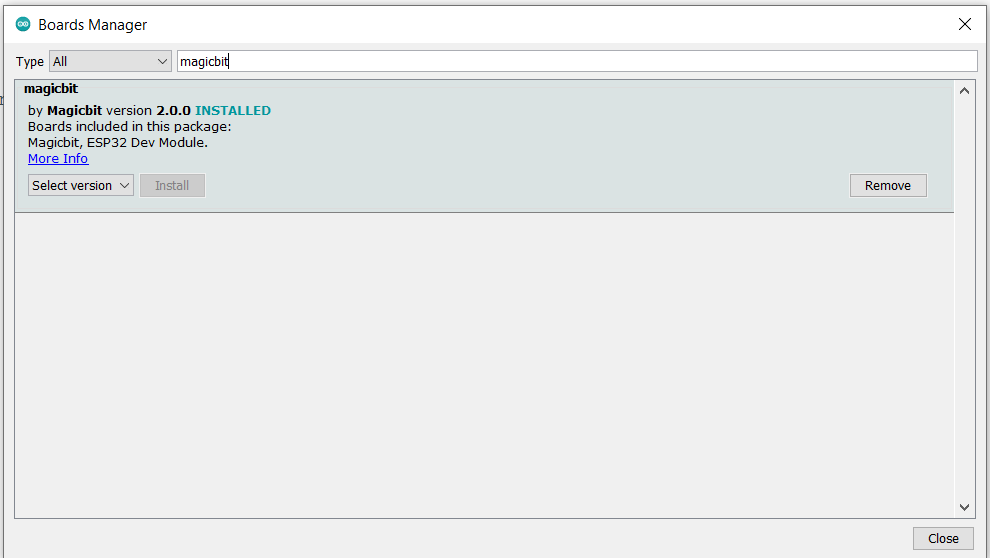
- (and don’t forget to – – select Magicbit from Tools > Board menu after installation).
Magicbit has a CH340 chip as a USB-Serial converter which the driver is already packaged with Arduino IDE. if you have already installed the magic OS, drivers will automatically install on your computer. otherwise you can Download and install (Ch-340 )drivers manually.
Connect Magickey to the computer using provided USB cable.
open the Arduino IDE and go to the Tools menu. and select the port you connected and select Board as magicbit.
- Open Arduino IDE if not opened already
- Select Magicbit from Tools ⇒ Boards
- Select port Tools ⇒ Ports
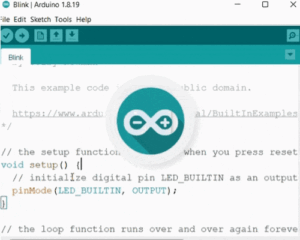
- Open Blink Example File ⇒ Examples ⇒ Basic ⇒ Blink
- Upload the code to the Magicbit using the upload button on Arduino IDE
- If the Green LED on the backside of the Magicbit is blinking, you have just begun the magic with Magicbit
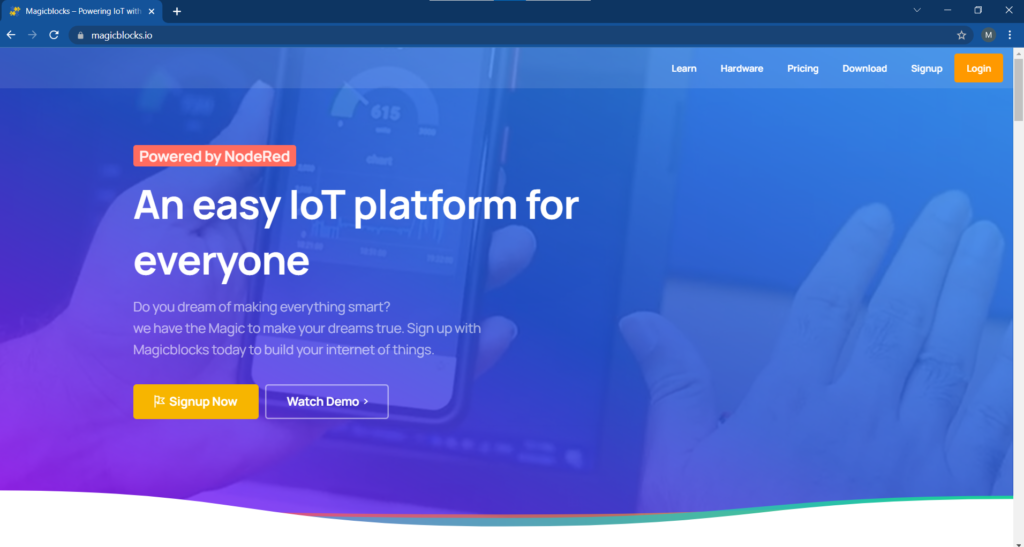
Create Magicblocks.io Account
- Go to Magicblocks website, http://magicblocks.io/
- Click on Signup Now
- Click on the Signup button after inserted your details
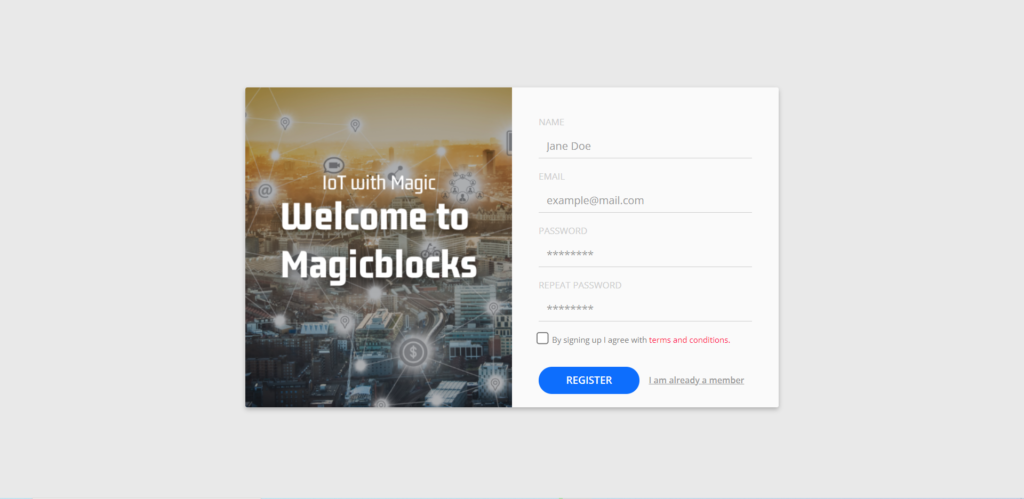
- Go to the email account you provided and activate your Magicblocks account with the Activation Link
- Follow the Activation Link which we have sent you in an email

Gmail verification email
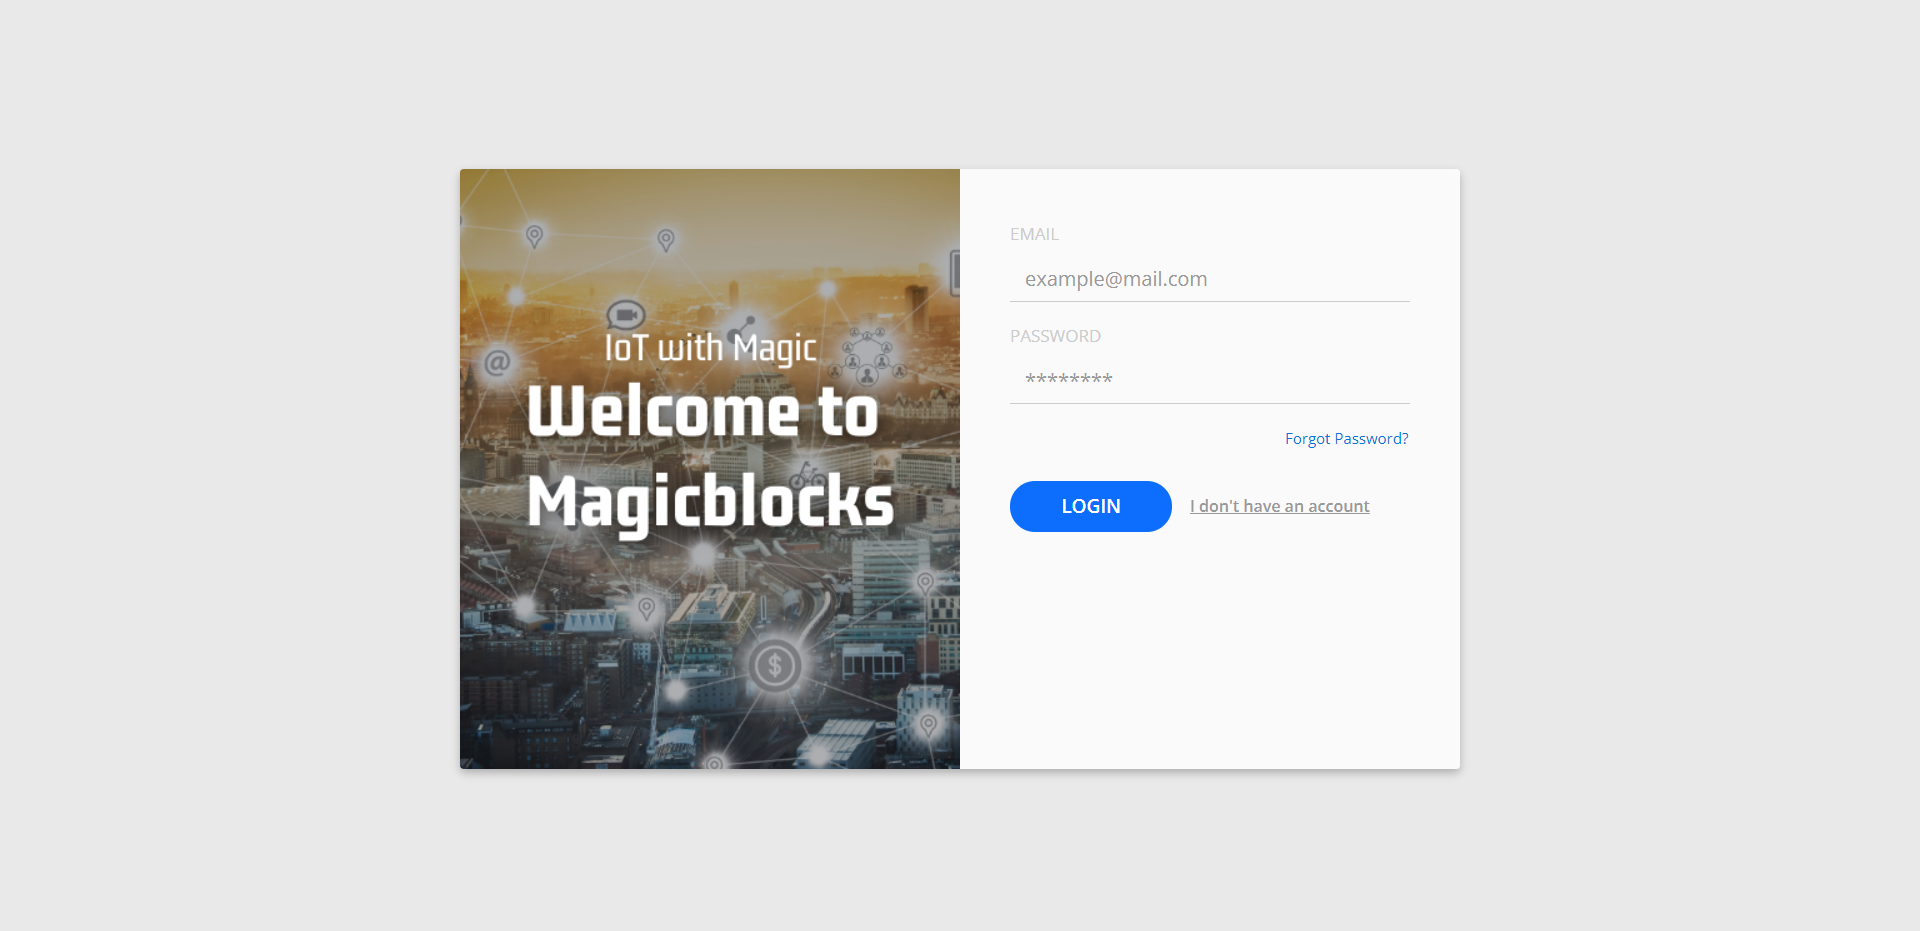
Login to Your Magicblocks.io Account
- Go to Magicblocks.io official website – magicblocks.io
- Select LOGIN
- Provide your login details
- Enter your email address and the Magicblocks Password and sign in to Magicblocks
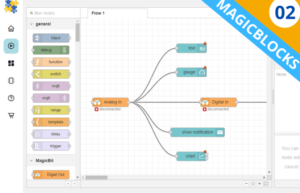
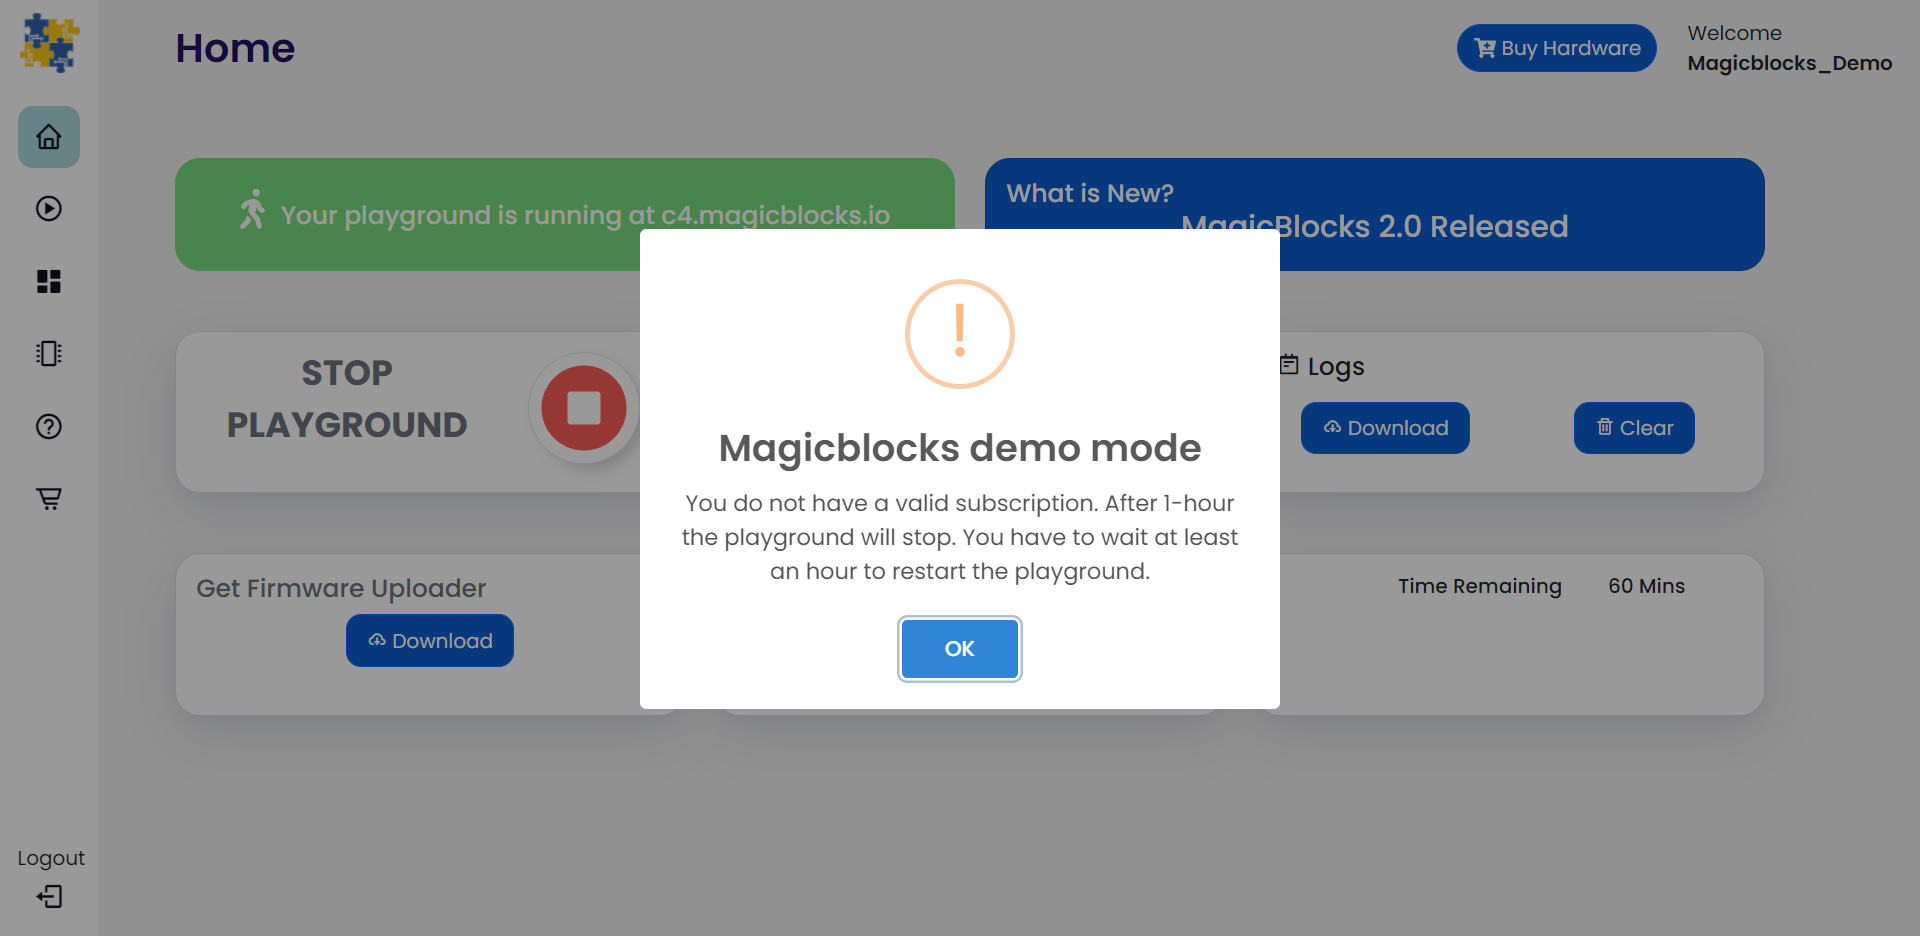
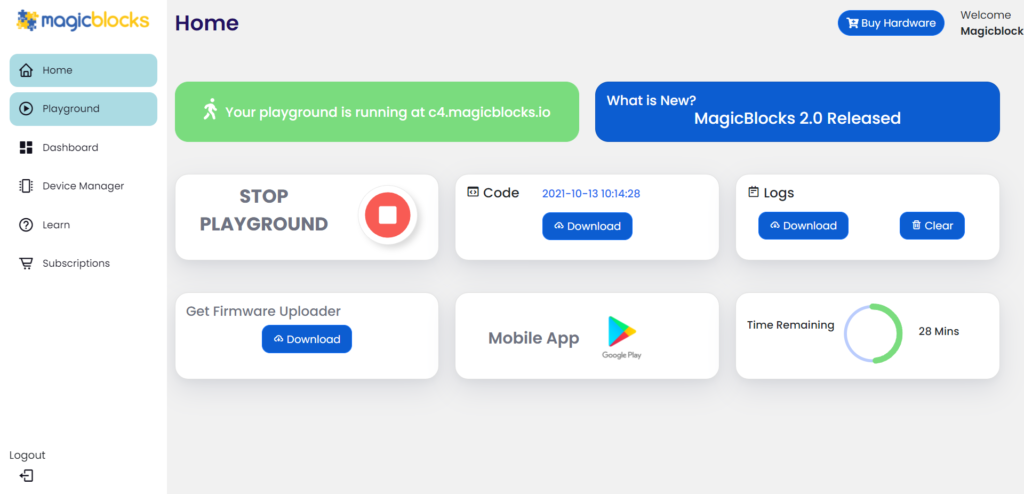
Start the Playground
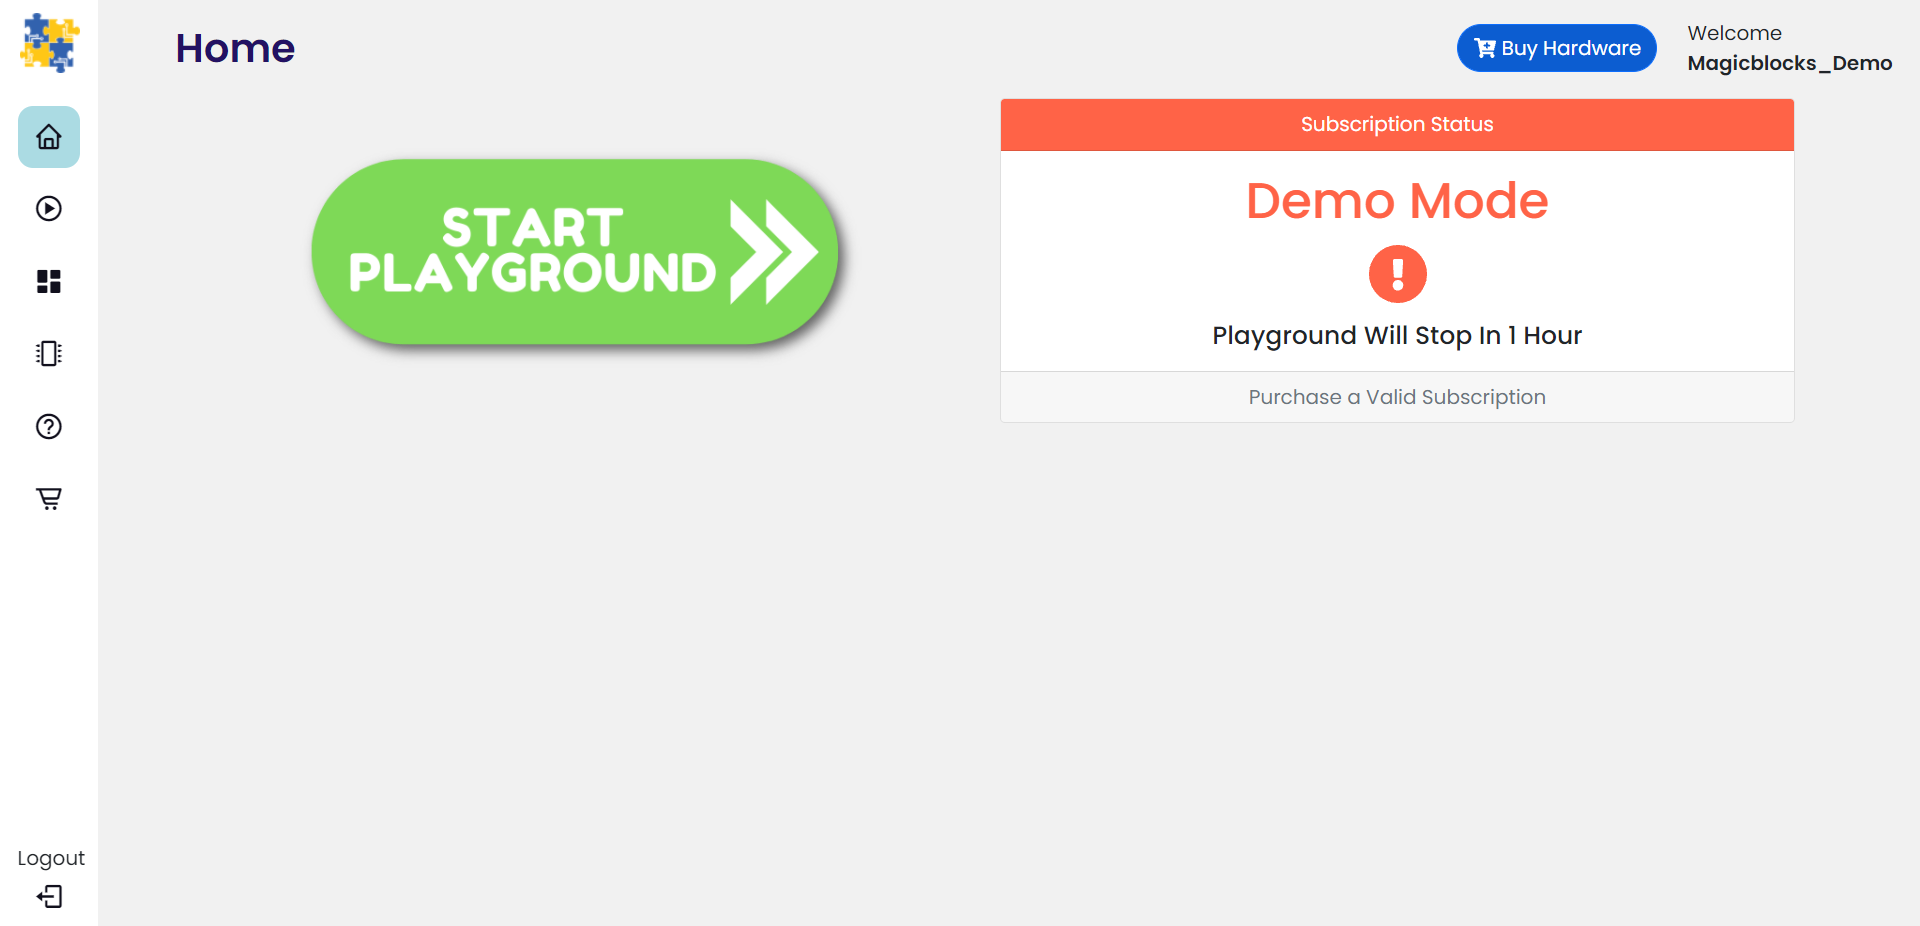
The playground is the visual programming environment based on Node-Red that has been customized for seamless integration with hardware devices to enable IoT. When you log in for the first time, your playground will not be running. If you do not have a valid subscription, you will be allowed to run the playground only for 1 hour continuously before it is automatically stopped. You will need to restart the playground manually after this 1-hour period. You can subscribe to the Standard Subscription by entering the coupon code in the Subscription tab provided with your Magicbit device. If you have any issue please write to [email protected]
Create a new device
Go to Device Manager and add a new device. Set device type as Magicbit & set the status to Active. You can use any name and description.
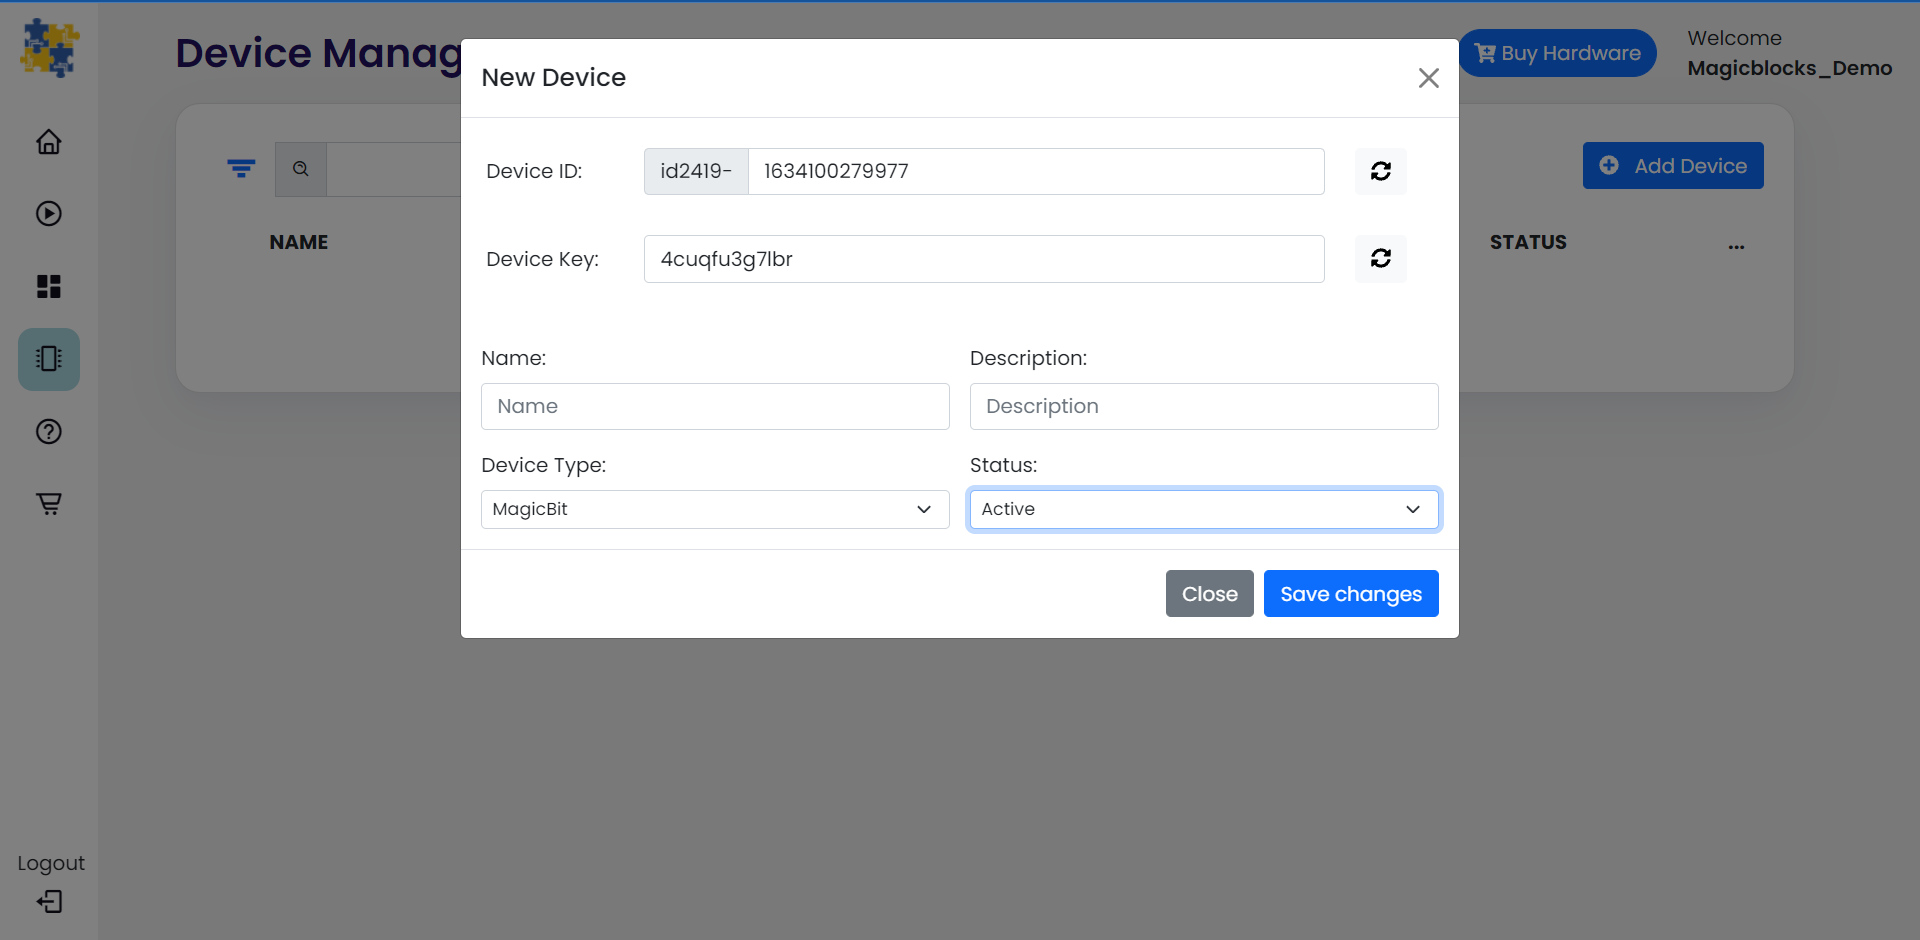
Keep this browser tab open, since you will need to copy the device ID and the key to set up the device.
Setting up a device
- Connect Magicbit to the computer using provided USB cable.
- Connect the Magicbit to the computer. After, click the

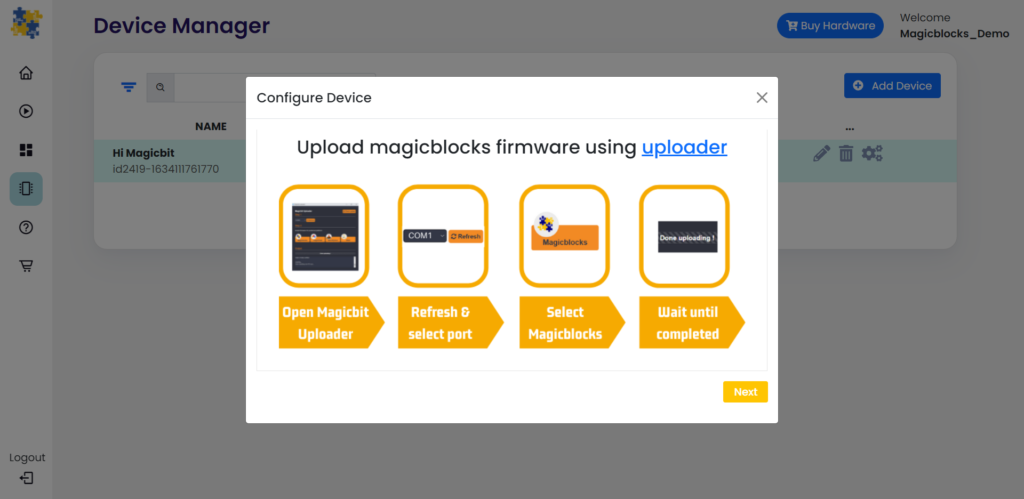
- Download the Magicbit Uploader and install on your computer. After, open the Magicbit Uploader software and install the drivers, then select your device COM port.
- Finally, install the Magicblocks firmware.
- Wait for the installation to finish. Afterward, connect your computer to the Magicbit WiFi network.
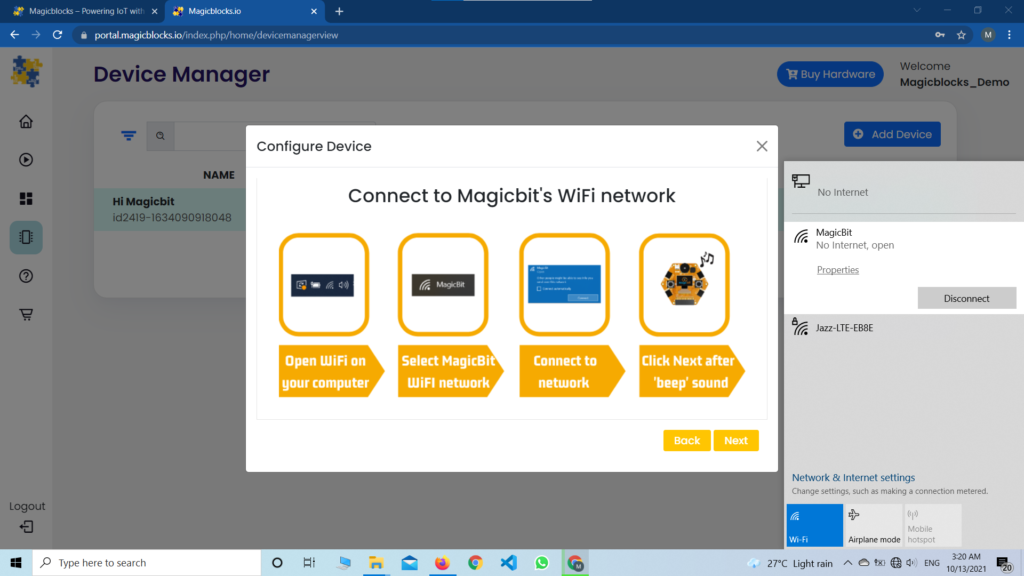
- Then, click next button and you will be directed the webpage below and close the page.
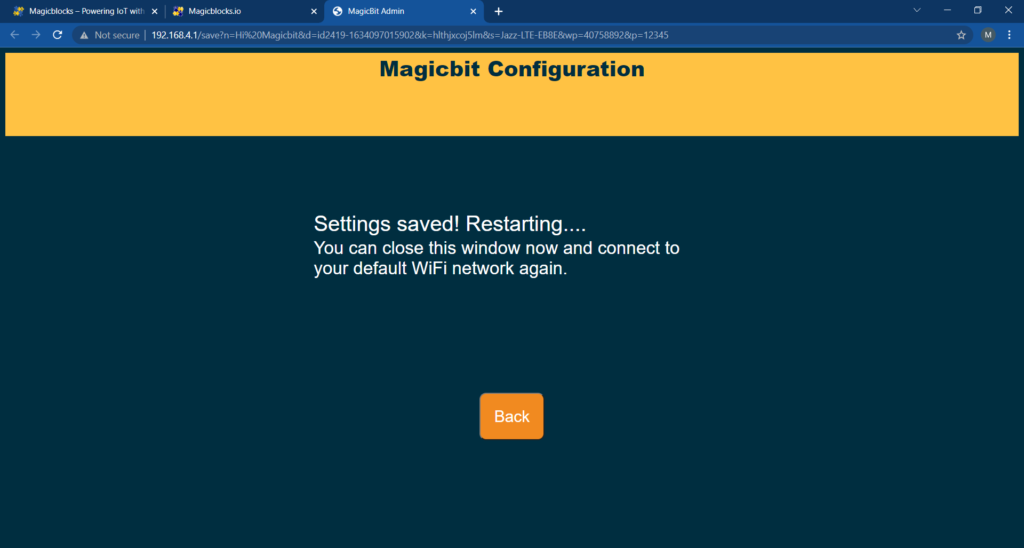
- Login to Magicblocks, navigate to Device Manager, and check if the Connection column comes up as a green indicator. If yes, you can proceed to the next step. Finally, disconnect from Magicbit WiFi and reconnect to your default WiFi.
Go to the playground!
- Login to Magicblocks and click on Playground Button to open the playground.
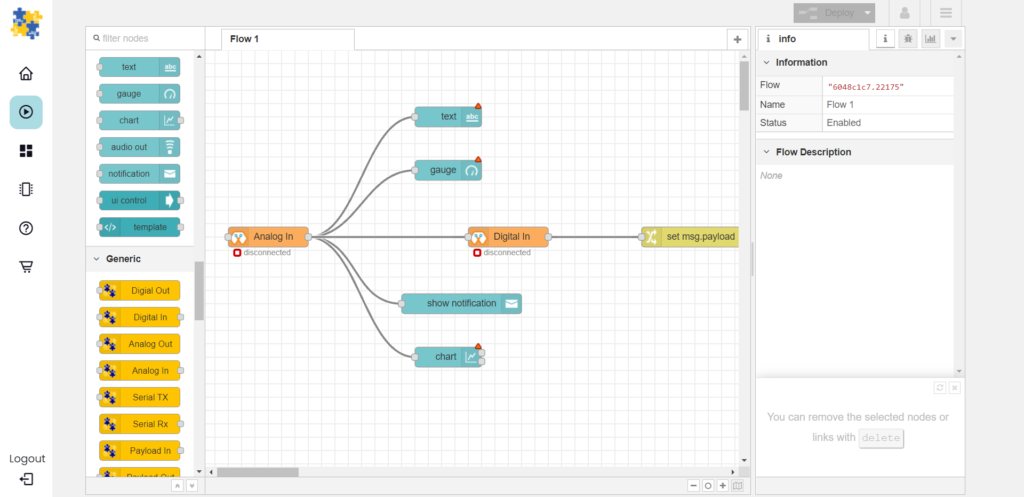
 The playground is a hosted instance of a customized version of the open-source Node-Red application. On the left, you will find the palette where all the blocks will reside. You can drag and drop the blocks from the palette to the canvas and start rolling very quickly. Once done, click the Deploy button in the top right corner and all your changes will be saved. In the next section, we will go through some examples covering all the relevant blocks.
Hello Magicbit
Let’s start magic by displaying text on the Magicbit display.
- Turn on your Magicbit board that was set up in the previous section and wait for it to connect
- Open the playground
- Drag and drop the Display block under the category Magicbit
- Double-click on the block and select the device ID
- Drag and drop inject blocks under the input category and connect them to the Display block
- In one inject node-set payload type as String and type Hello Magicbit in the text box. You can set a topic too.
- Click deploy
- Click the button in inject node to see the magic. You can set any text from anywhere in the world!!!
Introduction
MagicCode is a Scratch 3.0 based graphical programming software that makes you learn to code superfast. If you are new to the world of programming, MagicCode is one of the best companions that makes coding fun and easy. The user-friendly interface and drag and drop functionality make coding more interesting because of no need to worry about traditional programming rules. You can create your interactive games, animations, or program robots and projects with MagicCode. You can directly connect your Magicbit, Arduino, or Microbit boards with MagicCode and control generic sensors and actuators, or It also has an upload mode where you can upload your code inside boards.
Getting Started
MagicCode interface and tools
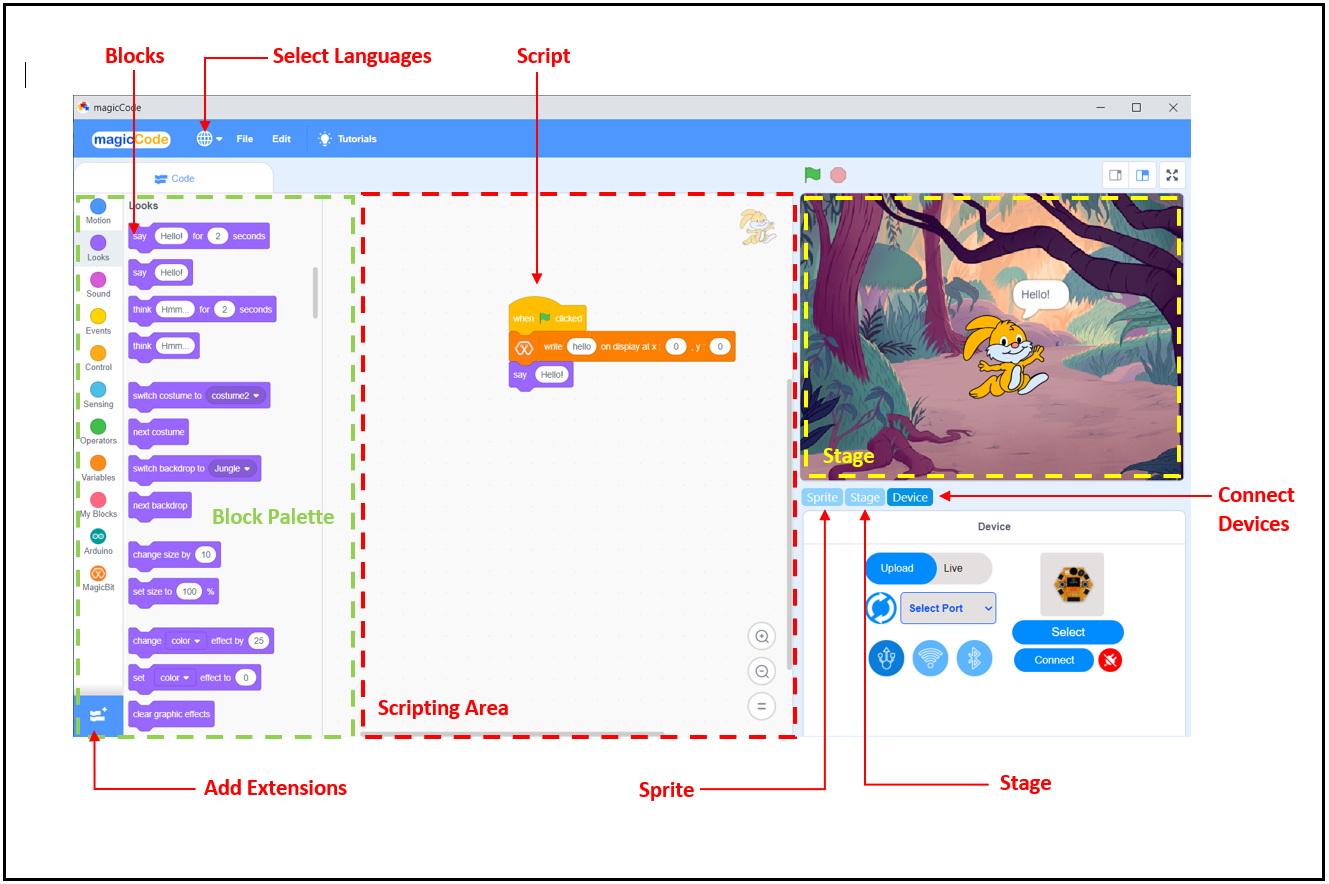
- Blocks
A block is like a jigsaw puzzle piece that is used to write programs by simply dragging and dropping them below one another in the scripting area. Blocks are often easier to work with than text-based programming, as one has to memorize the commands typed and syntax errors may occur. There are ten categories of blocks: Motion, Looks, Sound, Event, Control, Sensing, Operators, Variables, List, and My Blocks. The list blocks are shown under the Variables Blocks.
- Block palette
The block palette is under the Code tab. It consists of different palettes such as Motion, Sound, and Control. Each palette has different blocks that perform functions specified by the palette name. There are other varieties of block palettes that can be loaded from the Add Extension button located at the left bottom.
- Script
A script is a program or code in MagicCode which is a collection or stack of blocks that all interlock with one another. The blocks and their order are very important, as they determine how sprites interact with each other and the backdrop. Sometimes, comments are attached to scripts to explain what certain blocks do and what the script’s purpose is. You can write multiple scripts, all of which can then run simultaneously.
- Connect Devices
Connect Devices is used to connect devices (Magicbit, Arduino, or Microbit) with MagicCode.
- Add Extensions
Add Extensions are used to add new palettes to the block palette.
- Sprite
Sprites, either user-created, uploaded, or found in the MagicCode Sprites library, are the objects that perform actions in a project. Most projects have at least one sprite as well because only sprites can move.
![]() Users can give instructions to a sprite (such as telling the sprite to move) by snapping blocks together in the script area. Clicking on the block(s) in the script area will cause the sprite to react based on the function of the block(s) clicked. Clicking on a sprite’s thumbnail in the sprite pane will bring up the script area of that sprite.
Users can give instructions to a sprite (such as telling the sprite to move) by snapping blocks together in the script area. Clicking on the block(s) in the script area will cause the sprite to react based on the function of the block(s) clicked. Clicking on a sprite’s thumbnail in the sprite pane will bring up the script area of that sprite.
The look of a sprite can also be changed by using costumes. The current costume of a sprite can be changed by clicking on the “costumes” tab and clicking on the desired costume of choice, or by using look blocks to select the sprite’s costume. New costumes for the sprite can be imported, created, and edited in the MagicCode Paint Editor.
Some sprites additionally have at least one sound. Unlike costumes, sounds are an optional field, so you can have a sprite with no sounds. The sounds tab allows you to add, delete, and edit sounds. Sounds can be played in the sound editor or with blocks that play a specific sound. Sprites (with all of their scripts, costumes, and sounds) can be exported, and then imported into another project if desired. This is achieved by right-clicking on a sprite’s thumbnail in the sprite pane and then selecting “save to local file” in the pop-up menu. A sprite can also be dragged into the backpack and dragged out into another project for transporting. However, this will not save the sprite to one’s computer.
- Stage
The stage is the background of the project where your sprites perform their actions, but it can have scripts, backdrops (costumes), and sounds, similar to a sprite, and it has its own scripts and sounds. But the stage has some restrictions on sprite functions, such as motion and size blocks.
The stage is 480 pixels wide and 360 pixels tall. All sprites have a particular position on the stage. However, no sprites can move behind the stage, and it is always at the back layer.
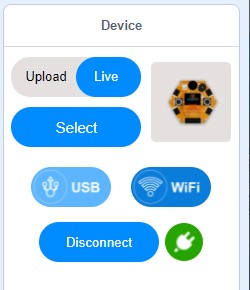
The Device tab is the place where you can connect your boards with MagicCode. MagicCode provides facilities to connect five boards. You can connect your Magicbit, Arduino UNO, Arduino Mega, Arduino Nano, or Microbit Boards with MagicCode. You can program your board either in live mode or Upload mode.
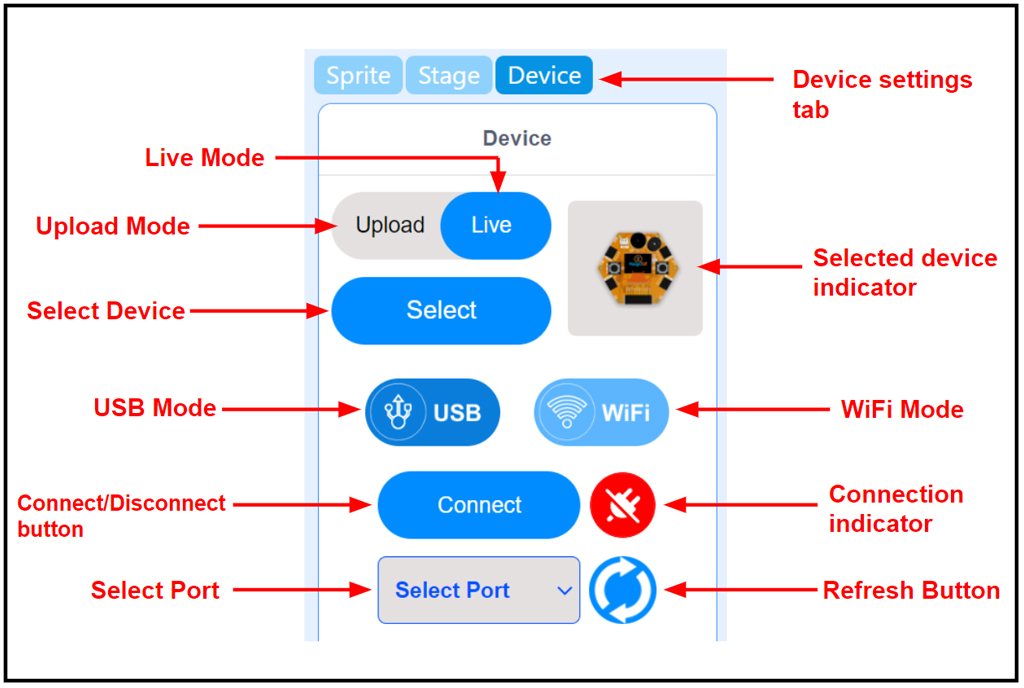
Live mode
In the Live mode, you can view the program execution effect in real-time, which facilitates the commissioning of the program.
Note
In this mode, you must keep the board connected to MagicCode. If it is disconnected, then the program cannot be executed.
Upload mode
In the Upload mode, you need to upload the compiled program to the device. After being successfully uploaded, the program can still run properly on the device when the device is disconnected from MagicCode.
Connecting Magicbit with Computer
There are two ways to connect a MagicBit to the computer.
- Wirelessly through WiFi (Useful when using magiccode for robotics and sensing applications).
- Through a USB cable from a serial connection.
WiFi Mode
If you have MagicbitOS installed in your magicbit, you can select magiccode-WiFi option to program magicbit board with magiccode. Continue from step 3 if you have magicbitOS.
1. Connect your device to the pc with a USB Connector. Alternatively, you could connect your magicbit to a 5V phone charger or a 3.7V battery too.
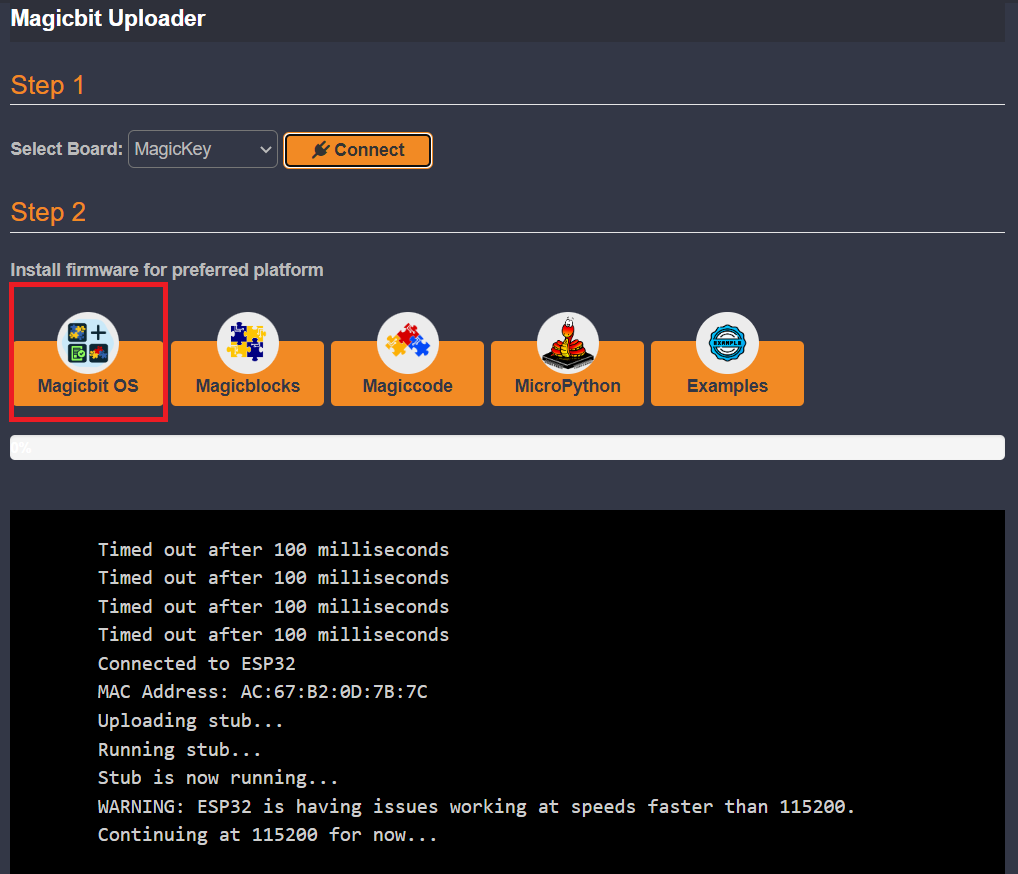
2. Upload magicbitOS firmware using magicbit uploader.
Select the correct serial port and click on magicbitOS button.
Now you can connect the board to a battery, a powerbank, or a phone charger brick. and wirelessly program the magicbit.
3. Boot from magiccode.
On the boot menu, using left key, select magiccode and press left key to load it.

4. Connect to magiccode
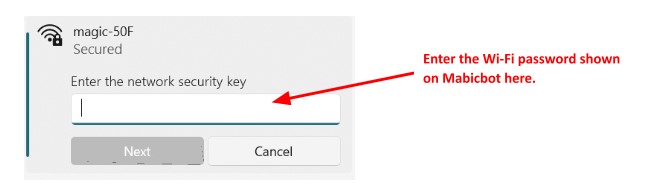
Then a SSID and a password will appear on the screen.
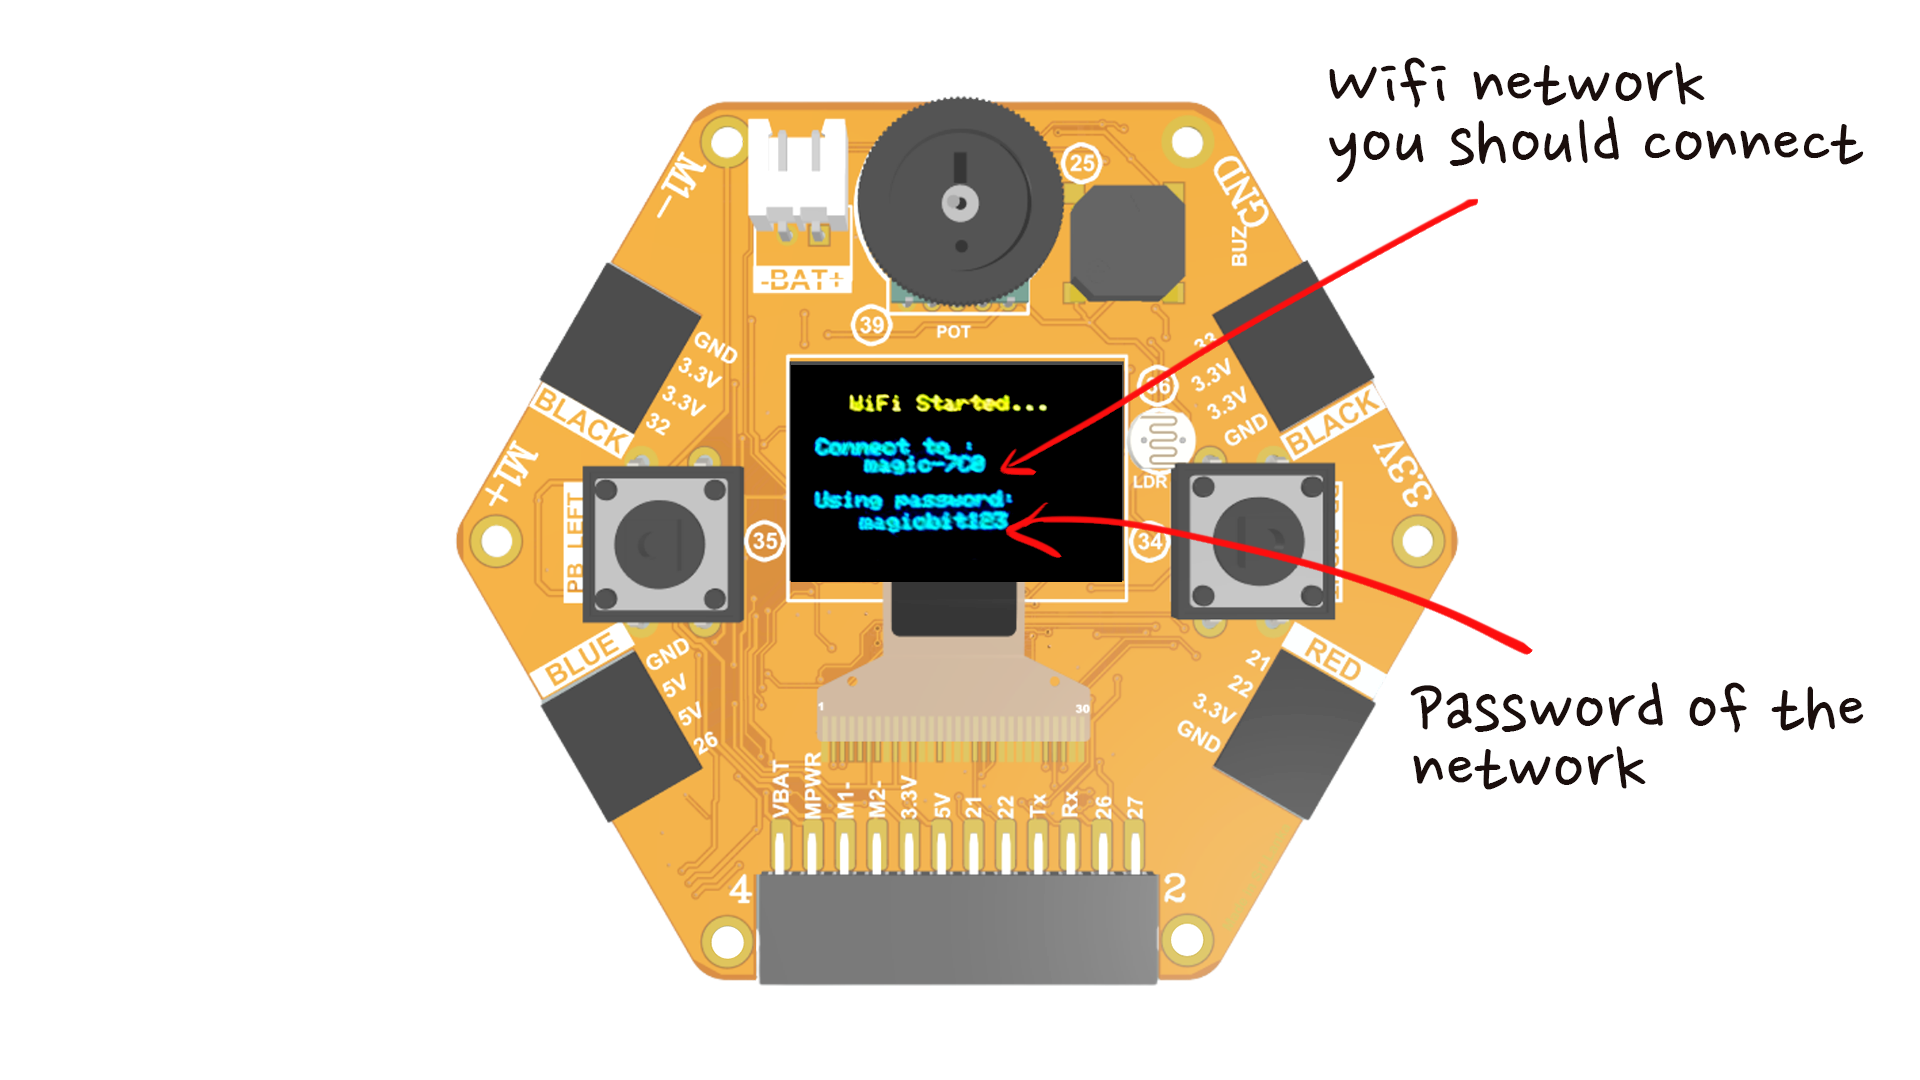
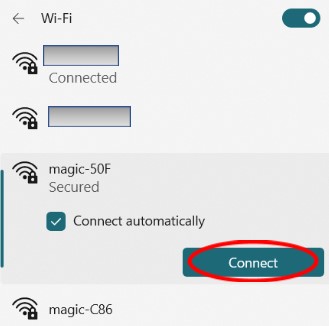
Go to wifi settings in the computer and select the wifi SSID name displayed on the Magicbit screen with the password. This will connect the board with the computer via wifi to communicate wirelessly.
5. Start building with magiccode
Open MagicCode software and select the devices tab.
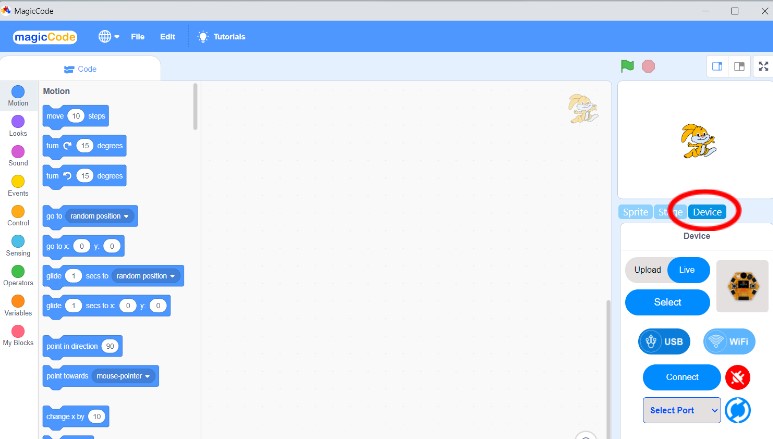
Choose the Wi-Fi option and click on connect. This will connect the software to the board.
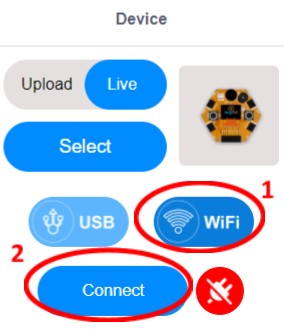
If everything works properly disconnect button will appear.
Now you can execute magiccode comands as usual.
Using USB mode.
1. Connect your device to the pc with a USB Connector.
2. Upload magicCode firmware using Magicbit Uploader
Select the correct serial port and click on magiccode icon.
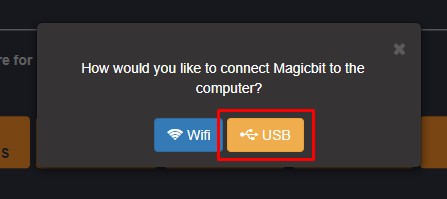
Select USB option. Then magiccode firmware will be loaded on to the magicbit.
3. Go to the Device tab at the down right corner of the MagicCode interface.
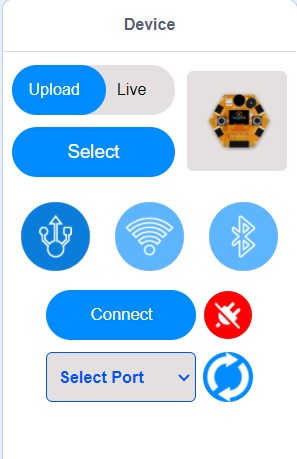
3. Select Live Mode.
4. Select your Device by clicking the Select button.

The above Devices’ library is displayed after clicking the select button and select your devices from the library.
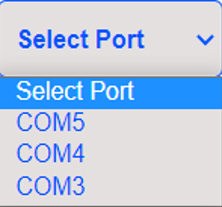
5. Select the Serial port where the device is connected.
Click on the USB mode button. Then serial port selection menu will appear.
If you don’t see any port in the select port menu, then click the refresh button. The following figure, displays the select port menu.
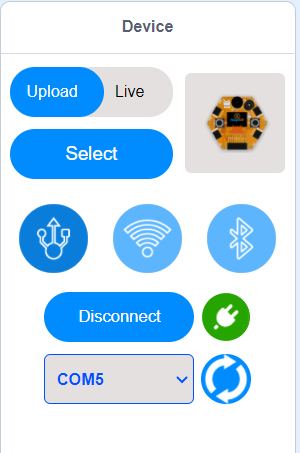
6. Click the connect button and connect your device to MagicCode.
After the device has connected, the “Connect” button changes to the “Disconnect” button and the icon changes.
Now you can create and execute your program with your board.
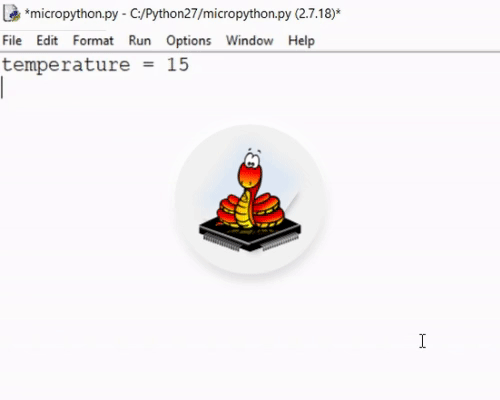
What is Micropython?
MicroPython is a lean and efficient implementation of the Python 3 programming language that includes a small subset of the Python standard library and is optimized to run on microcontrollers and in constrained environments. Learn more about MicroPython
It is very useful to use an IDE to program your Magicbit with MicroPython firmware. Thonny IDE will be introduced to you in this session. Using MicroPython and the Thonny IDE, you’ll have your first LED blinking using Micropython and thonny IDE.
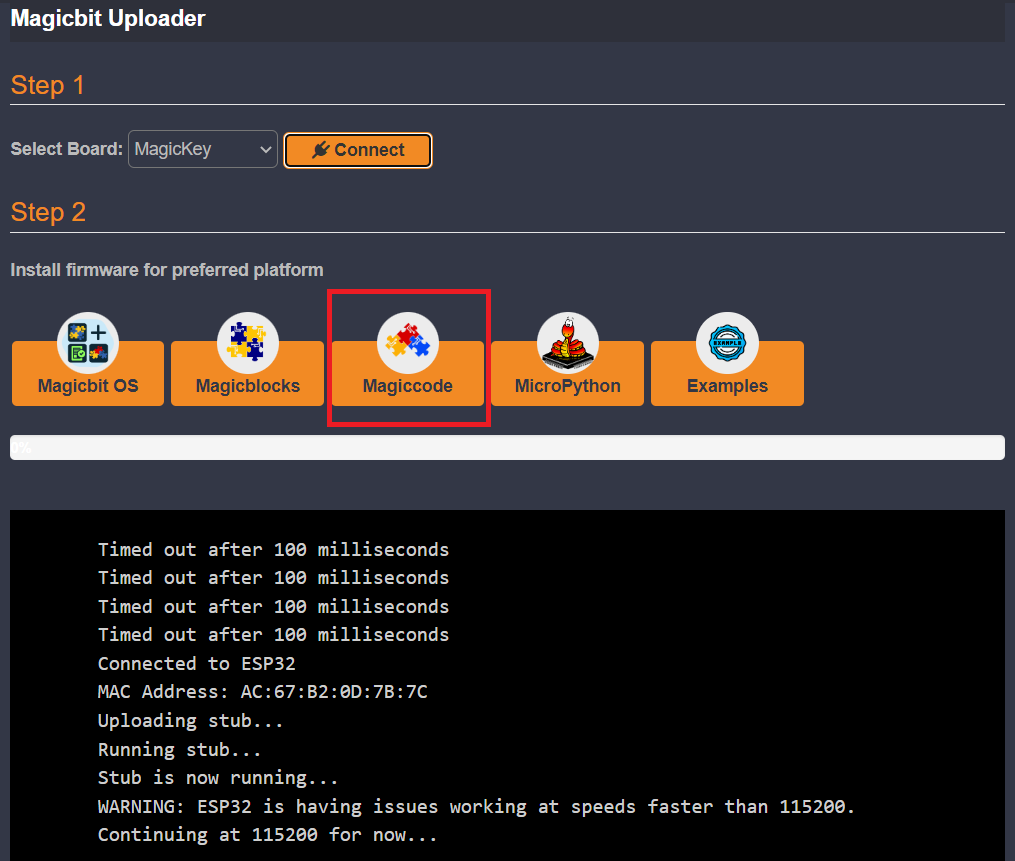
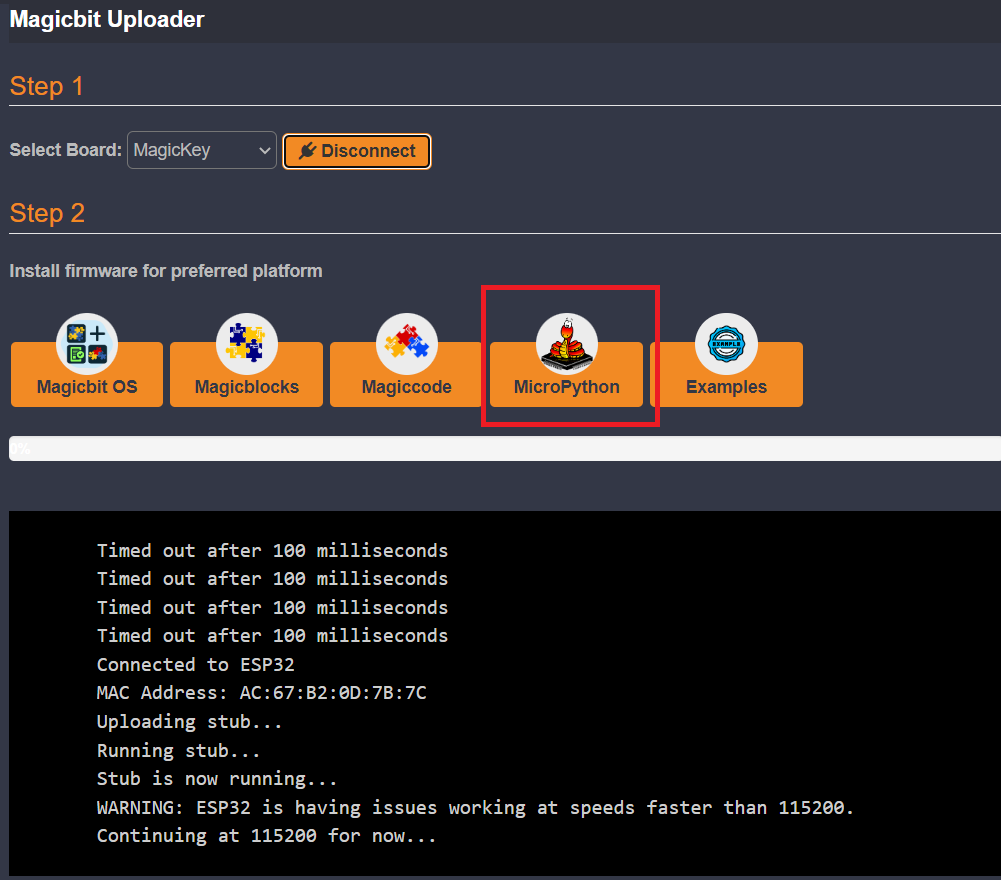
Upload Micropython firmware using Magicbit Uploader
If you are starting the programing, you should have uploaded the micropython firmware to the magicbit.
- Use the magicbit web uploader or download and install Magicbit uploader offline
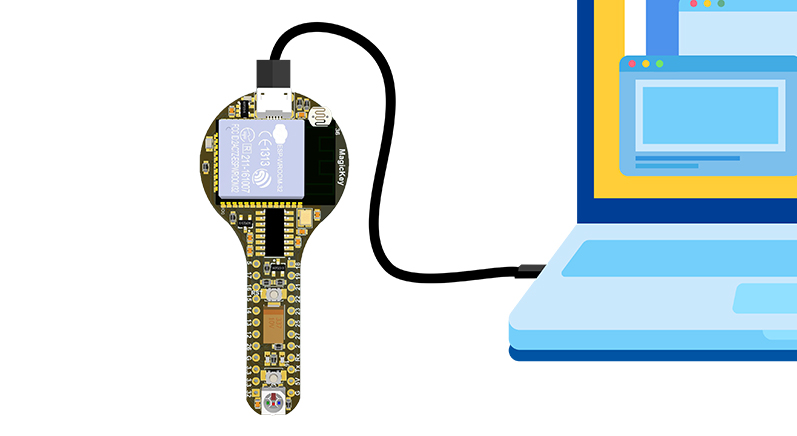
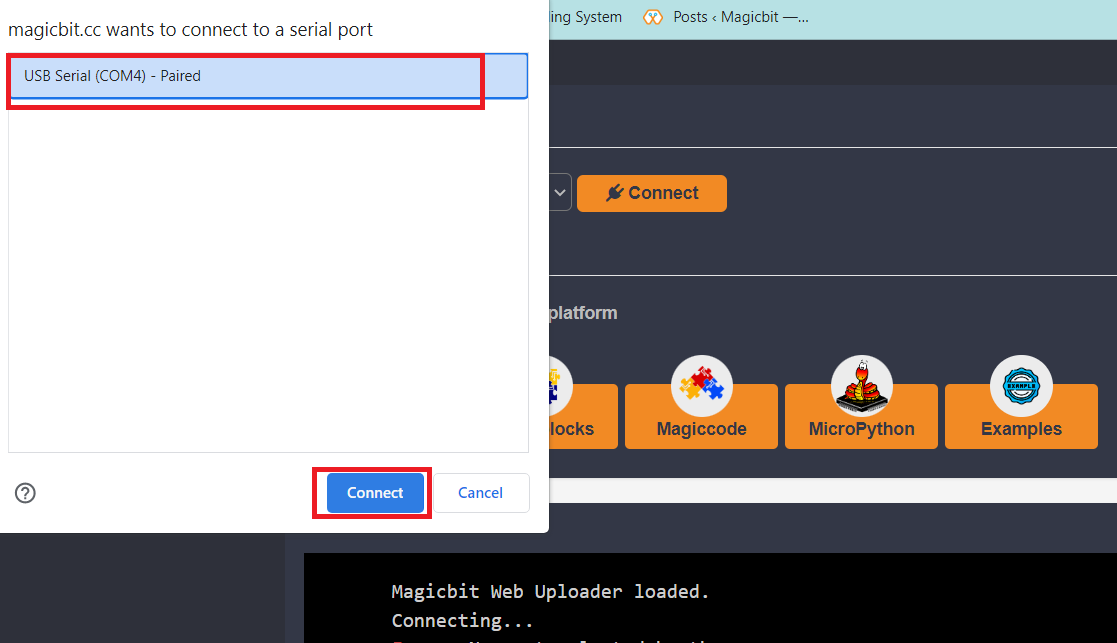
- Connect Magickey to the computer
- In the web uploader, select “magickey” and press connect button. If you are using magicbit uploader offline, open Magicbit Uploader and select “magickey” & press connect.
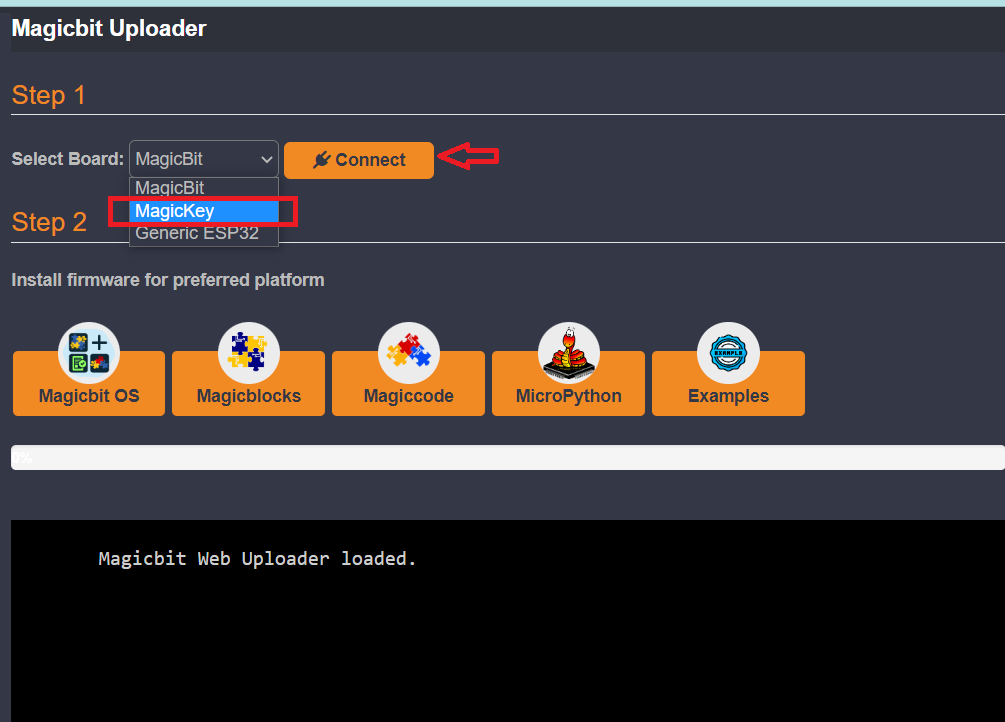
4. select the correct COM port. and press connect.
 5. Install Micropython firmware
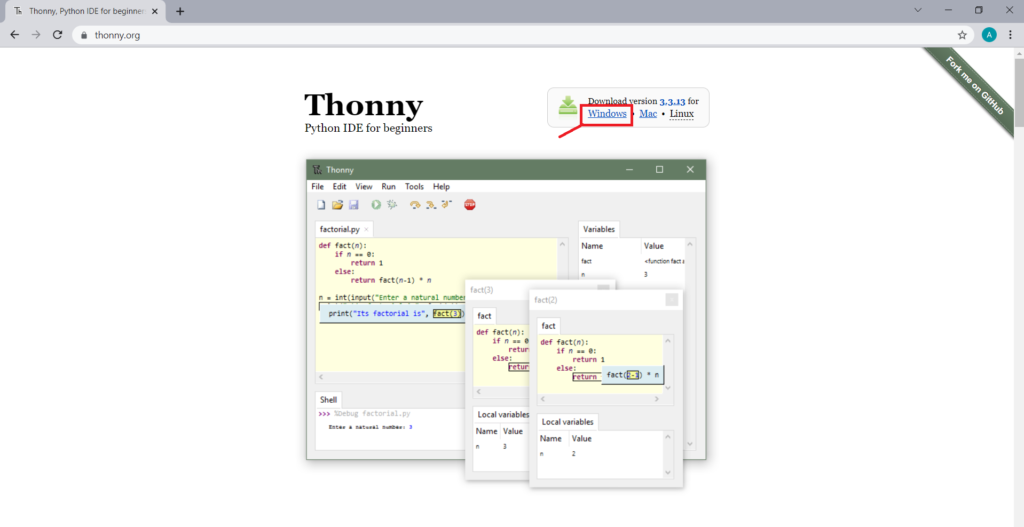
Installing Thonny IDE
- Go to https://thonny.org
- Download the version for Windows and wait a few seconds while it downloads.
- Run the .exe file.
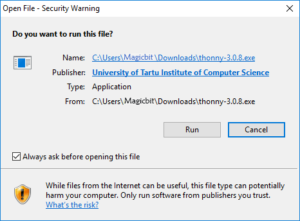
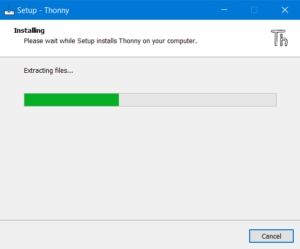
- Follow the installation wizard to complete the installation process. You just need to click “Next”.
- After completing the installation, open Thonny IDE. A window as shown in the following figure should open.
Create First Project (LED Blink)
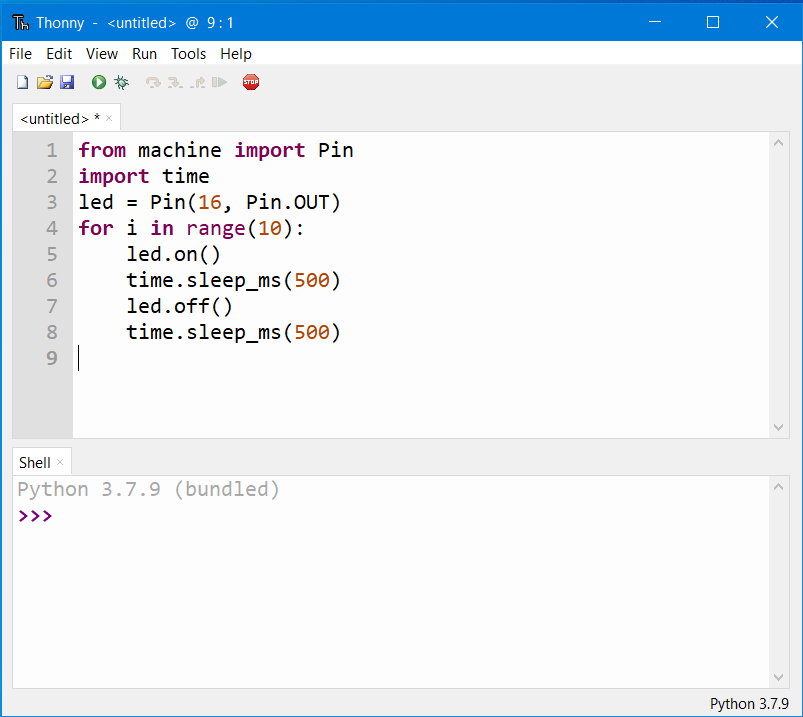
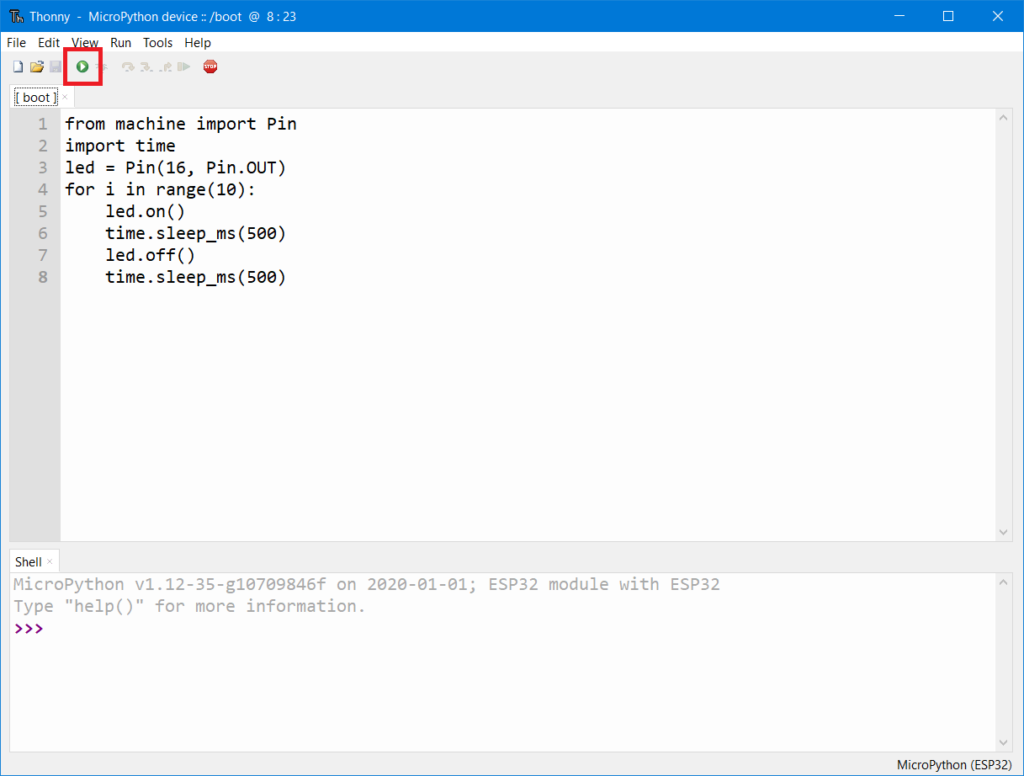
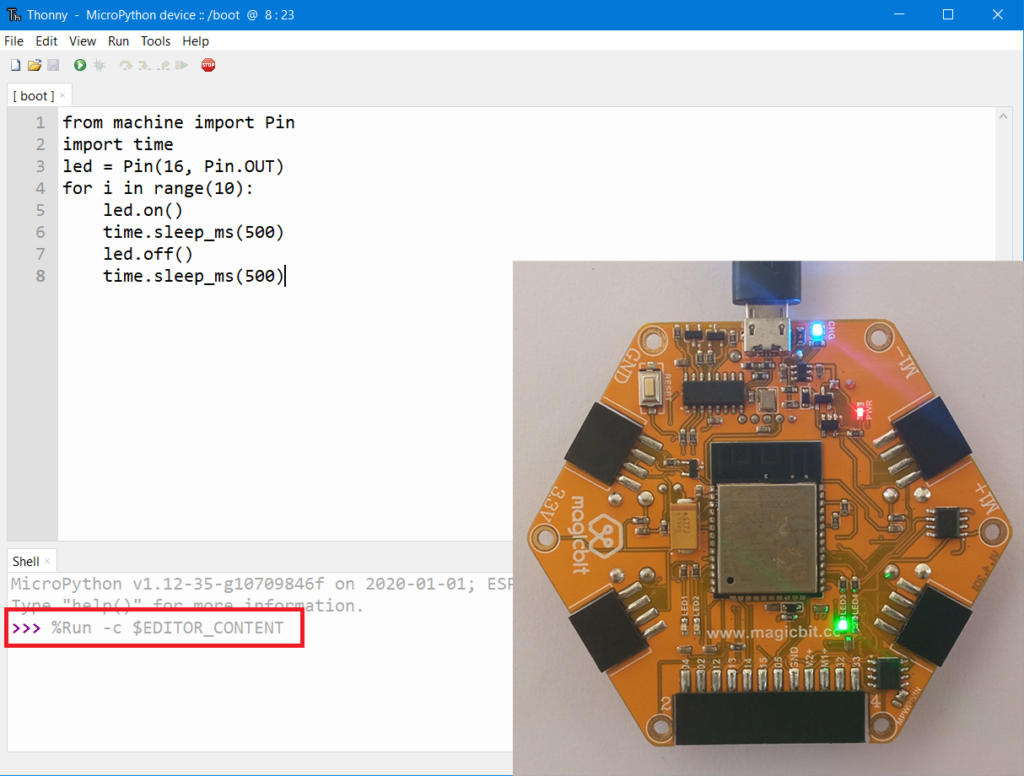
- Open Thonny IDE
- Copy – Paste following code on the editor
from machine import Pin
import time
led = Pin(16, Pin.OUT)
for i in range(10):
     led.on()
     time.sleep_ms(500)
     led.off()
     time.sleep_ms(500)
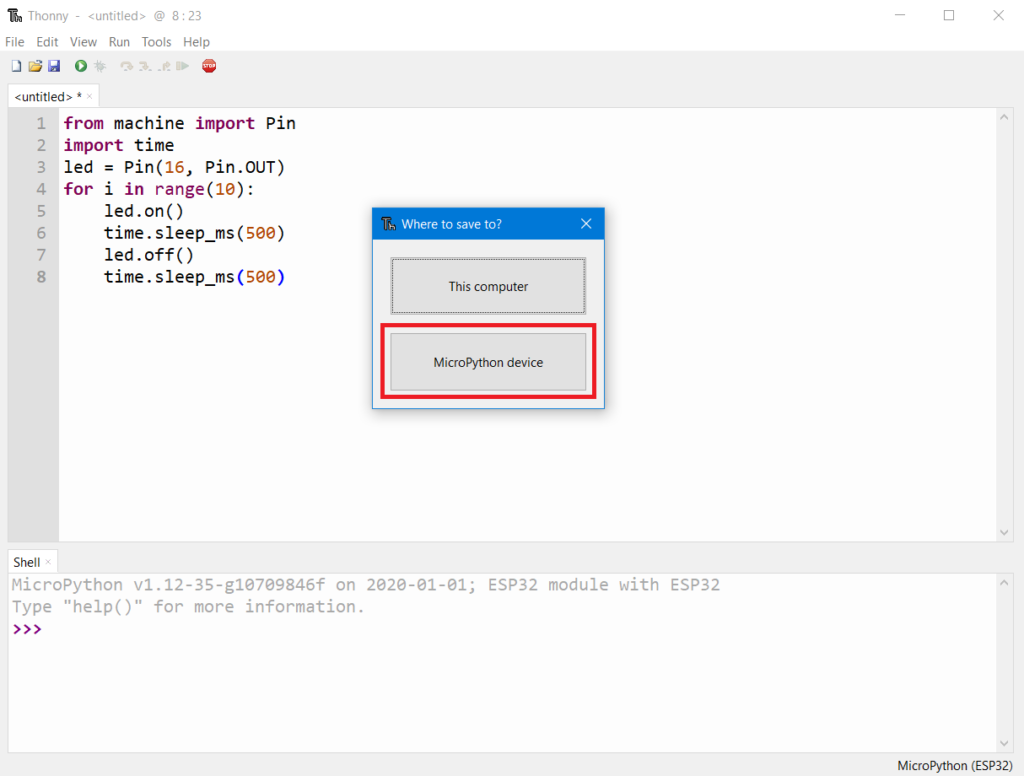
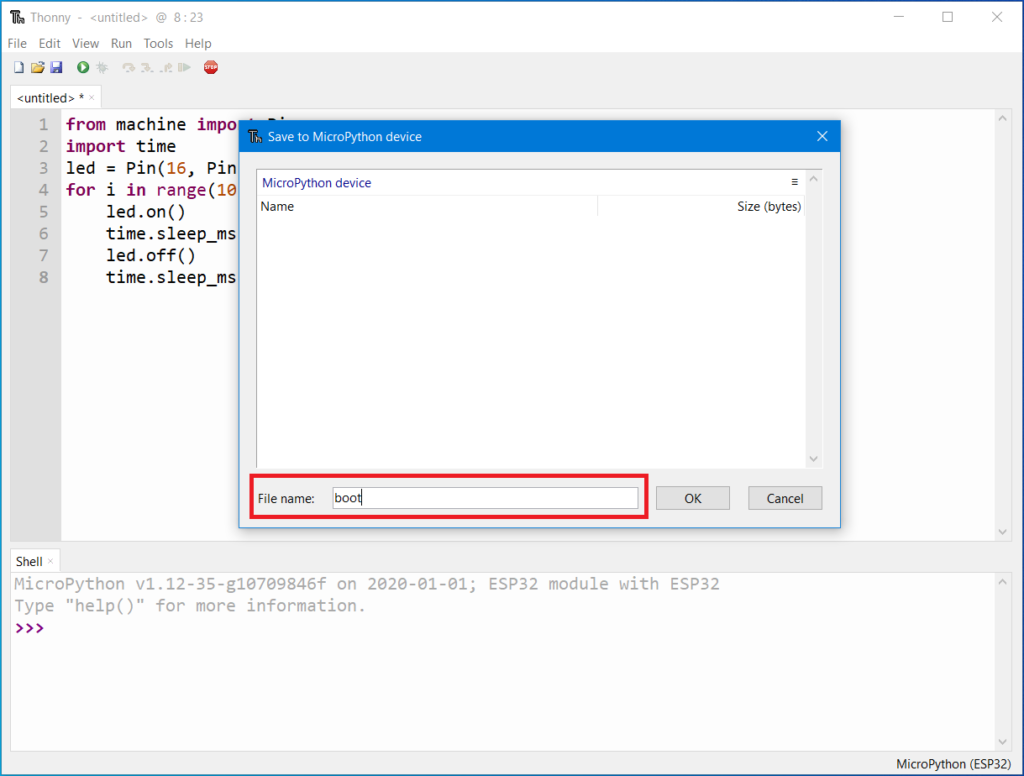
- click save as and select ‘Micropython Device’ and choose file name as ‘boot.py’
- Click Run (Green Arrow) on the IDE — If the Green LED on the backside of the Magicbit is blinking, you have just begun the magic with Magicbit
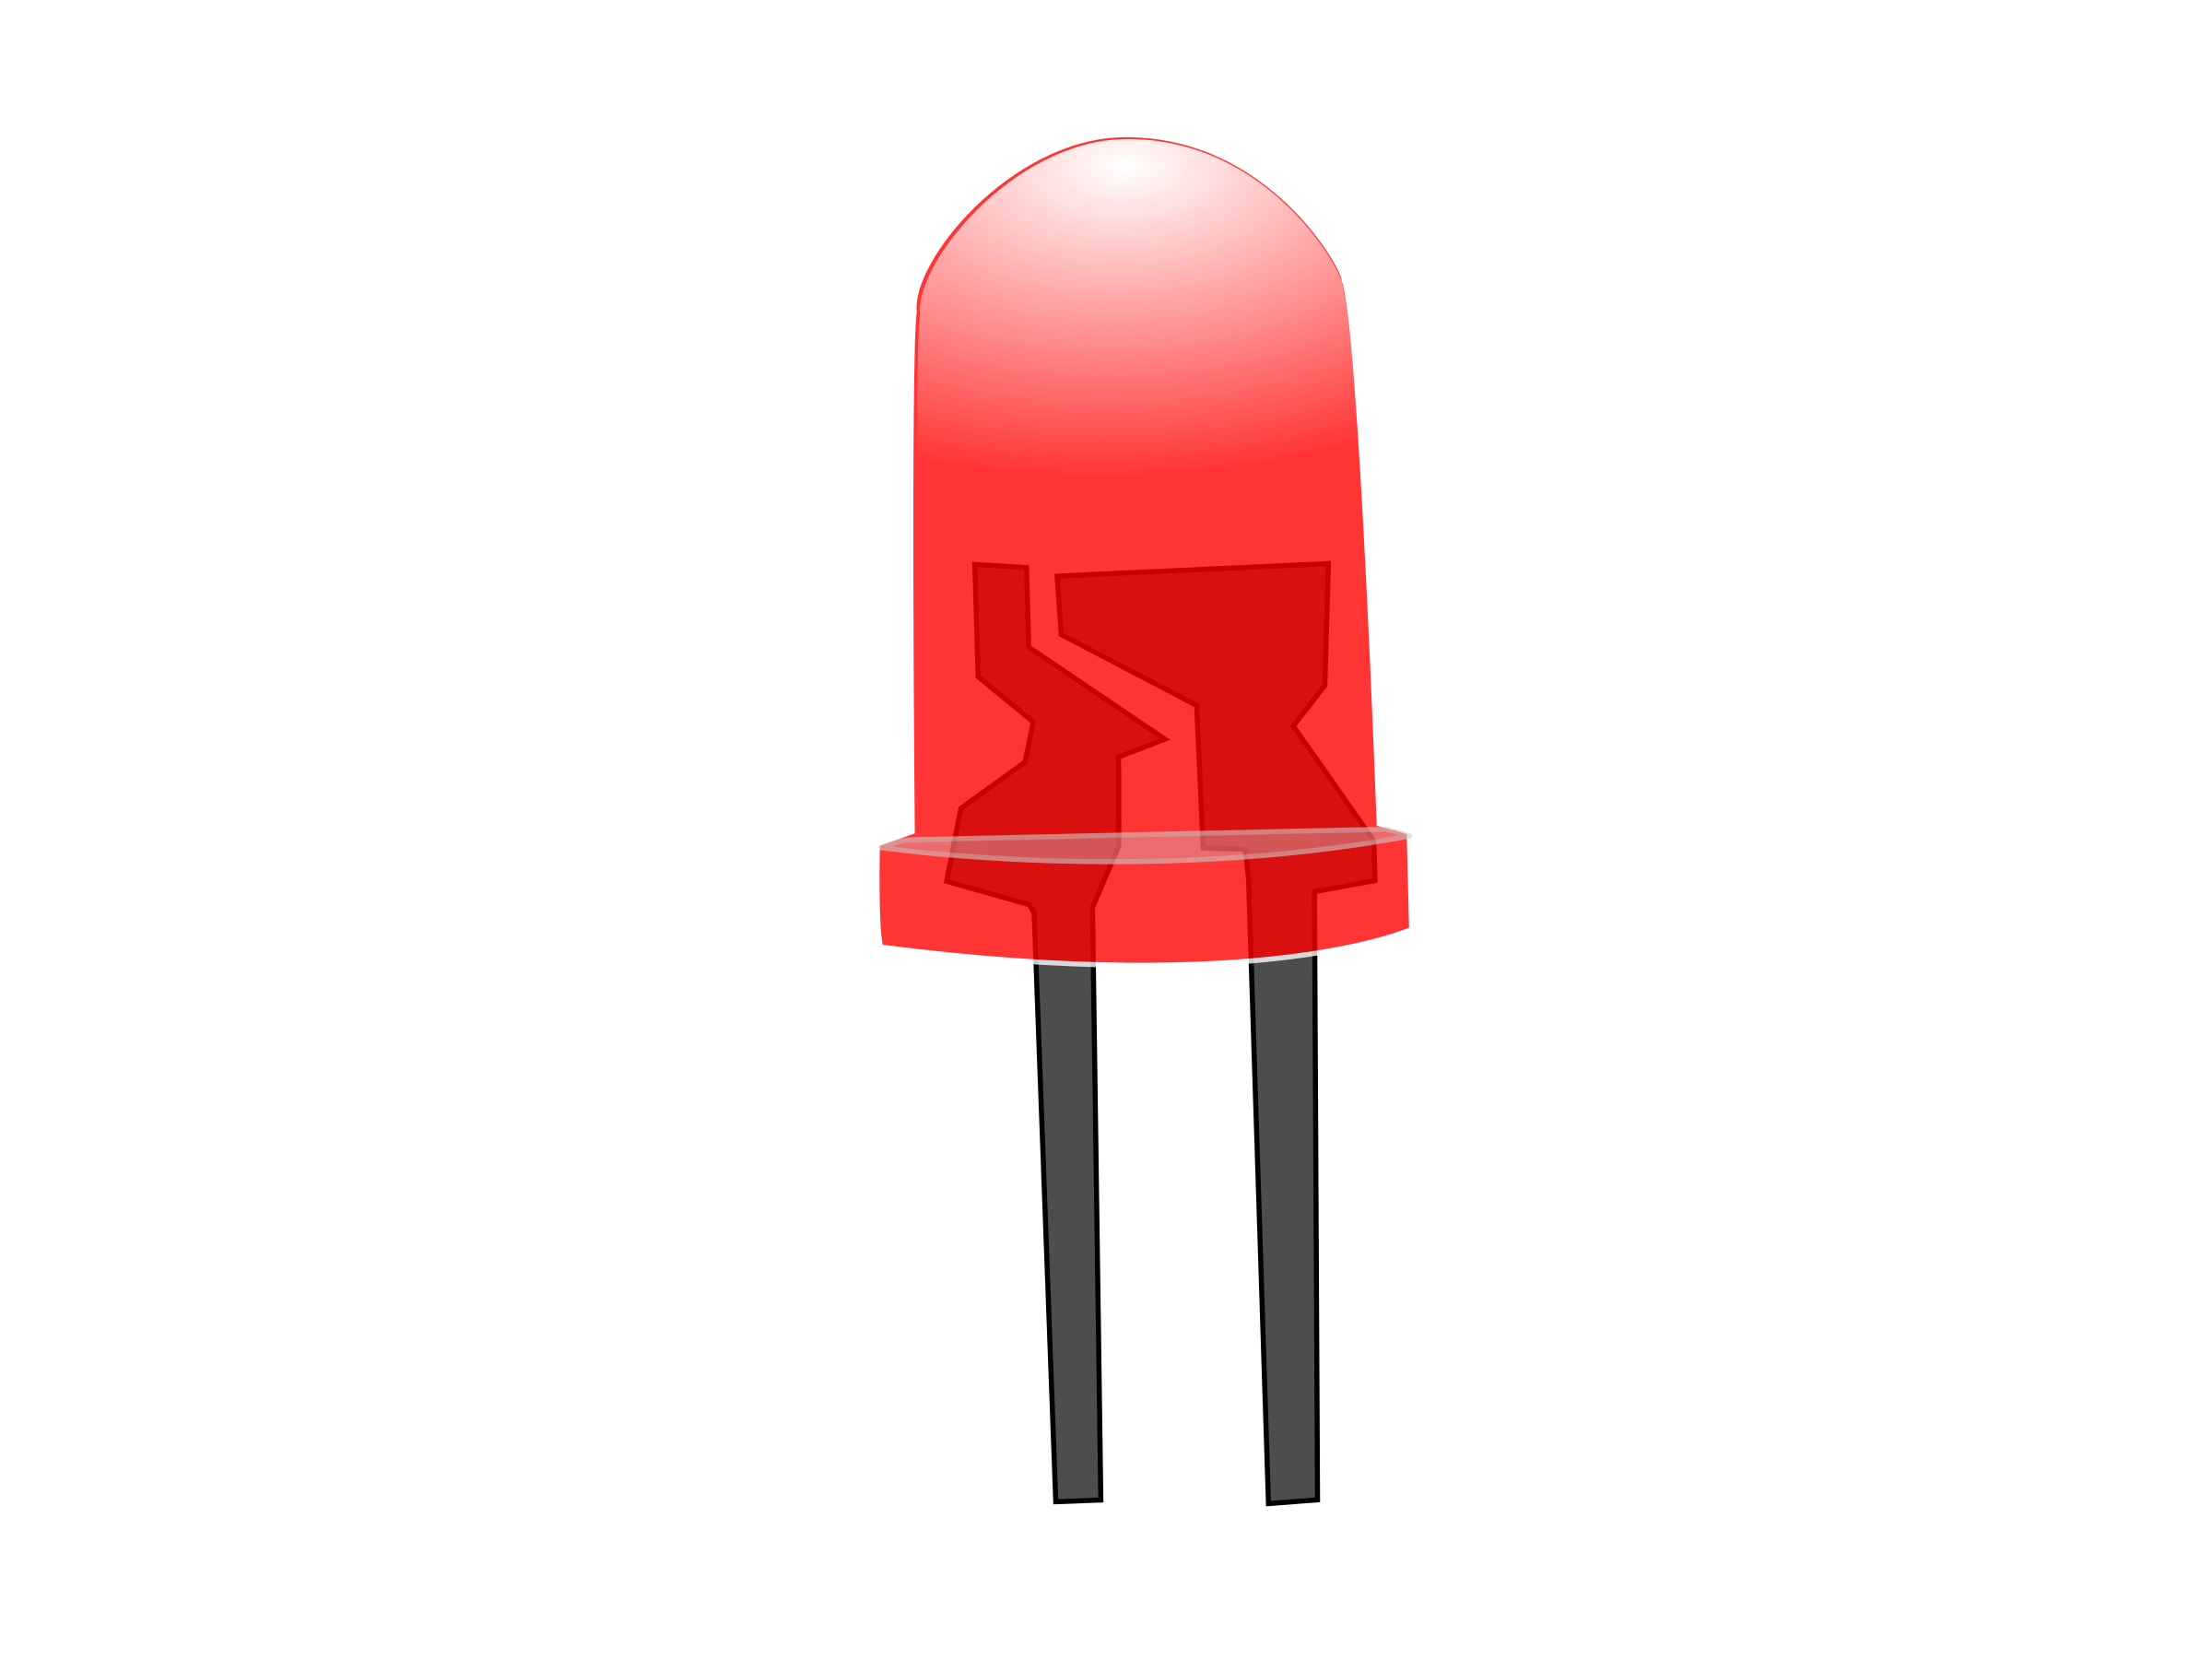
A light-emitting diode (LED) is a semiconductor light source that emits light when current flows through it.
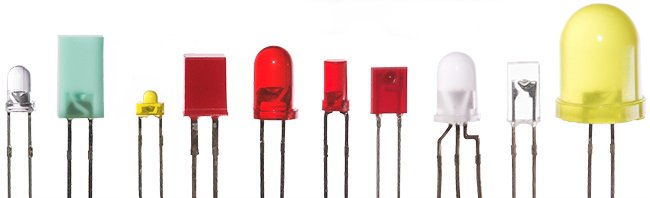
In short, LEDs are like tiny lightbulbs. However, LEDs require a lot less power to light up by comparison. They’re also more energy efficient, so they don’t tend to get hot as conventional lightbulbs do.
Here is the circuit symbol.
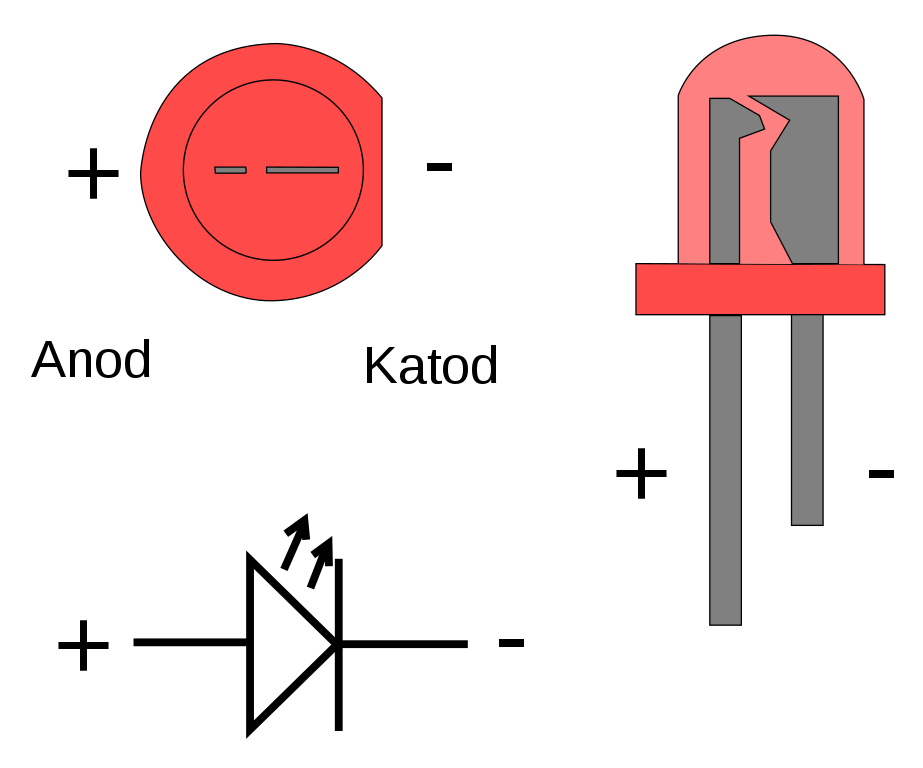
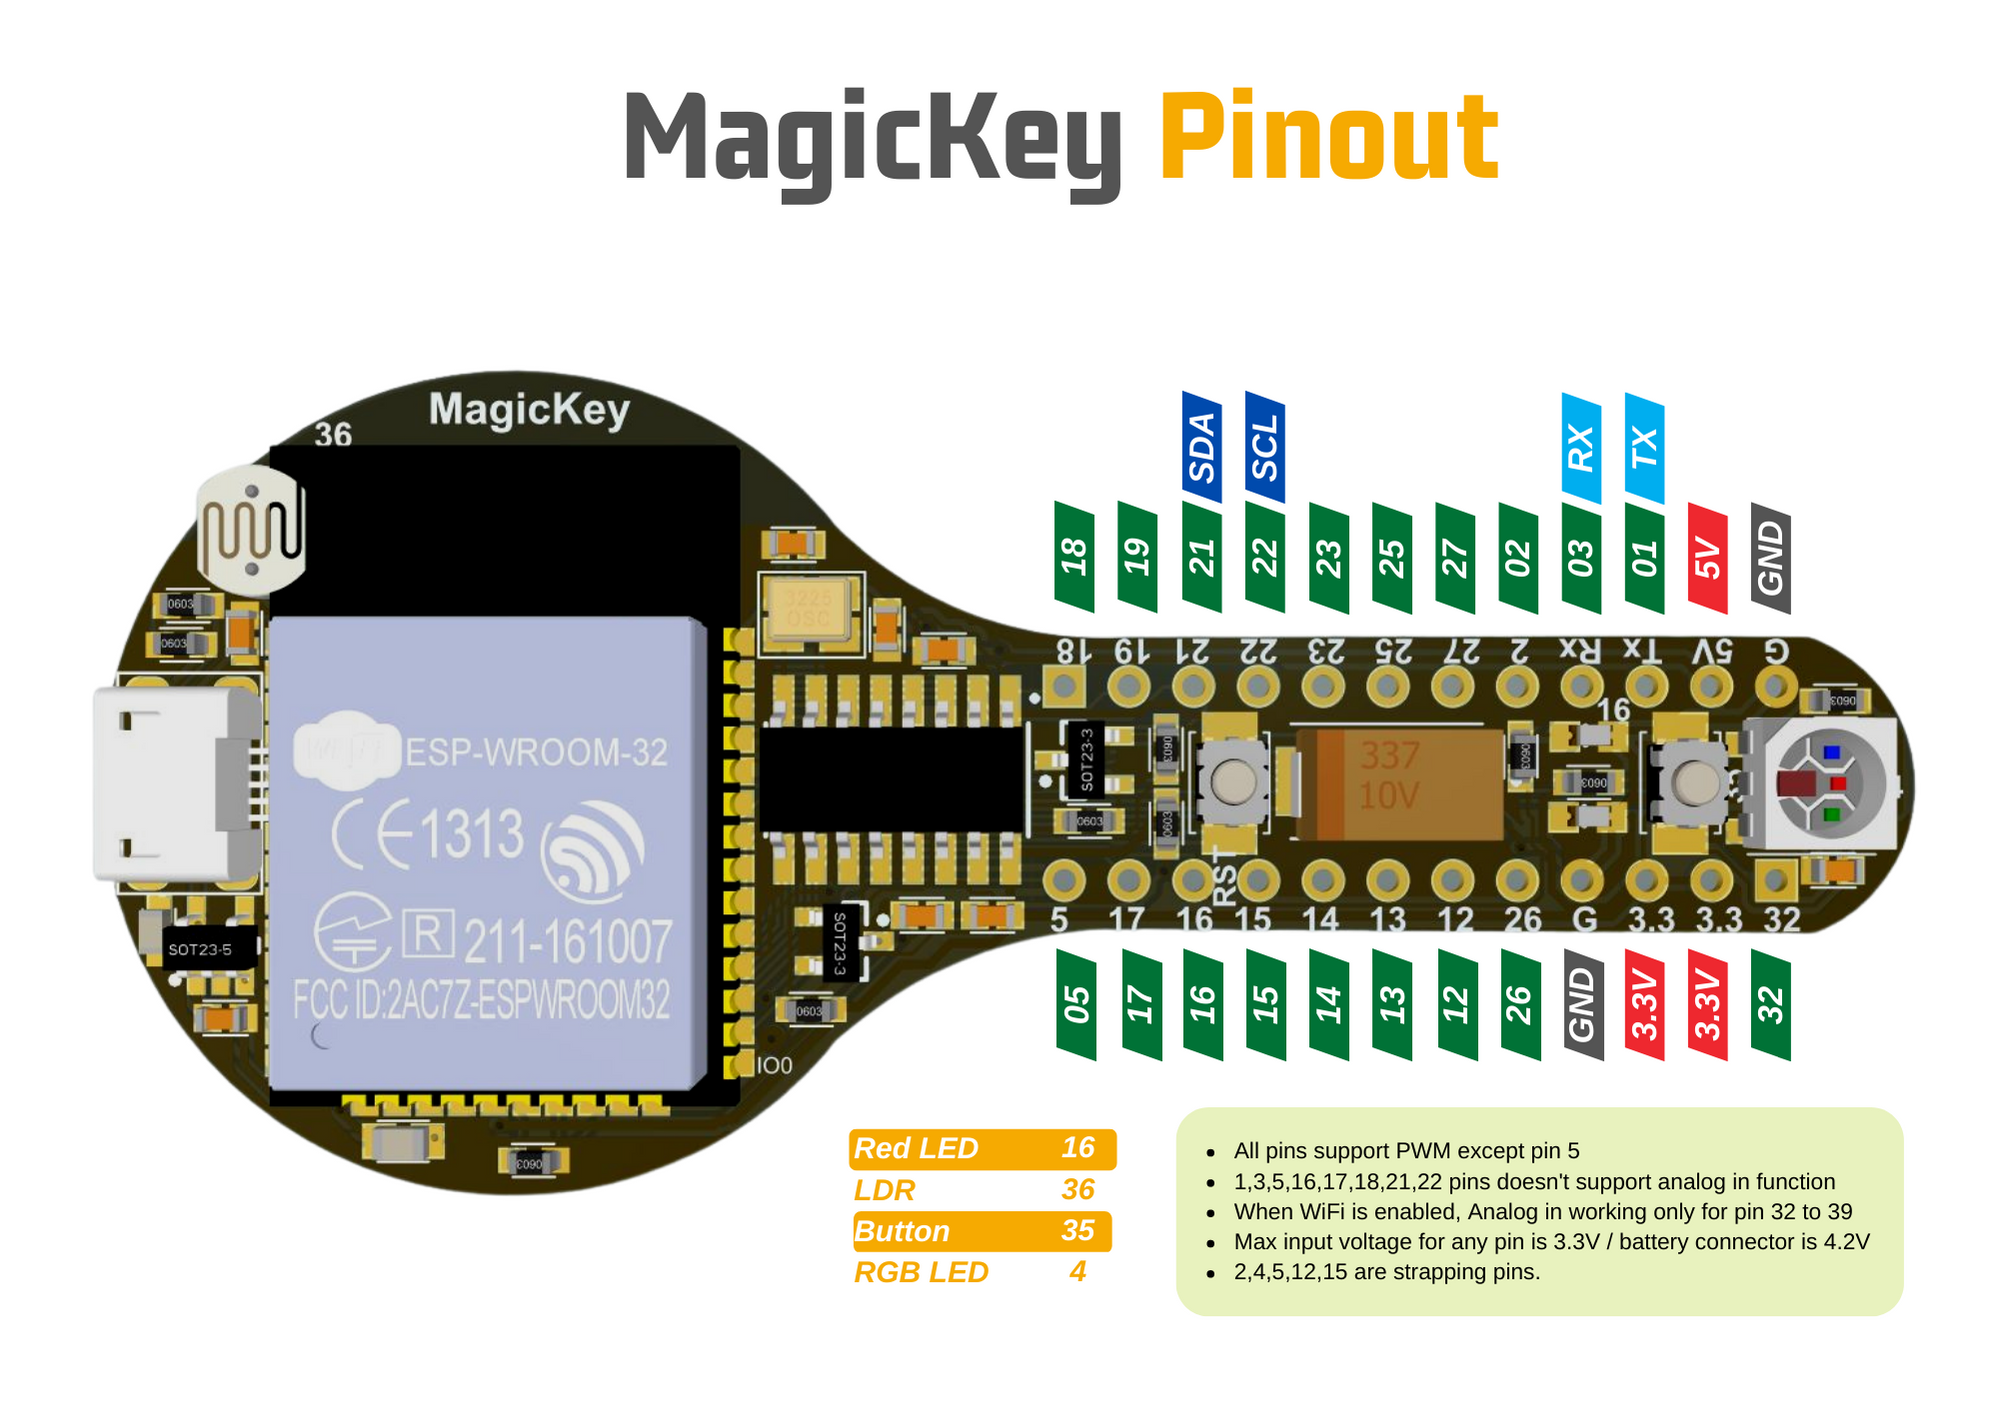
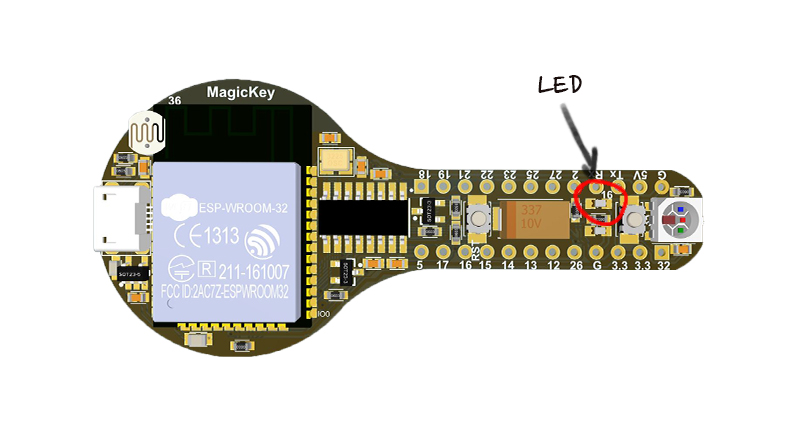
magickey dev Board has 1 LED connected to the pin numbers 16. By setting the output state to a high of the LED pin will turn on the LED and by setting the output state to LOW will turn off the LED.
blinking-a-led
In this example, you are learning how to turn on and off a LED or any other actuator which can be controlled by a digital output such as relay, bulb, motor

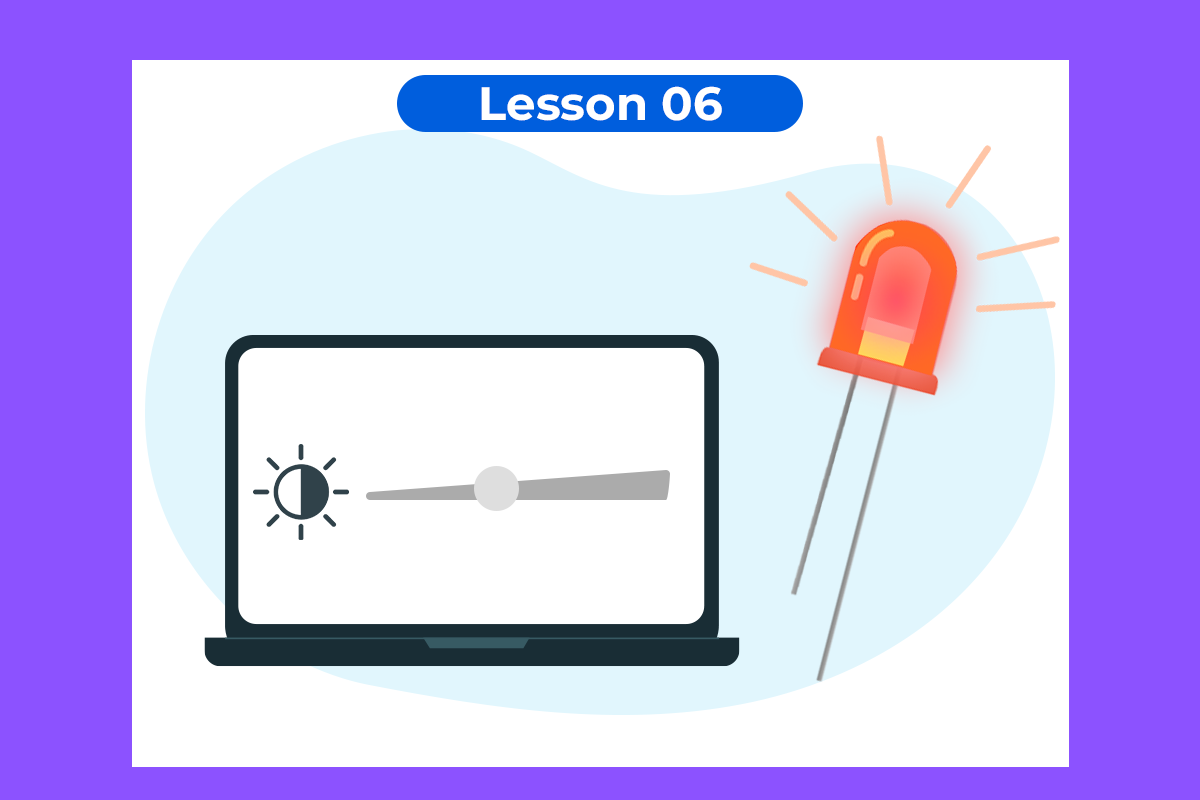
Changing brightness of a LED
In this example you are learning how read a digital input from something like a button & use it to turn on and off a LED or any other digital device.
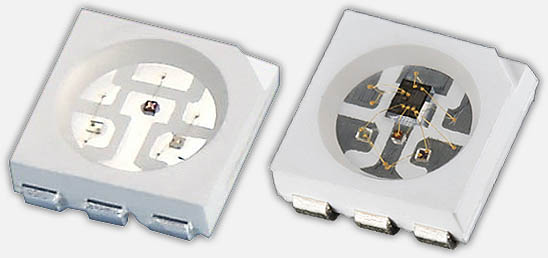
NeoPixel led is a strip of LEDs with RGB combinations. The LED was made by the Adafruit company to avoid the pins issue and complex circuitry. it can be controlled from a single pin on a microcontroller.
With an RGB LED you can produce almost any color. To produce other colors, you can combine the three colors in different intensities.

Here is the circuit symbol.
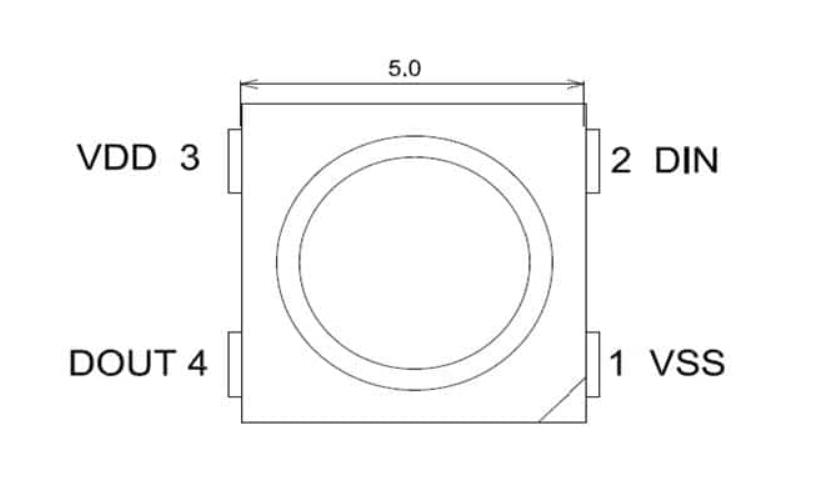
magickey dev Board has RGB LED connected to the pin number 4. 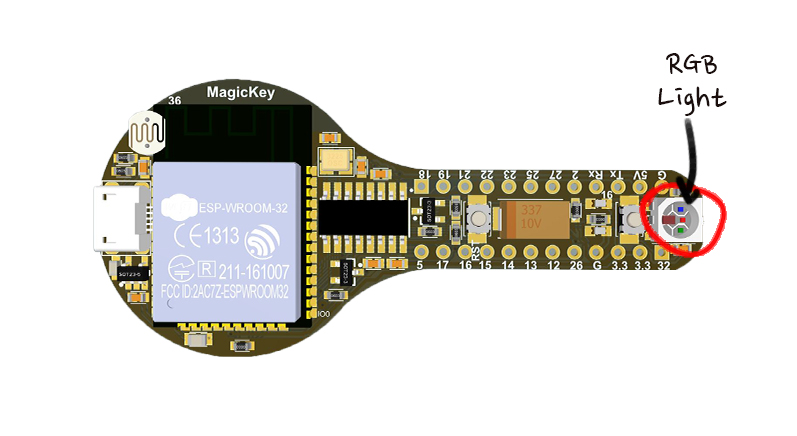
RGB

Light-dependent resistors, LDR is an electronic component that is often used in electronic circuit designs where it is necessary to detect the presence or the level of light.

Here is the circuit symbol.
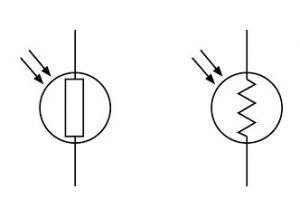
Magickey has an inbuild LDR connected to pin 36 . it gives an analog voltage input from 0 to 3.3V and it converts to a digital value of 0 to 4095.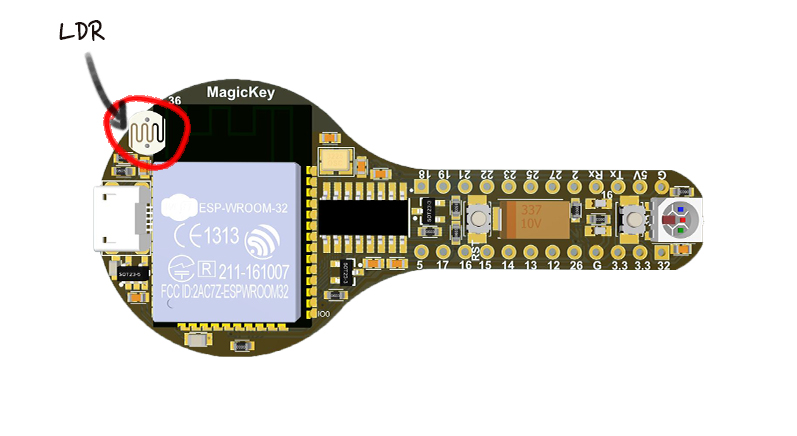

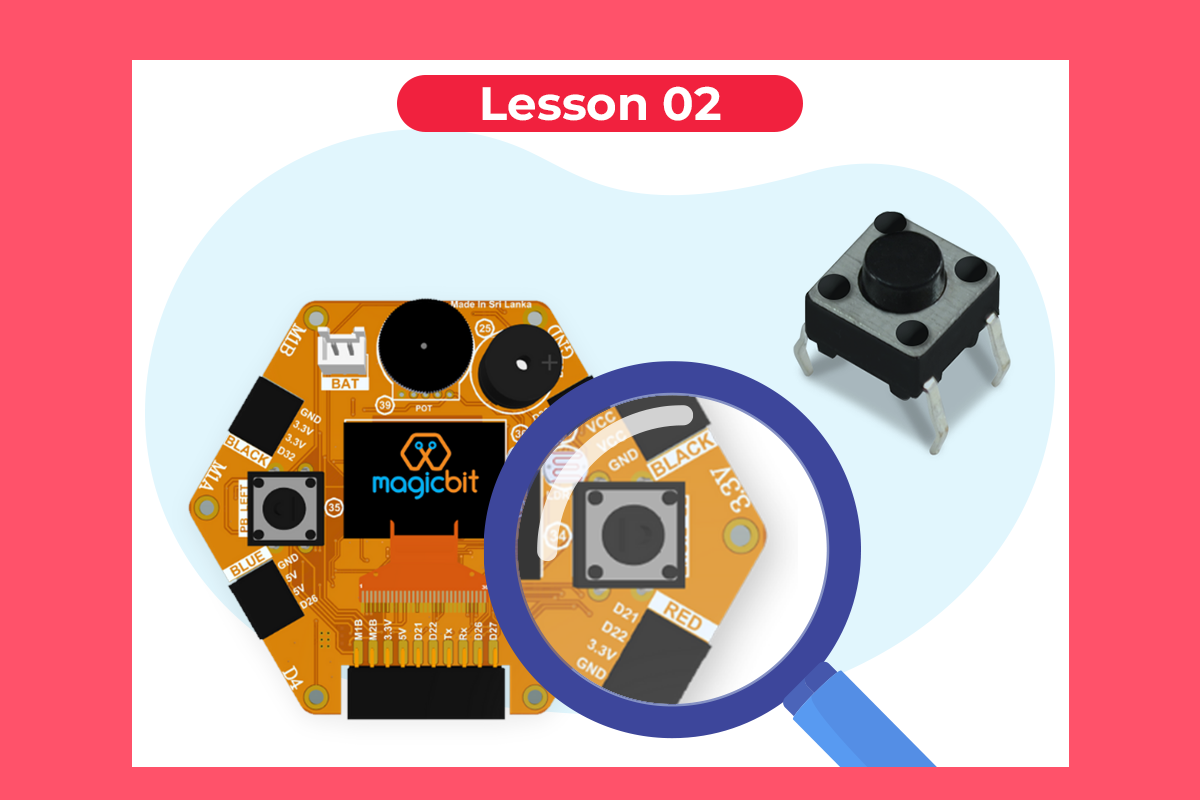
A push button switch is a mechanical device used to control an electrical circuit in which the operator manually presses a button to actuate an internal switching mechanism. They come in a variety of shapes, sizes, and configurations, depending on the design requirements.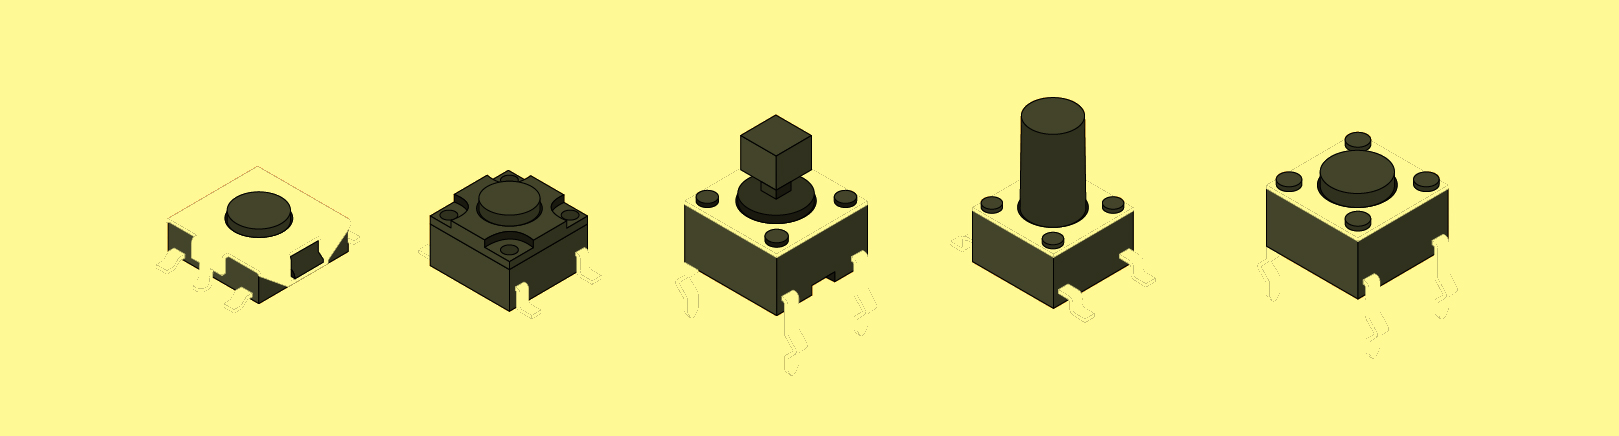
When the pushbutton is open (unpressed) there is no connection between the two legs of the pushbutton, When the button is closed (pressed), it makes a connection between its two legs.
Here is the circuit symbol.
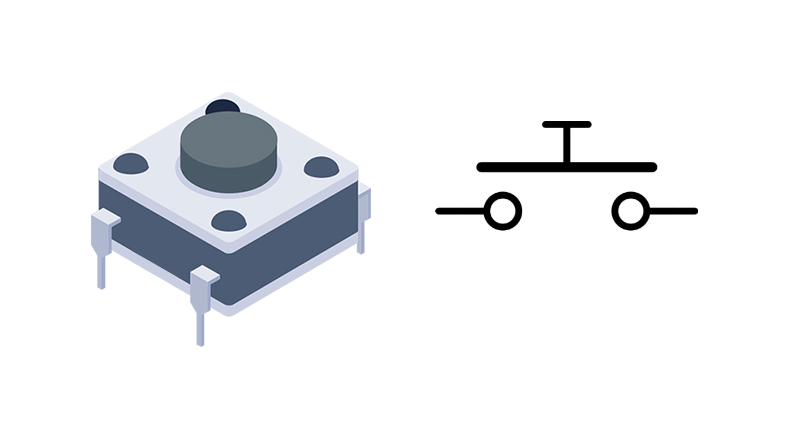
There is 1 Pushbutton on the magickey dev board. it’s connected to pin number 35.