Visualizing data from Magicbit in AWS
Data collected from sensors connected to Magicbit will be published to AWS IOT core through MQTT to be visualized graphically in real time
Components Required

Story
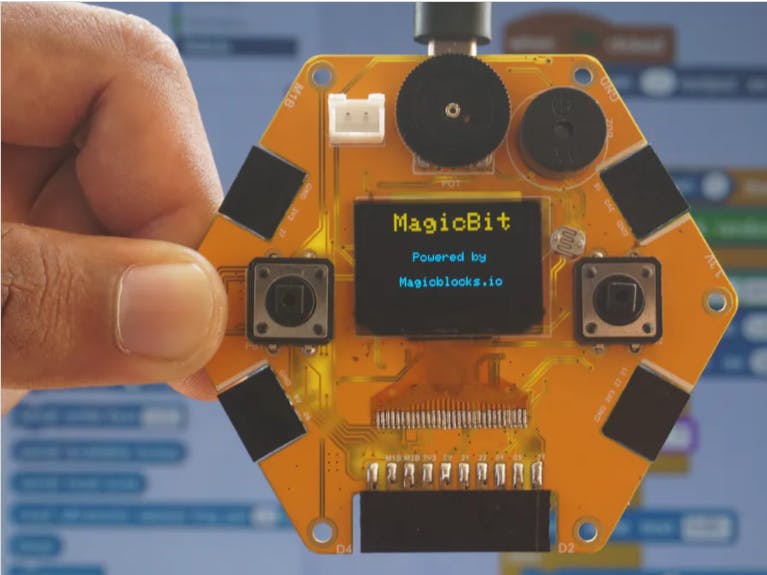
This Project is about connecting your Magicbit device to the AWS Cloud through MQTT. Data sent through MQTT is analyzed and visualized in the cloud using AWS services. So lets get started.
First you should go to the AWS Console and sign in. For learning purposes you can use the free tier option offered by AWS. It will be enough for this project.
To make it simpler I will divide the project into two section.
This is going to be the first stage of our project. At the end of the first stage data will be stored in the S3 buckets.
The AWS services that will be used in the first section,
- Kinesis Firehose
- AWS Glue
- AWS S3
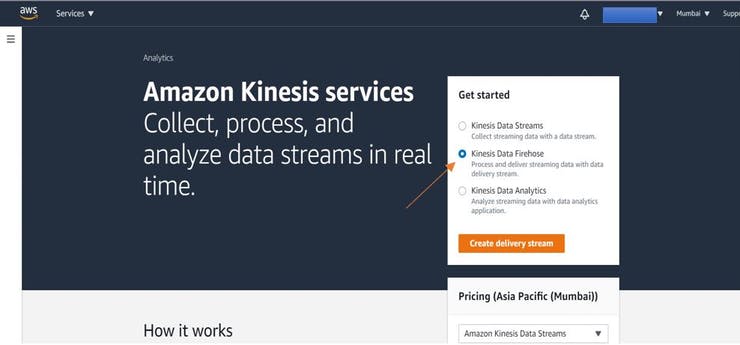
First navigate to AWS Kinesis service.
- Choose Kinesis Data Firehose as shown below and click Create.
Then you will be directed to Step 1 of creating a Firehose service. Input a delivery stream name and choose Direct Put or Other Sources . Click Next.
In Step 2 window leave everything as default and click next. After creating the AWS Glue Service we will come back to edit this step.
In Step 3 choose a S3 bucket if you have created it before. Otherwise click create and create a bucket. In the S3 prefix section use dest/ and in error prefix enter error/. You can enter any name for the above two. But for easiness we will continue with a common name. Be sure to create a folder named dest inside the bucket you chose. Click Next.
In Step 4 choose the minimum buffer size and buffer interval for real time data transfer. In the Permission section choose Create or update IAM role KinesisFirehoseServiceRole. Keep everything default. Click next.
In the next section a review of the changes you made will be shown. Click OK. Then you will have a functioning Kinesis Firehose.
If you successfully created the Firehose service you will obtain something like this.
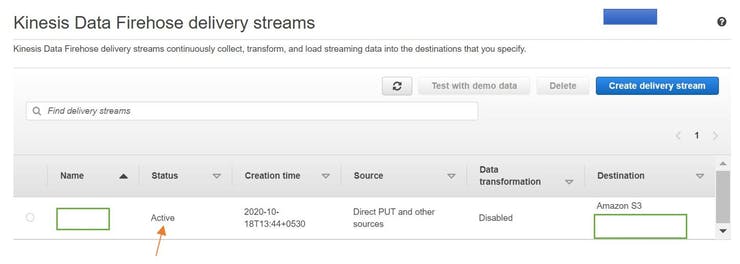
Testing the Firehose and S3 bucket
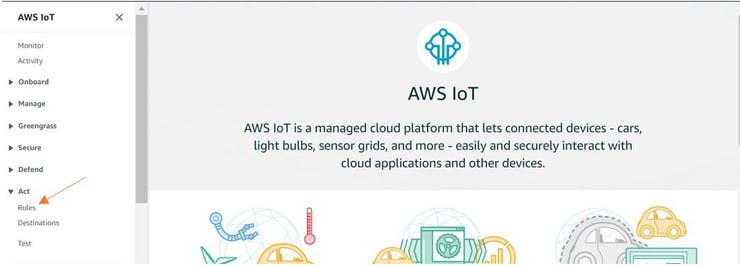
To test that the firehose and S3 bucket is working properly, select IOT core in the console. You will be directed to a page like this. Choose Rule and create a rule.
What is AWS IOT rule ?
It is used to forward any data received from MQTT to a particular service. In this example we will forward to Kinesis Firehose.
Pick a name for the Rule. Leave the Rule and Query Statement as it is. This tells us that anything published to the iot/topic topic will be forwarded to kinesis Firehose through this rule.
Under the section Set one or more actions click add action. Choose Send a message to Amazon Kinesis Firehose Stream. Choose configure. Then select the name of the firehose stream created earlier. Then click Create a Role and create a role. Now you have successfully created a role in AWS.
Any message you publish will be forwarded through the Kinesis Firehose to S3 buckets.
Keep in mind the Firehose sends data when its buffer is filled or when the buffer interval is reached. The minimum buffer interval is 60 sec.
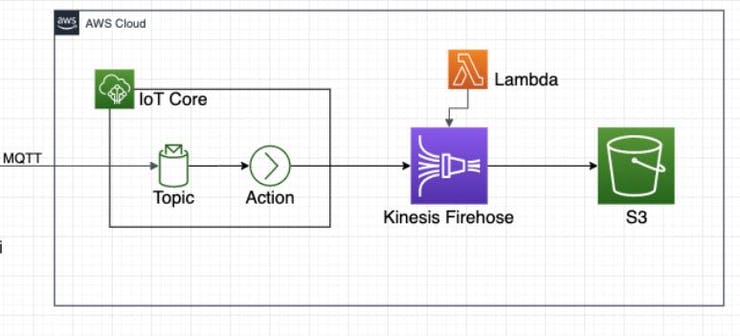
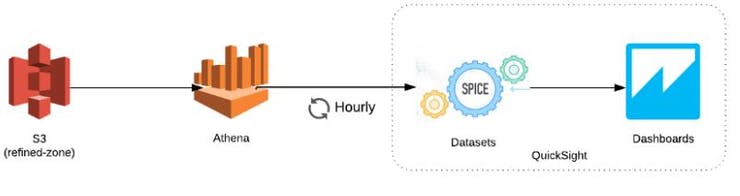
Now we can move to the second part of the project. This will be our dataflow diagram.
Configuring AWS Glue
Why we need AWS Glue and AWS Athena?
Data stored in S3 buckets cannot be directly used as input to AWS Quicksight. First we need to arrange the data in the form of tables. For this we use the above two services.
Go to AWS Glue. Select Crawler on the side tool bar. Then select Add Crawler.
In the first step enter a name for you crawler. Click next. In the next step leave it as default. In the third step enter the path to your chosen S3 bucket. Leave the next window as default. In the fifth window enter any IAM role. In the next step chose the frequency of running the service.
It is advisable to select custom in the drop down box and choose a minimum time.
In the next step click Add Database and then next. Click Finish.
Now we should integrate our Kinesis Firehose with the AWS Glue we created.
Go to AWS Kinesis firehose we created and click edit.

Scroll down to the section Convert Record Format and chose Enabled.
Chose output format as Apache Parquet. For the rest of the details fill in the details of the Glue database you created. A table should be created in the database and the name should be added into this section. Click Save.
Configuring AWS Athena
Choose the database and the data table you created. In the query section this code should be added.
![]()
table-name should be replaced by the actual name of the Glue table you created.
Click Run Query. If it works the data stored in AWS S3 bucket should be displayed as a table of data.
Now we are ready to visualize the data we got.
Configuring QuickSight
Navigate to AWS Quicksight
Click New Analysis on the top right corner and then click New Dataset.
Choose Athena from the list. Enter any Data source name on the pop up card.
Select the Glue database from the drop down box and the relevant table. This will navigate you to this page.
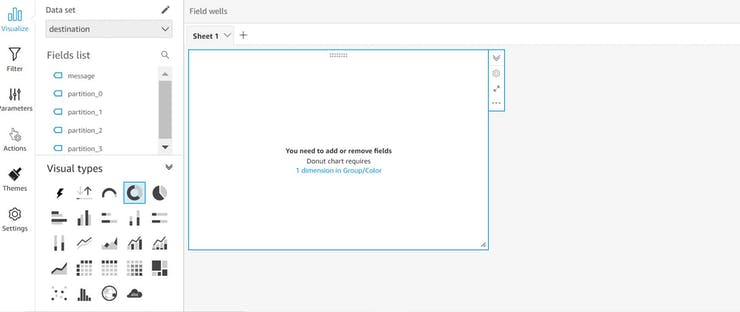
Drag and drop any field from the field list and select any visual type.
Now you can visualize any data sent from your MagicBit Using AWS services!!!
Remember to allow access for quicksight for respective S3 buckets in order to visualize the data in them.