
Magicblocks Lesson 1
Getting Started
Getting Started
Create Magicblocks.io Account
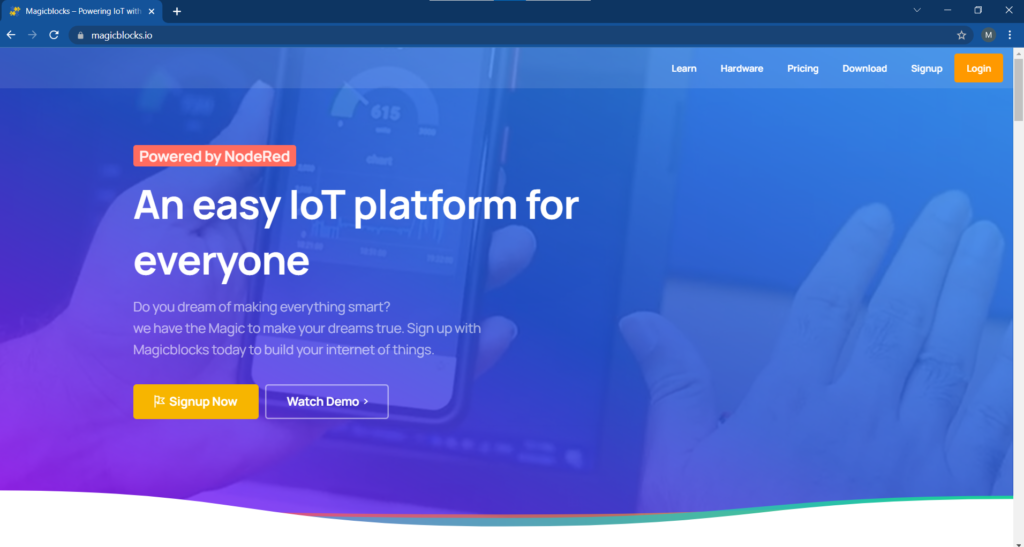
- Go to Magicblocks website, http://magicblocks.io/
- Click on Signup Now
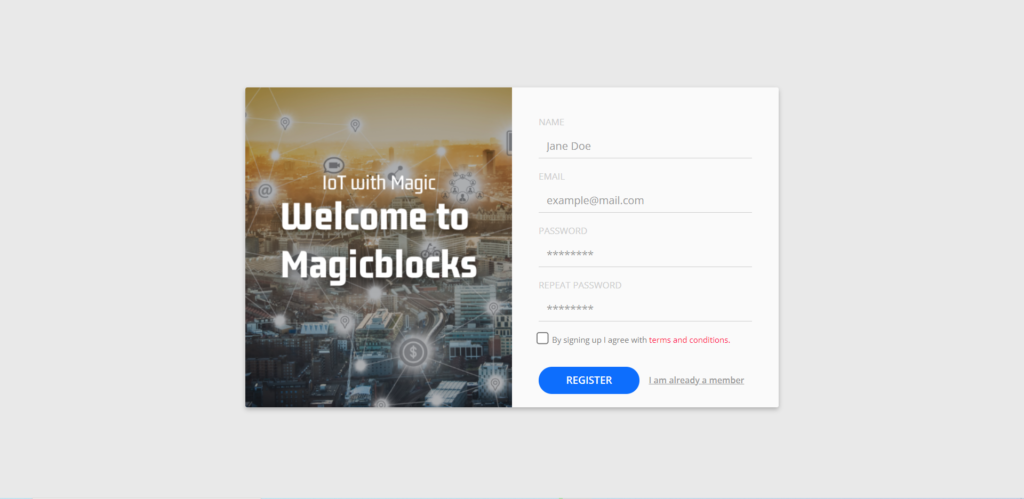
- Click on the Signup button after inserted your details
- Go to the email account you provided and activate your Magicblocks account with the Activation Link
- Follow the Activation Link which we have sent you in an email. Check spam folder if you didn’t find in your inbox.

Gmail verification email
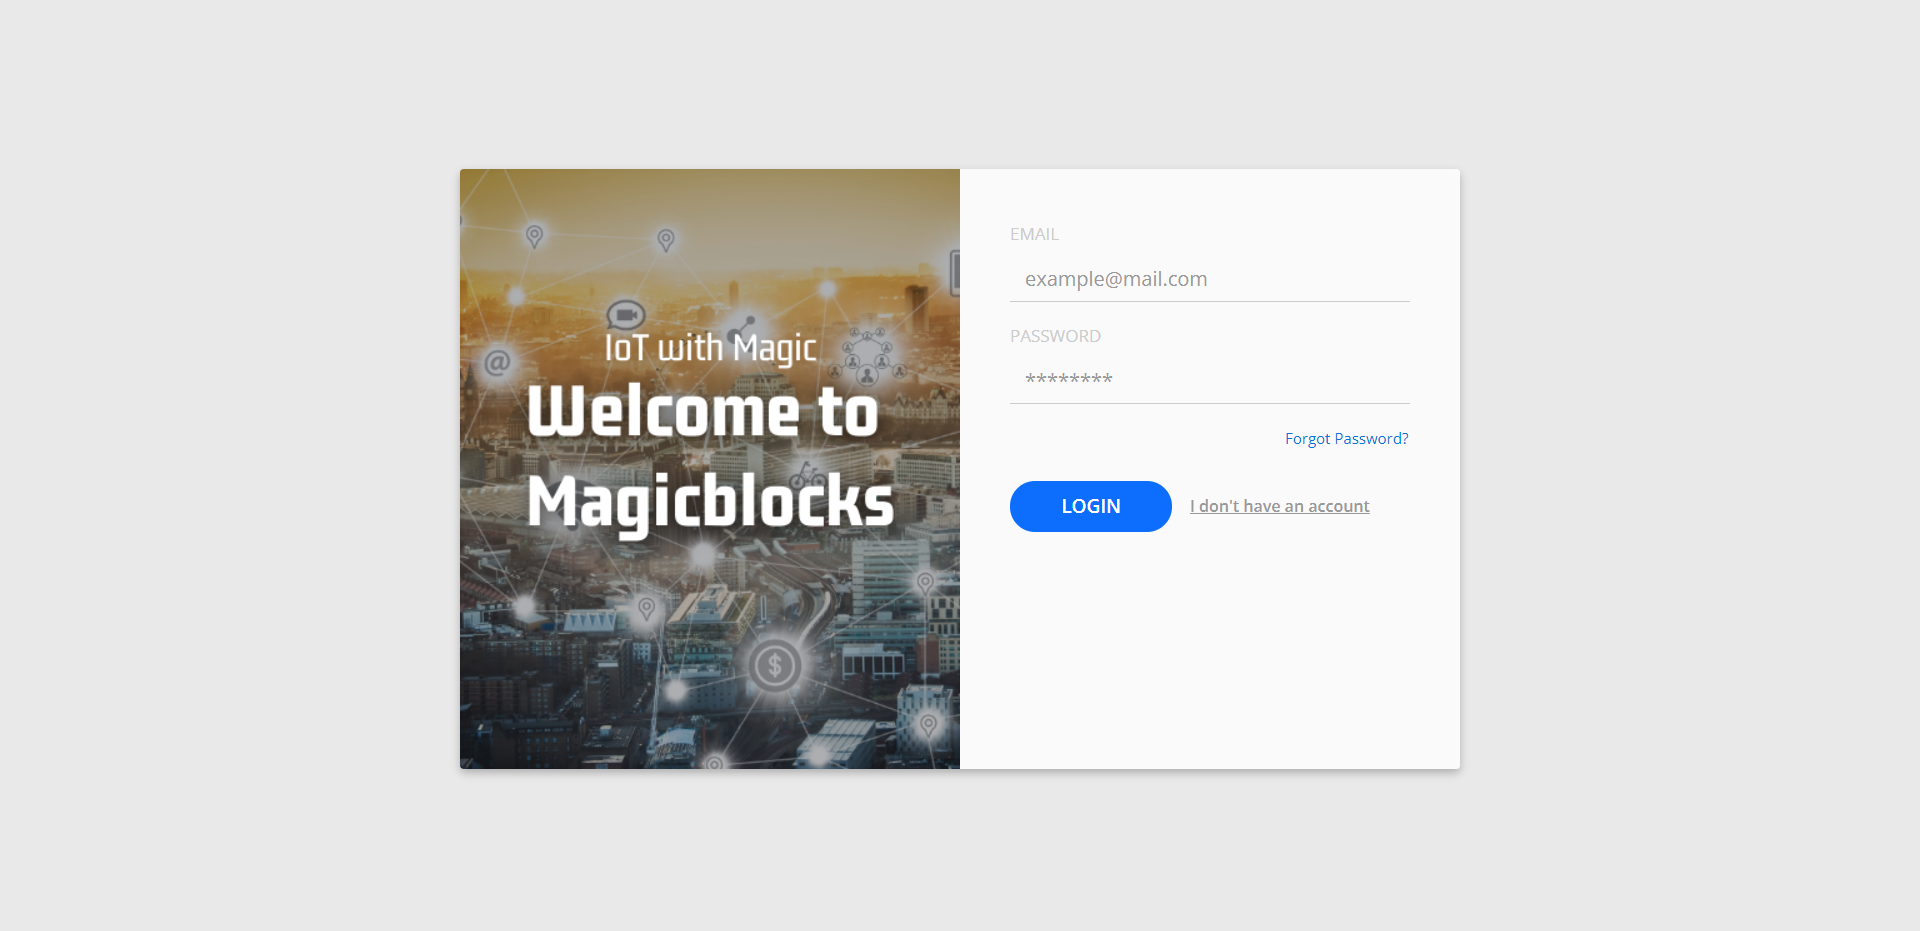
Login to Your Magicblocks.io Account
- Go to Magicblocks.io official website – magicblocks.io
- Select LOGIN
- Enter your email address and the Magicblocks Password and sign in to Magicblocks
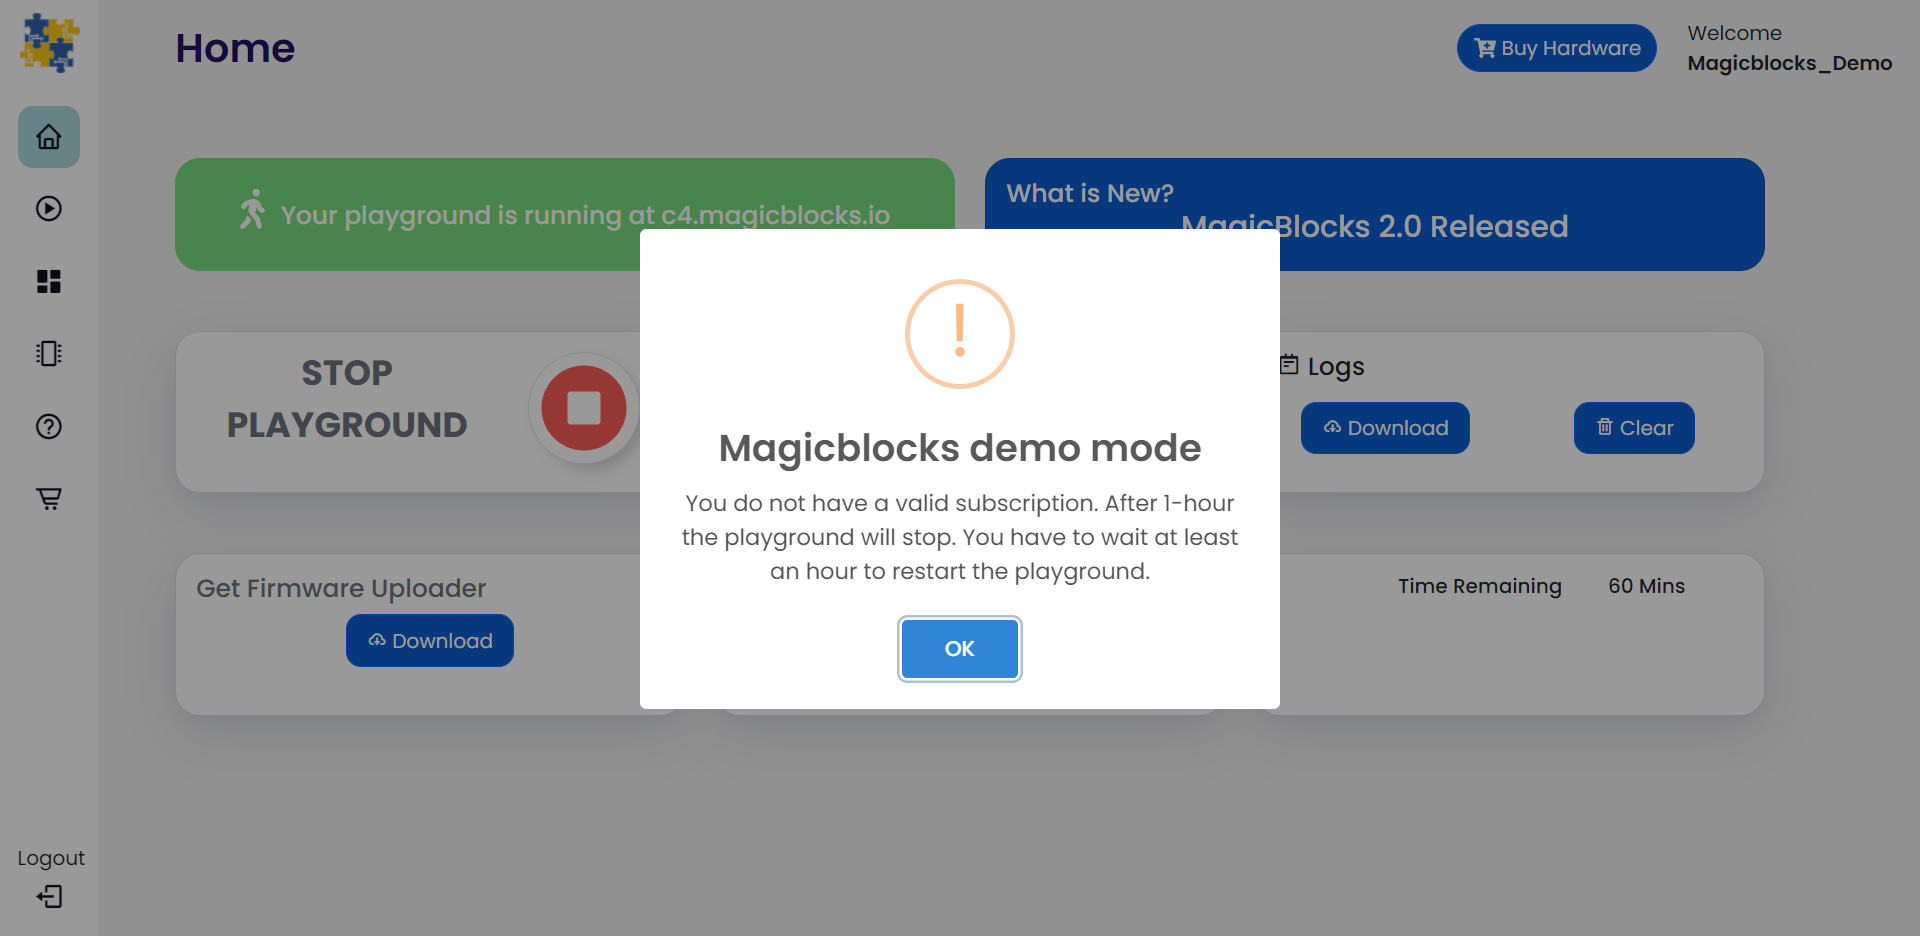
Start the Playground
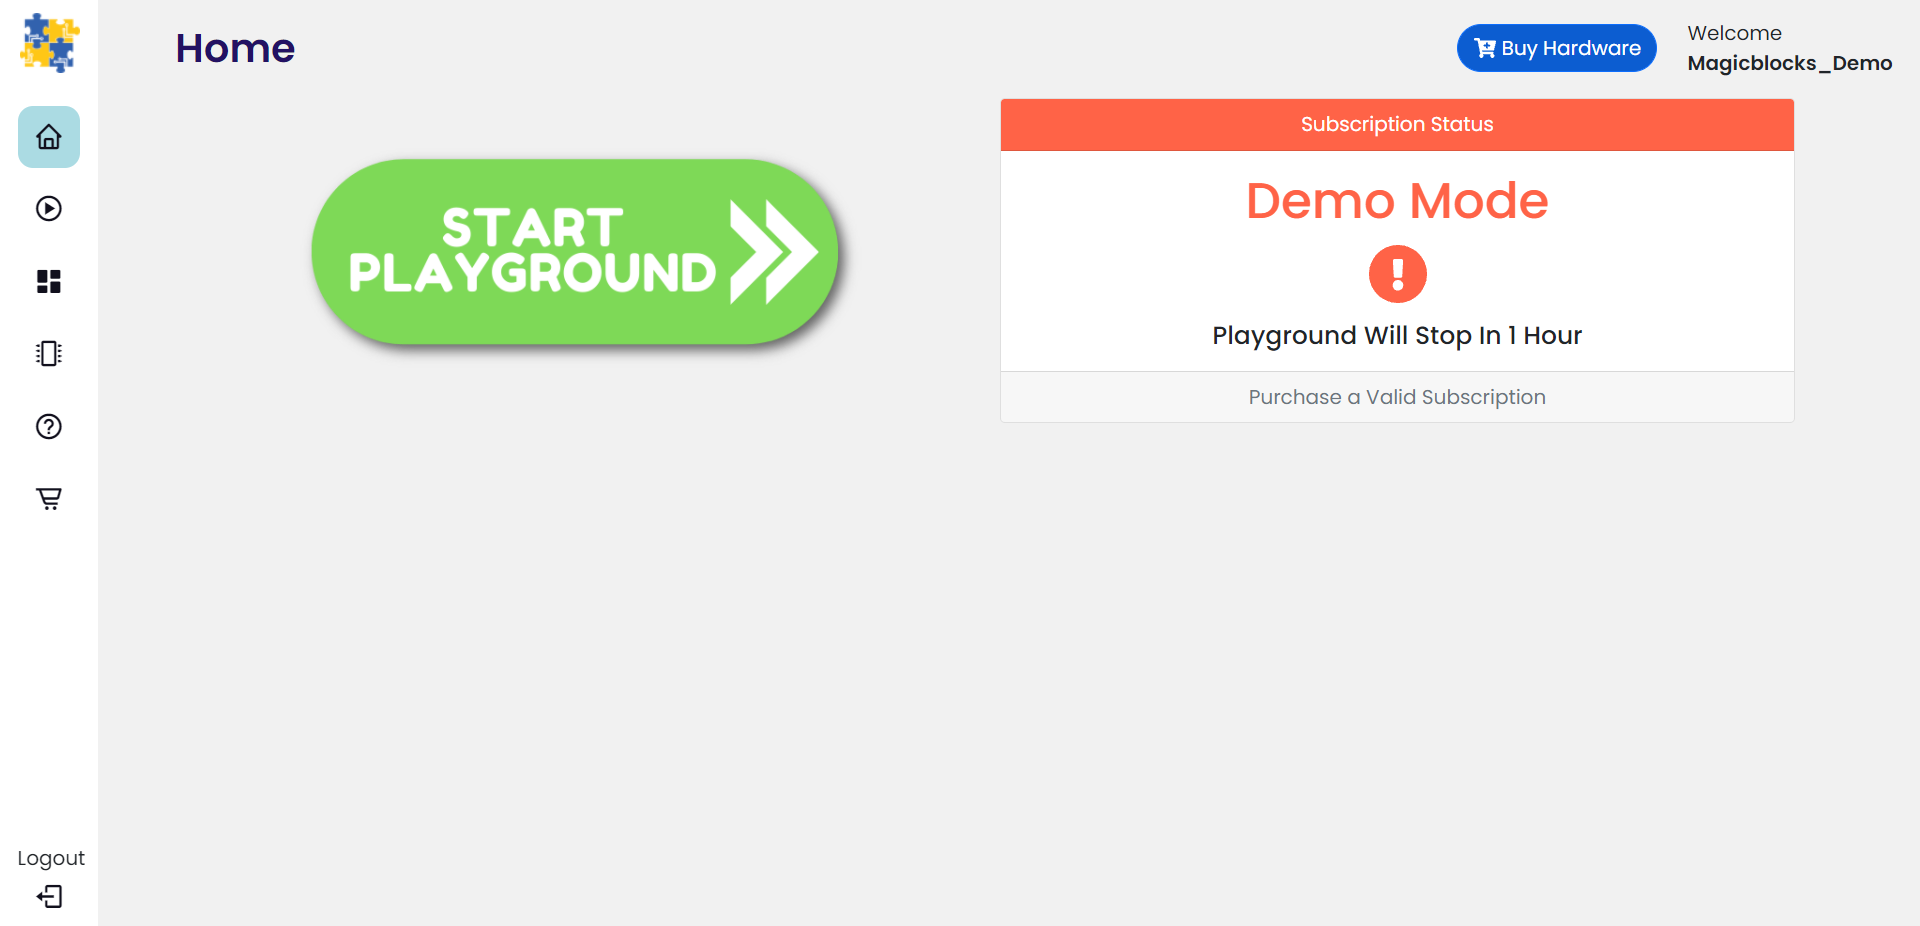
The playground is the visual programming environment based on Node-Red that has been customized for seamless integration with hardware devices to enable IoT. When you log in for the first time, your playground will not be running. If you do not have a valid subscription, you will be allowed to run the playground only for 1 hour continuously before it is automatically stopped. You will need to wait for 1hour to start the playground again. You can subscribe to the Standard Subscription by entering the coupon code in the Subscription tab provided with your Magicbit device. If you have any issue please write to [email protected]
Setting up a device
Step 01
- Connect Magicbit to the computer using provided USB cable.
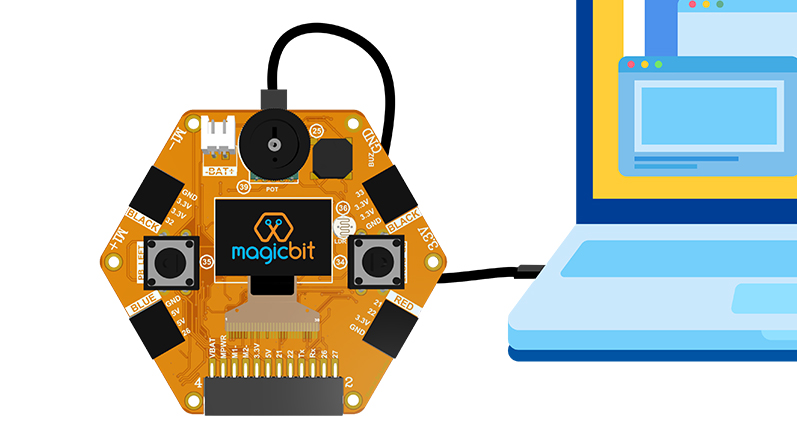
- Once the Magicbit is powered , it should load the Magicbit OS.
- If this is not loaded, then you need to upload the Magicbit OS to the Magicbit using the Magicbit Web uploader
Step 02
- Then log into your Magicblocks account from http://magicblocks.io/
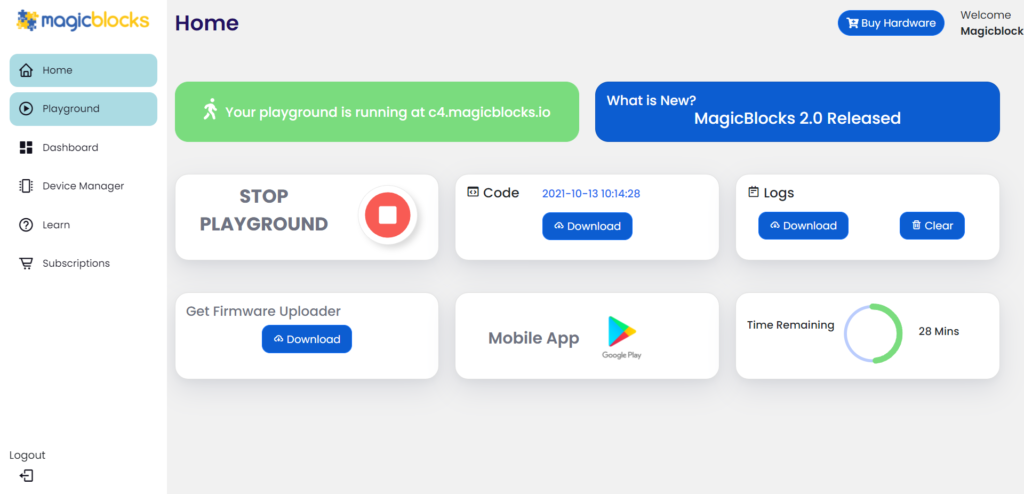
- Start the playground in Magicblocks. Click on green color “Start playground” tab.
- Then the Home page of the Magicblocks.io platform will look as follows.
Step 03
- Rotate the potentiometer wheel in the Magicbit and Select the “Magicblocks” mode.
- Press the right side poush button to load the Magicblocks mode
- Then the Magicblocks firmware will start to open in the magicbit
Step 04
- Go to Device Manager tab in Magicblocks web page and click on Add device.
Step 05
- Select your device type (Magicbit) & keep the status as Active .
- You can use any name and description. Click “save changes” to finish .
Step 06
- The device you added earlier will appear in the list.
- Select that device and click on settings icon


Step 07
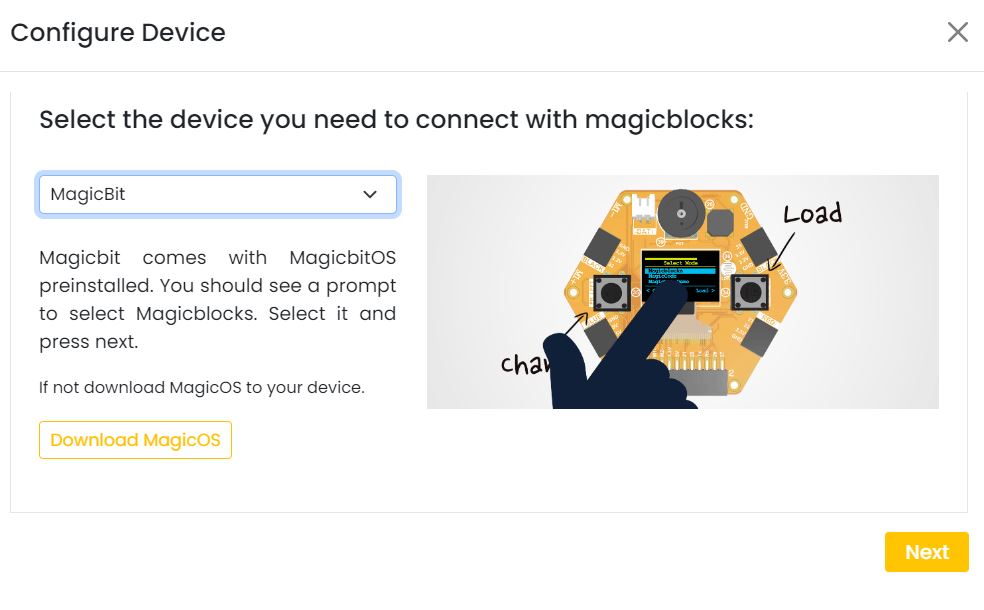
- Then you will directed to a page as follows .
- There select the device as Magicbit and click Next.
- As you have already uploaded the Magicbit OS, no need to do it again.
Step 08
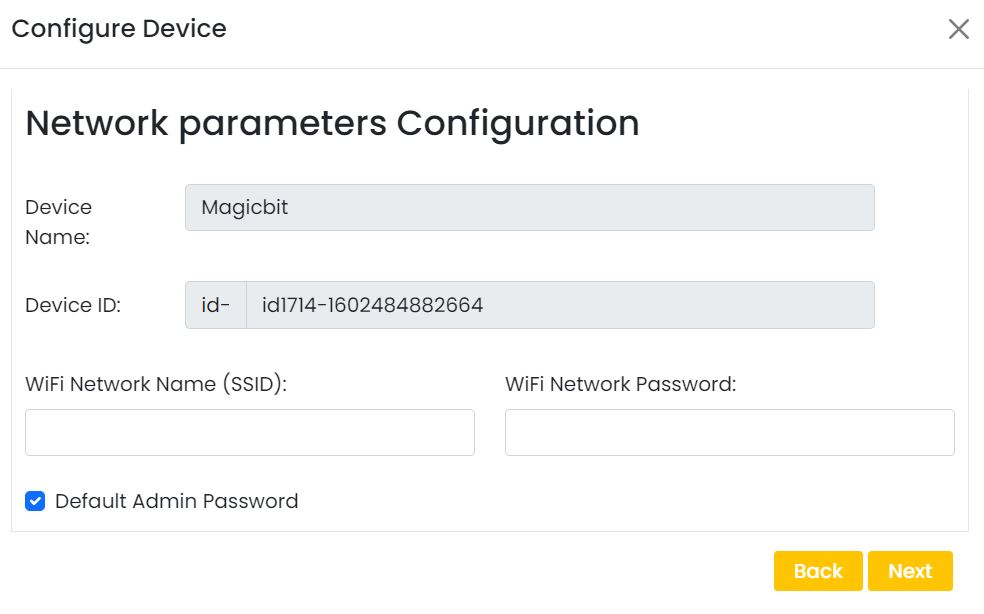
- In the next page give the Wifi SSID and Password that your computer already connected . Then click on Next.
- Here Wifi network must be 2.4 GHz
- Instead of Wifi you can use any mobile hotspot or laptop hotspot.
Step 09
- Now select the method ( USB ) you want to connect the device with Magicblocks and click Next .
 Step 10
- Then you will get a window with the details you entered earlier. Click on “Finish” button.
Step 11
- Next a pop-up will come to select the USB port that your Magicbit connected.
- Select the Correct USB port and Click on “Connect” button.
Step 12
- Now your magicbit will restart
Once you get connected successfully,
- A message will come saying that your configuration is successful
- The connection status will blink in Green Color.
- In the Magicbit Display, the wi-fi signal symbol will display.
Go to the playground!
- Login to Magicblocks and click on Playground Button to open the playground.
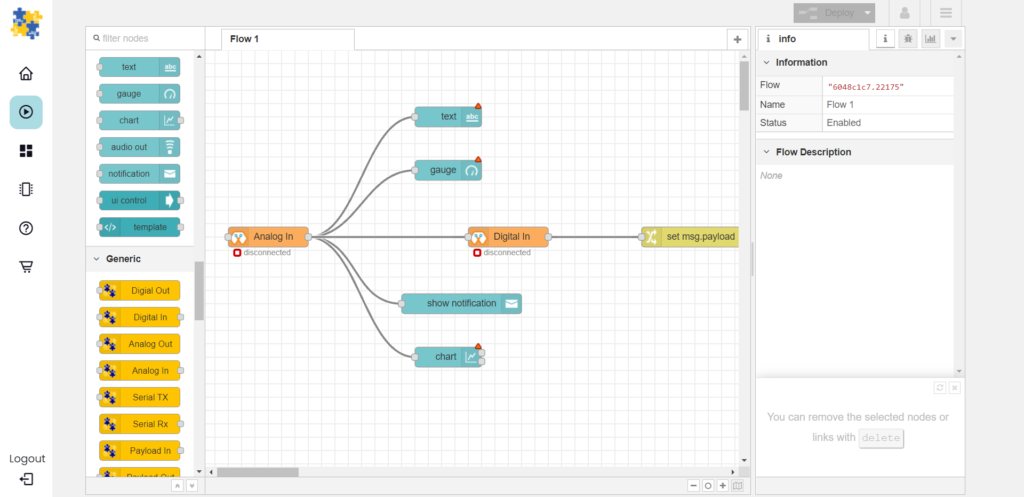
 The playground is a hosted instance of a customized version of the open-source Node-Red application. On the left, you will find the palette where all the blocks will reside. You can drag and drop the blocks from the palette to the canvas and start rolling very quickly. Once done, click the Deploy button in the top right corner and all your changes will be saved. In the next section, we will go through some examples covering all the relevant blocks.
Hello Magicbit
Let’s start magic by displaying text on the Magicbit display.
Open the Device Manager in your Magicblocks account
- Turn on your Magicbit board that was set up in the previous section and wait for it to connect
- Open the playground
- Drag and drop the Display block under the category Magicbit
- Double-click on the block and select the device ID
- Drag and drop inject blocks under the general category and connect them to the Display block
- In one inject node-set payload type as String and type Hello Magicbit in the text box. You can set a topic too.
- Click deploy
- Click the button in inject node to see the magic. You can set any text from anywhere in the world!!!
If you have any configuration issue please send an email to [email protected] or chat with our online agents.
Thulan
how to reset the magicbit board? Im ussually working with arduino ide and I have already connected magicbit to magic blocks and i want to disable or quit magic blocks and make magicbit respond to arduino. How can i do it
Anuruddha Tennakoon
you can just program with Arduino. follow getting started guide for arduino