Smart Dustbin from Magicbit
Make a Smart dustbin using Magicbit with Arduino
Components Required


Story
In this tutorial we will learn about how to make a Smart dustbin using Magicbit dev. board with Arduino IDE. Lets get start.
Before move in to project lets look at what is Smart dustbin. There are one or more dustbins in every home. In many times you covered it. Because that will make smell in your home. So when you want to put some garbage to dustbin, you have to open it. But if, when you walk near to dustbin to put the garbage and automatically it cover is opening then how its look like. Crazy aaa…. so that is the smart dustbin.
Theory and Methodology
The theory is very simple. When you walk near to dustbin it will detect you. If the distance between you and dustbin is smaller than some defined distance, then the cover of the dustbin will open automatically. For to complete both these objects we use HC-SRO4 ultrasonic sensor and small servo motors. You can get any type of digital servo motor.
Hardware Setup
For this project we mainly used three hardware components. They are Magicbit, servo motor and ultrasonic sensor. The connection between all these parts are shown in below Figure.
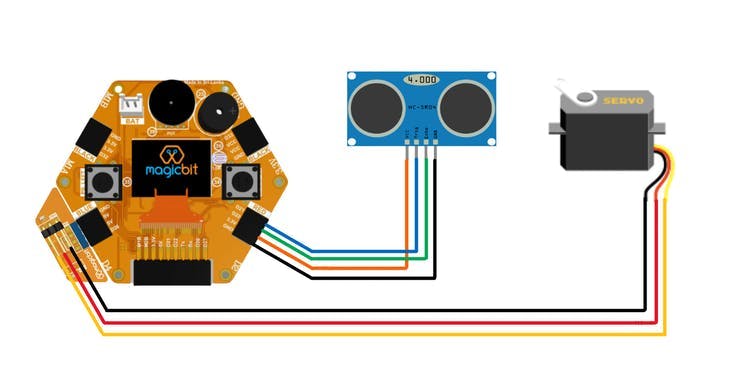
Ultrasonic sensor used 3.3 v for power up. Therefor we used right lower port of Magicbit board to connect ultrasonic sensor to Magicbit. But servo motor is used 5V for proper working, Therefor we used left lower port to connect servo motor with Magicbit. In this case, we use Magic bit servo connector module. But if you don’t have that module you can use three jumper wires to connect 5V to 5V, Gnd to Gnd and signal pin to 26 pin on magicbit.
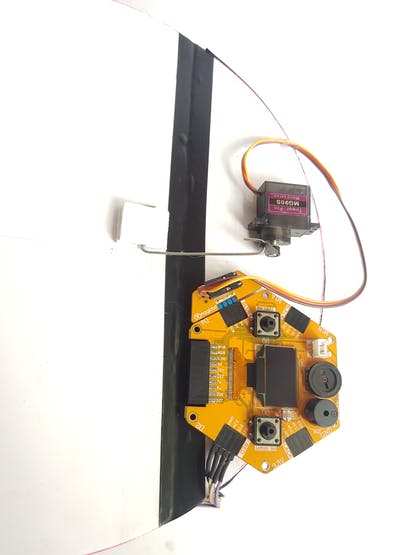
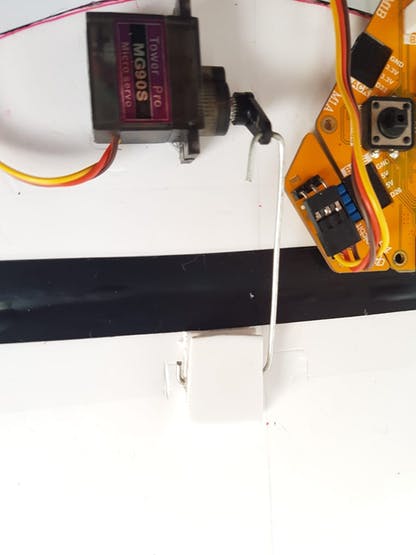
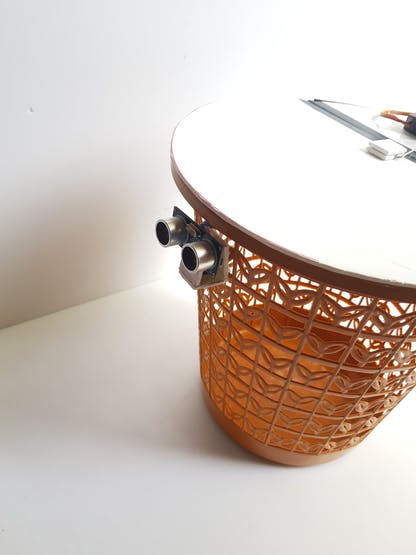
Now lets look at mechanical side of our project. To open the cover we use very simple lever mechanism. We connected one side servo hand clip to servo. Then we connected the corner hole in the clip and the dustbin cover using strong metal wire. The metal wire can rotate with respect to servo clip and dustbin cover. By studying top image and video you can build that very easily.
Software Setup
The software part is also very easy.let’s look at Arduino IDE code and how that code is work.
For driving servo we use ESP32 servo library. This library almost include in magic bit board manager in Arduino IDE. To deal with ultrasonic sensor we use newPing library. This can be download from following link.
https://bitbucket.org/teckel12/arduino-new-ping/downloads/
Download the zip file and and go tools>include library>add Zip library in Arduino. now select your downloaded zip file of new pin library. in the code we first declare servo and ultrasonic sensor libraries. In the loop function we always check the distance from dustbin to nearest front object. If that grater than 200, then distance output of the library is 0. When distance is lower than 60cm, then it execute for loop for open the cover by rotating servo. If the distance is larger than 60cm then the cover will put down. By using boolean variable we always check the state of the cover. If cover is down then only it will open. Also vice versa.
Now select the correct COM port and board as magcibit, Then upload the code. Now your smart dustbin is ready to use.
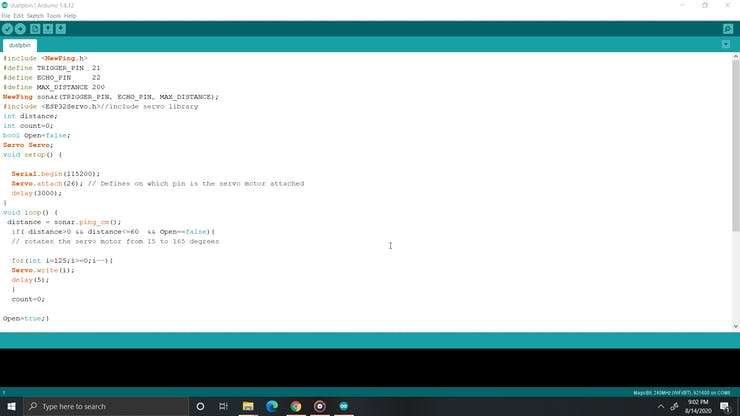
Code
#include <NewPing.h>
#define TRIGGER_PIN  21
#define ECHO_PIN     22
#define MAX_DISTANCE 200
NewPing sonar(TRIGGER_PIN, ECHO_PIN, MAX_DISTANCE);
#include <ESP32Servo.h>//include servo library
int distance;
int count=0;
bool Open=false;
Servo Servo;
void setup() {

  Serial.begin(115200);
  Servo.attach(26); // Defines on which pin is the servo motor attached
  delay(3000);
}
void loop() {
 distance = sonar.ping_cm();
  if( distance>0 && distance<=60  && Open==false){


  for(int i=125;i>=0;i--){
  Servo.write(i);
  delay(5);
  }
  count=0;

Open=true;}

  else if(  (distance>60 || distance==0) && Open==true){

   for(int i=0;i<=125;i++){
  Servo.write(i);
    delay(5);
  }
  Open=false;

}

delay(500);
}
If you need help or couldn’t understand a step be sure to check out our youtube video by clicking here: Youtube Video