Connect your Magicbit to ThingsBoard
Send data from sensors connected to magicbit which we can display visually on thingsboard.
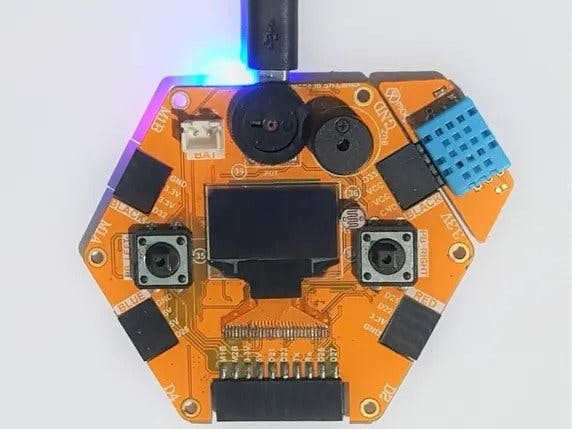
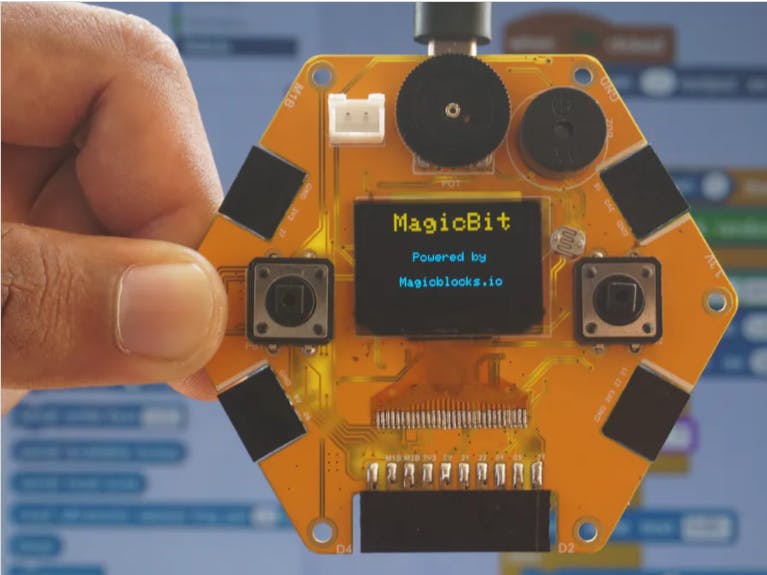
Components Required

What is ThingsBoard?
ThingsBoard is an open-source server-side platform that allows you to monitor and control IoT devices. It is free for both personal and commercial usage and you can deploy it anywhere. If this is your first experience with the platform we recommend to review what-is-thingsboard page and getting-started guide.
Story
Introduction
ThingsBoard is an open-source server-side platform that allows you to monitor and control IoT devices. It is free for both personal and commercial usage and you can deploy it anywhere. If this is your first experience with the platform we recommend to review what-is-thingsboard page and getting-started guide.
This sample application will allow you to display humidity/temperature data from DHT11 sensor using your magicbit device and ThingsBoard web UI.
The application that is running on Magicbit device is written using ThingsBoard Arduino SDK which is quite simple and easy to understand.
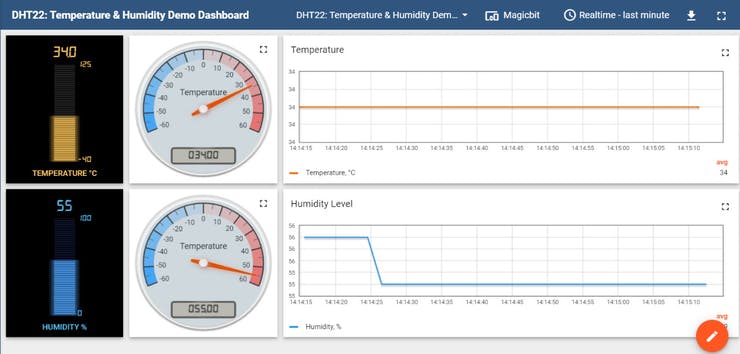
Once you complete this sample/tutorial, you will see your sensor data on the following dashboard.
Visit the Thingsboard Demo official page and get signed up.
After Signing in On the Left Side Bar you will see Devices. Click devices and add a new device.
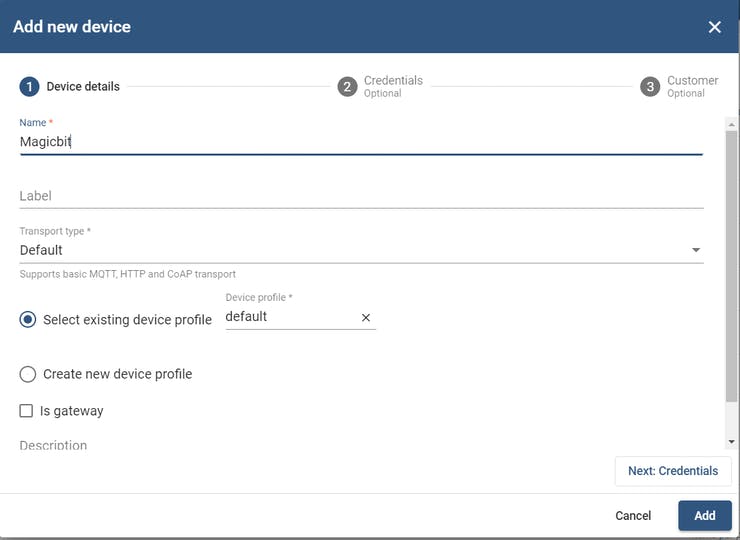
On the credentials tab tick Add credentials tab and choose Access Token from the drop down box. Either you can add your own Access Token or leave blank to auto generate token.
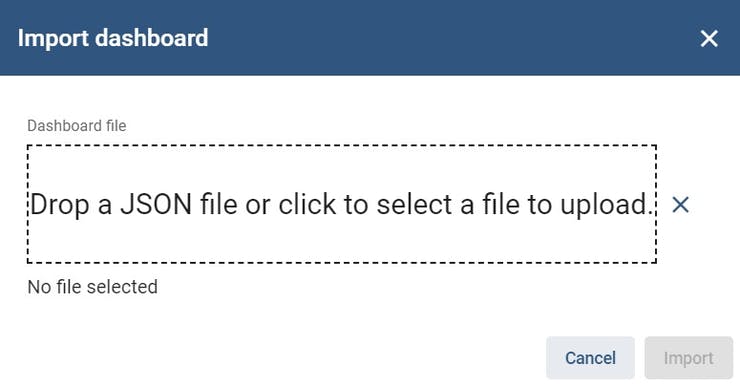
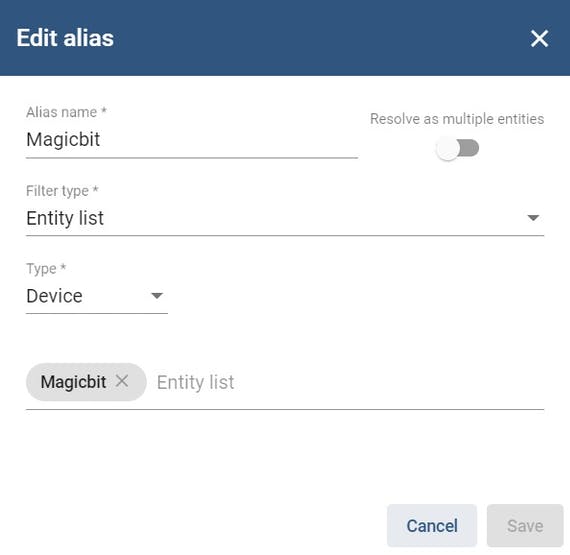
Set device to magicbit in alias. Go to the dashboard tab and import dashboard.
Follow the following steps in images to Import the dashboard. Find the demo JSON file called “magicbit_temperature_humidity_demo_dashboard.json” in attachments.
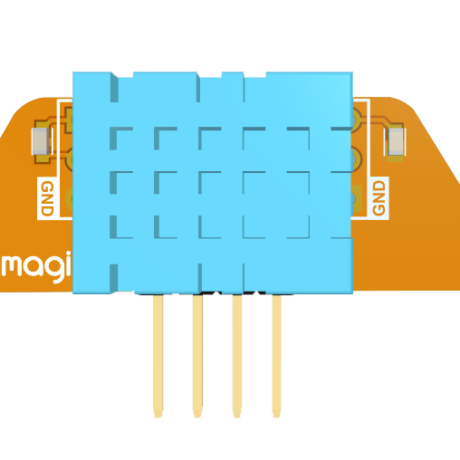
Connect your magicbit with DHT11 module as follows to pin 33.
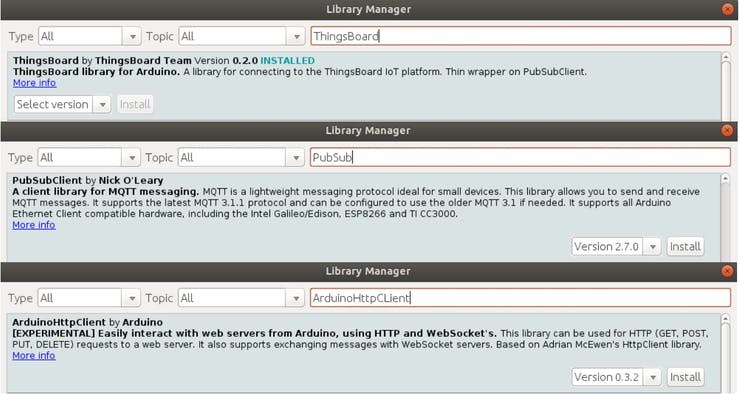
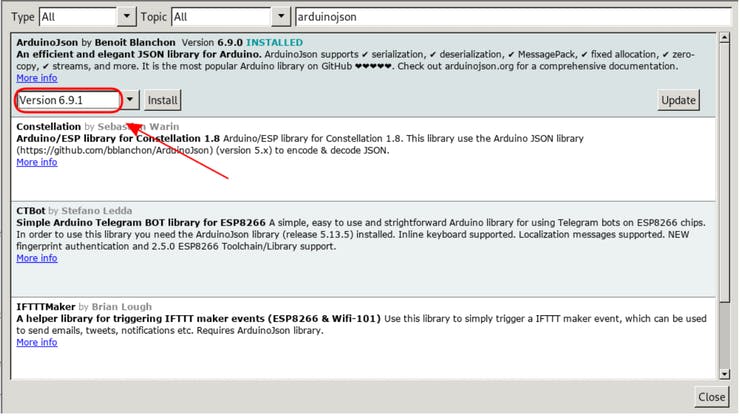
In the Arduino IDE download the following libraries,
The following is the Arduino code you will be using.
Note You need to edit following constants and variables in the sketch:
WIFI_AP– name of your access pointWIFI_PASSWORD– access point passwordTOKEN– the $ACCESS_TOKEN from ThingsBoard configuration step.THINGSBOARD_SERVER– ThingsBoard HOST/IP address that is accessible within your wifi network. Specifydemo.thingsboard.ioif you are using live demo server.
#include <DHT.h>           // DHT for Library library
#include <WiFi.h>           // WiFi control for ESP32
#include <ThingsBoard.h>    // ThingsBoard SDK

#define DHTPIN 33     // what digital pin we're connected to

#define DHTTYPE DHT11   // DHT 11
DHT dht(DHTPIN, DHTTYPE);

// Helper macro to calculate array size
#define COUNT_OF(x) ((sizeof(x)/sizeof(0[x])) / ((size_t)(!(sizeof(x) % sizeof(0[x])))))

// WiFi access point
#define WIFI_AP_NAME       "4G"// "WIFI_AP"
// WiFi password
#define WIFI_PASSWORD      "nevergiveup"// "WIFI_PASSWORD"

// See https://thingsboard.io/docs/getting-started-guides/helloworld/
// to understand how to obtain an access token
#define TOKEN              "XZjQ26r9XJcsNkWGuASY" // "TOKEN"
// ThingsBoard server instance.
#define THINGSBOARD_SERVER  "demo.thingsboard.io"

// Baud rate for debug serial
#define SERIAL_DEBUG_BAUD    115200

// Initialize ThingsBoard client
WiFiClient espClient;
// Initialize ThingsBoard instance
ThingsBoard tb(espClient);
// the Wifi radio's status
int status = WL_IDLE_STATUS;


// Period of sending a temperature/humidity data.
int send_delay = 2000;
unsigned long millis_counter;
void InitWiFi()
{
  Serial.println("Connecting to AP ...");
  // attempt to connect to WiFi network

  WiFi.begin(WIFI_AP_NAME, WIFI_PASSWORD);
  while (WiFi.status() != WL_CONNECTED) {
    delay(500);
    Serial.print(".");
  }
  Serial.println("Connected to AP");
}

void reconnect() {
  // Loop until we're reconnected
  status = WiFi.status();
  if ( status != WL_CONNECTED) {
    WiFi.begin(WIFI_AP_NAME, WIFI_PASSWORD);
    while (WiFi.status() != WL_CONNECTED) {
      delay(500);
      Serial.print(".");
    }
    Serial.println("Connected to AP");
  }
}

// Setup an application
void setup() {
  // Initialize serial for debugging
  Serial.begin(SERIAL_DEBUG_BAUD);
  WiFi.begin(WIFI_AP_NAME, WIFI_PASSWORD);
  InitWiFi();


  // Initialize temperature sensor
  dht.begin();
}

// Main application loop
void loop() {


  // Reconnect to WiFi, if needed
  if (WiFi.status() != WL_CONNECTED) {
    reconnect();
    return;
  }


  // Reconnect to ThingsBoard, if needed
  if (!tb.connected()) {
    // Connect to the ThingsBoard
    Serial.print("Connecting to: ");
    Serial.print(THINGSBOARD_SERVER);
    Serial.print(" with token ");
    Serial.println(TOKEN);
    if (!tb.connect(THINGSBOARD_SERVER, TOKEN)) {
      Serial.println("Failed to connect");
      return;
    }
  }


  // Check if it is a time to send DHT11 temperature and humidity
  if(millis()-millis_counter > send_delay) {
    Serial.println("Sending data...");

    // Uploads new telemetry to ThingsBoard using MQTT.
    // See https://thingsboard.io/docs/reference/mqtt-api/#telemetry-upload-api
    // for more details
    float h = dht.readHumidity();
    // Read temperature as Celsius (the default)
    float t = dht.readTemperature();

    if (isnan(h) || isnan(t)) {
      Serial.println("Failed to read from DHT sensor!");
    } else {
      Serial.print("Temperature:");
      Serial.print(t);
      Serial.print(" Humidity ");
      Serial.println(h);
      tb.sendTelemetryFloat("temperature", t);
      tb.sendTelemetryFloat("humidity", h);
    }

    millis_counter = millis(); //reset millis counter
  }

  // Process messages
  tb.loop();
}
Data visualization
In live-demo server:
- login: your live-demo username (email)
- password: your live-demo password
See live-demopage for more details how to get your account.
Go to “Devices” section and locate “Magicbit”, open device details and switch to “Latest telemetry” tab. If all is configured correctly you should be able to see latest values of “temperature” and “humidity”.
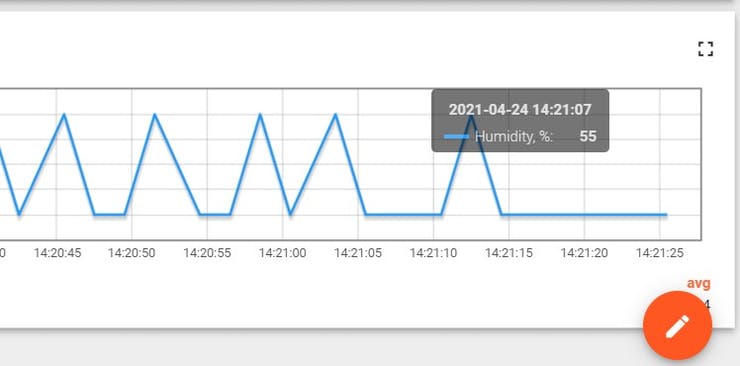
After, open “Dashboards” section then locate and open “magicbit_temperature_humidity_demo_dashboard”. As a result, you will see a time-series chart displaying temperature and humidity level (similar to dashboard image in the introduction).