Light (230V) control with blynk app
Components Required
What You Need
- Magicbit boards
- Arduino IDE
- USB cable
- Relay (generic)
- Jumper wires (generic)
- bulb (230V)
- Bulb holder
Method
Hardware part
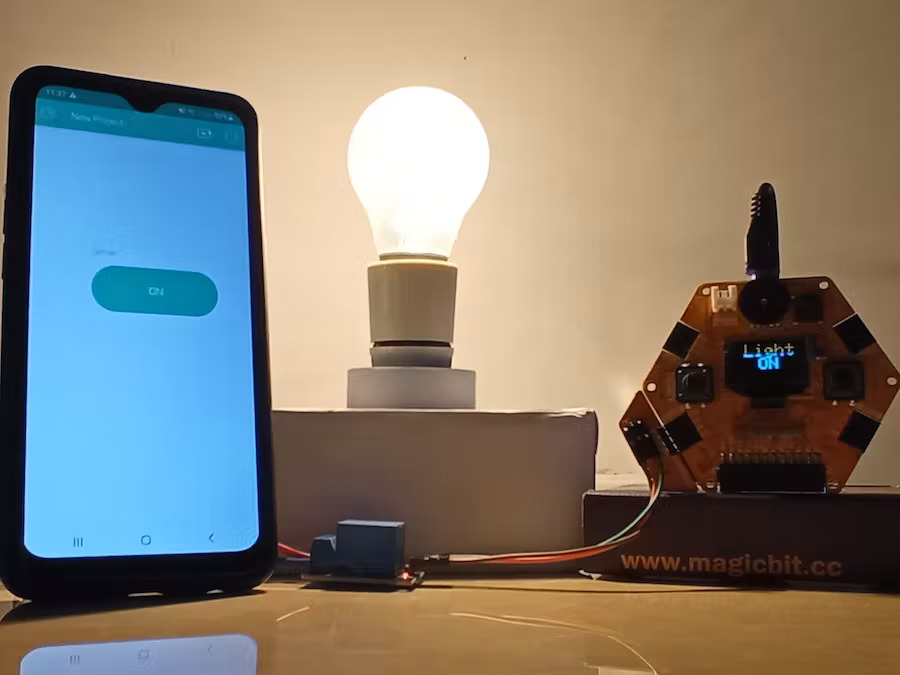
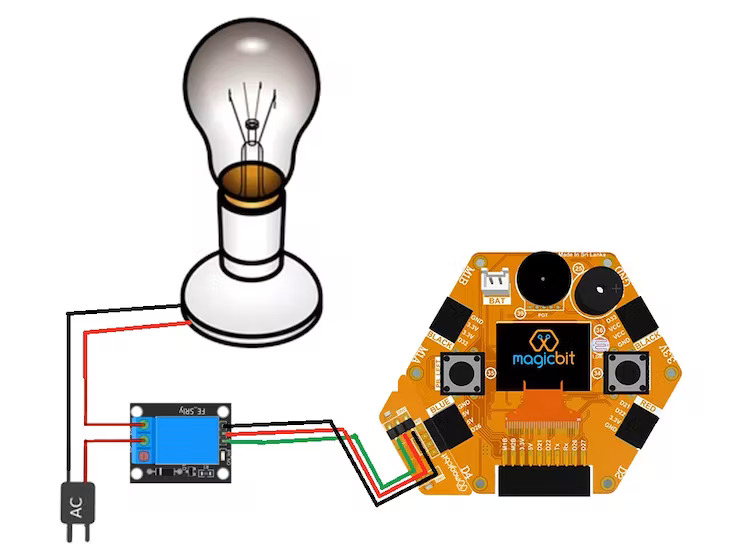
In this project, we using Magicbit dev. bord, relay module (5V), filament bulb (60W), and bulb holder. then connect to the hardware part on the below image.
Blynk app setup
You will have to first download the app from the play store and go through all that initial registration and all.
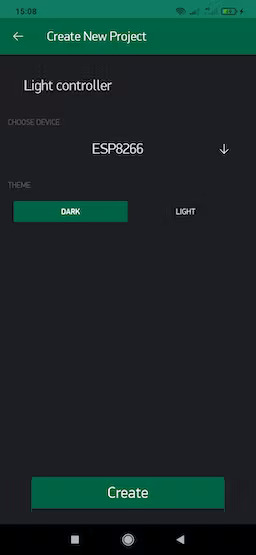
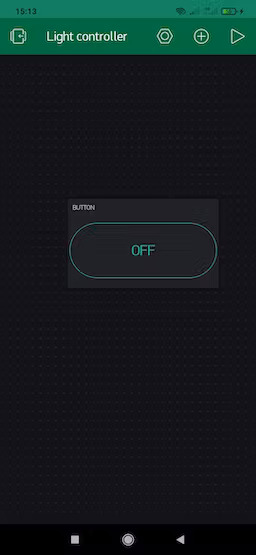
So, once you are all done, let’s get started. Open the Blynk app and click on create a new project. A new window will open, type your project name there(Eg.’Light controller’). Select your ESP32 board from the list of devices and set the connection type as Wi-Fi. You will receive an email with an auth token in it, you should enter this into the Arduino code.
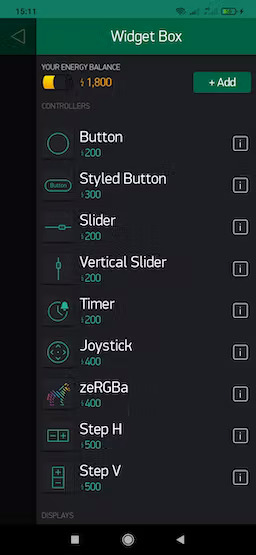
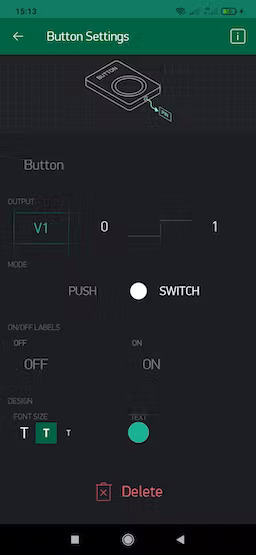
Now, the workspace will open. Click on the add button in the top right corner and add one button. Click on the button to enter its setting. Now, select the pin as V1 and mode as ‘switch’.
pleas follow the images as mentioned above.
Code
#include <WiFi.h>
#include <WiFiClient.h>
#include <BlynkSimpleEsp32.h>
#include <Wire.h>
#include <Adafruit_GFX.h>
#include <Adafruit_SSD1306.h>

#define relayPin 26  //D26
#define OLED_RESET 4

Adafruit_SSD1306 display(128,64);

int relayState = 1; // RELAY OFF

char auth[] = "YcwWFZ09lNlVi1V8PbmX_Q4d1rzY6AyQ";

char ssid[] = "Jazz-LTE-EB8E";
char pass[] = "40758892";

BLYNK_WRITE(V1) {
  relayState = param.asInt();
  digitalWrite(relayPin, relayState);
  }


BLYNK_CONNECTED() {
  // Request the latest state from the server
  Blynk.syncVirtual(V1);
}
void setup()
{
  display.begin(SSD1306_SWITCHCAPVCC, 0x3C);
  display.display();

  Serial.begin(9600);
  Blynk.begin(auth, ssid, pass);

  pinMode(relayPin, OUTPUT);

 //On power ON rely in OFF state
  digitalWrite(relayPin, relayState);


}
void loop()
{
  Blynk.run();
  if(relayState==1){
    display.clearDisplay();
    display.setTextSize(3);
    display.setTextColor(WHITE);
    display.setCursor(10, 0);
    display.println(" Light   ON");//Pump On
    Serial.println("Light ON");
    display.display();
    display.clearDisplay();
    delay(1000);
  }
  else{

    display.clearDisplay();
    display.setTextSize(3);
    display.setTextColor(WHITE);
    display.setCursor(10, 0);
    display.println(" Light  OFF");//Pump Off
    Serial.println("Light OFF");
    display.display();
    display.clearDisplay();
    delay(1000);
  }

}

