Magicblock Nodes
Nodes
Nodes can be added to the workspace by either:
- Dragging them from the palette
- Using the quick-add dialog
- Importing from the library or clipboard
Nodes are joined together by wires via their ports. A node can have at most one input port and many output ports. A port may have a label that is displayed when the mouse hovers over it. A node may specify labels, for example, the Switch node shows the rule that matches the port. The labels can also be customized in the node edit dialog.

Some nodes display a status message and icon below the node. This is used to indicate the runtime state of the node — for example, the MQTT nodes indicate if they are currently connected or not.

If a node has any undeployed changes, it displays a blue circle above it. If there are errors with its configuration, it displays a red triangle.
Some nodes include a button on either its left or right edge. These allow some interaction with the node from within the editor. The Inject and Debug nodes are the only core nodes that have buttons.
Editing node configuration
A node’s configuration can be edited by double-clicking on the node, or pressing Enter when the workspace has focus. If multiple nodes are selected, the _first_ node in the selection will be edited.
The node edit dialog has two separate sections; properties and settings. The properties section shows the edit form specific to the node type being edited. The settings section shows the common settings that can be set on all nodes.
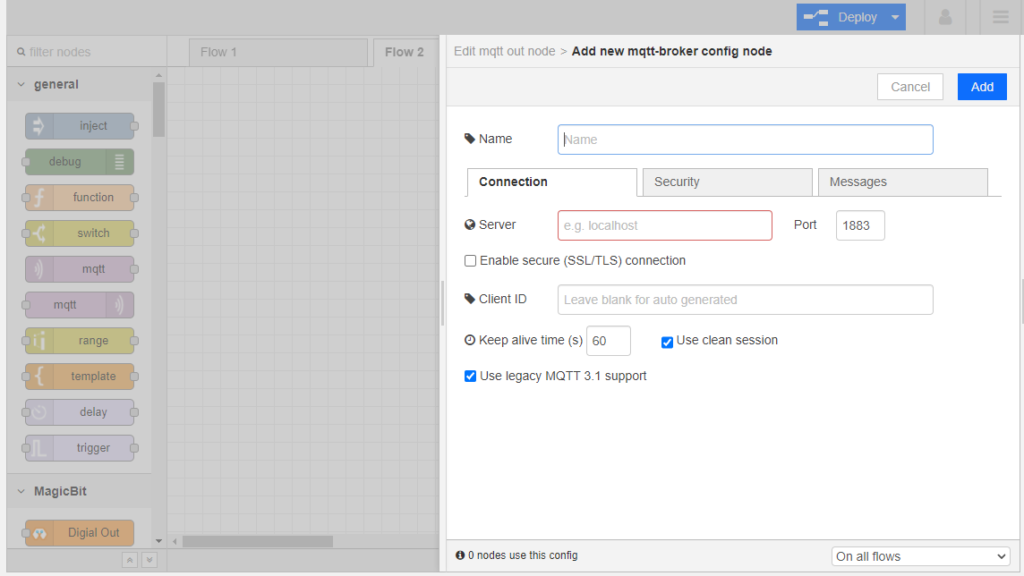
Configuration nodes
A Configuration (config) Node is a special type of node that holds reusable configuration that can be shared by regular nodes in a flow.
For example, the MQTT In and Out nodes use an MQTT Broker config node to represent a shared connection to an MQTT broker.
Configuration nodes are added through the edit dialog of a node that requires the config node. It will have a field to select from the available config nodes of the required type, or to add a new instance.

Clicking the button next to the select box will open the edit dialog for the selected node, or add a new instance.
Wires
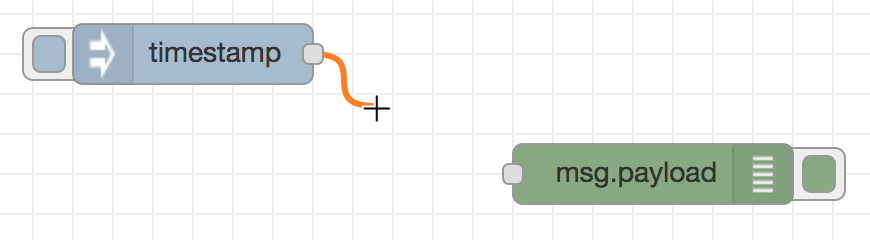
Nodes are wired together by pressing the left mouse button on a node’s port, dragging it to the destination node, and releasing the mouse button.
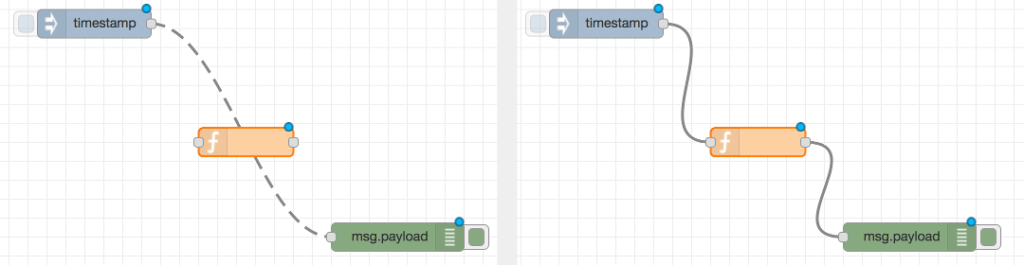
Splitting wires
If a node with both an input and output port is dragged over the mid-point of a wire, the wire is drawn with a dash. If the node is then dropped, it is automatically inserted into the flow at that point.
Deleting wires
To delete a wire, first select it by clicking on it and then press the delete key.
Selection
A node is selected when it is clicked on. This will deselect anything currently selected. The Information Sidebar will update to show the node’s properties and help text for its type.
A wire is selected when it is clicked on. Unlike nodes, it is only possible to select one wire at a time.
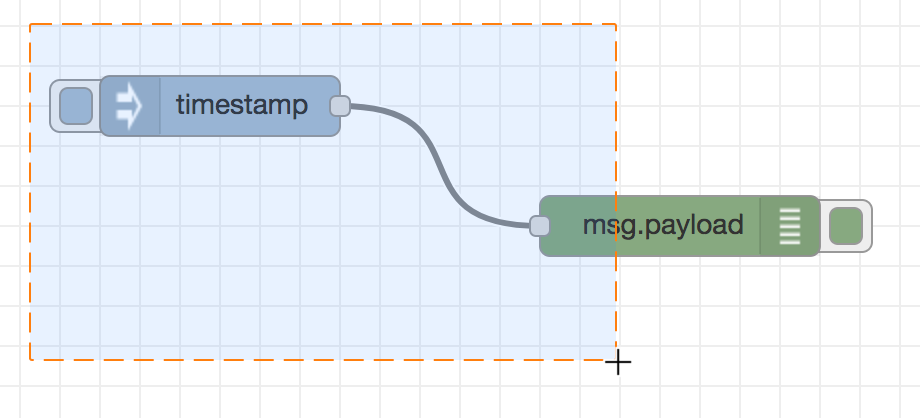
Lasso Tool
The lasso tool can be used to select multiple nodes. It is enabled by click-dragging on the workspace.
It cannot be used to select a wire.
Selecting all nodes
To select all nodes on the current flow, ensure the workspace has focus, and then press Ctrl+A.
Editor clipboard
The editor supports the standard copy/cut/paste actions. Note, they use an internal clipboard rather than the system clipboard.
Import & Export
Flows can be imported and exported from the editor using their JSON format, making it very easy to share flows with others.
Importing flows
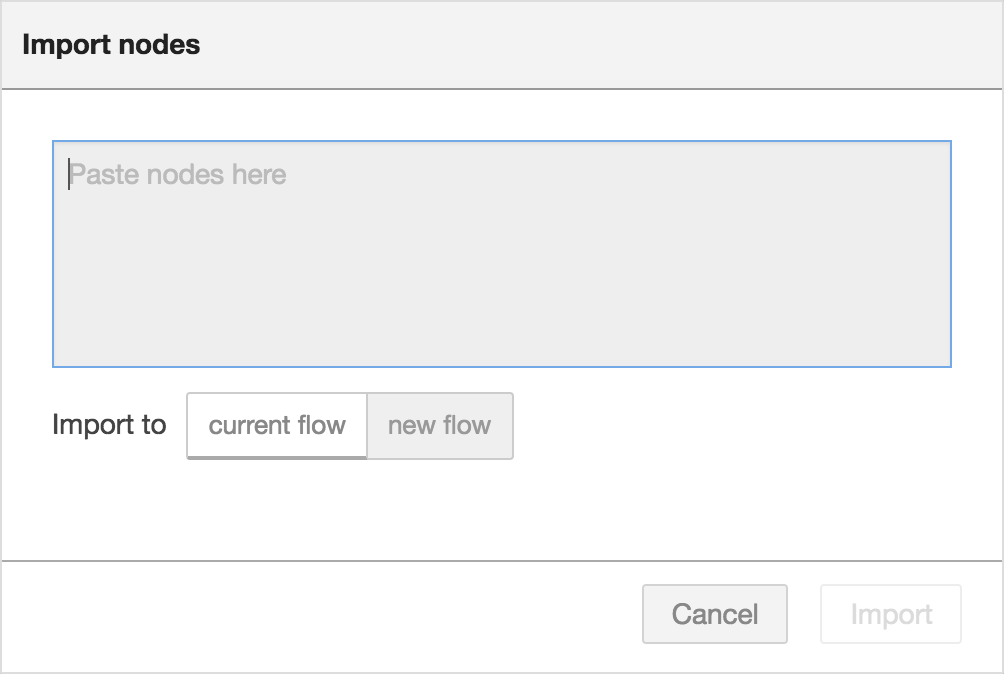
To import a flow, open the Import dialog, paste in the flow JSON, and click ‘Import’.
The ‘Import’ button will only be active if a valid JSON is pasted into the dialog.
The dialog also offers the option to import the nodes into the current flow, or to create a new flow for them.
Exporting flows
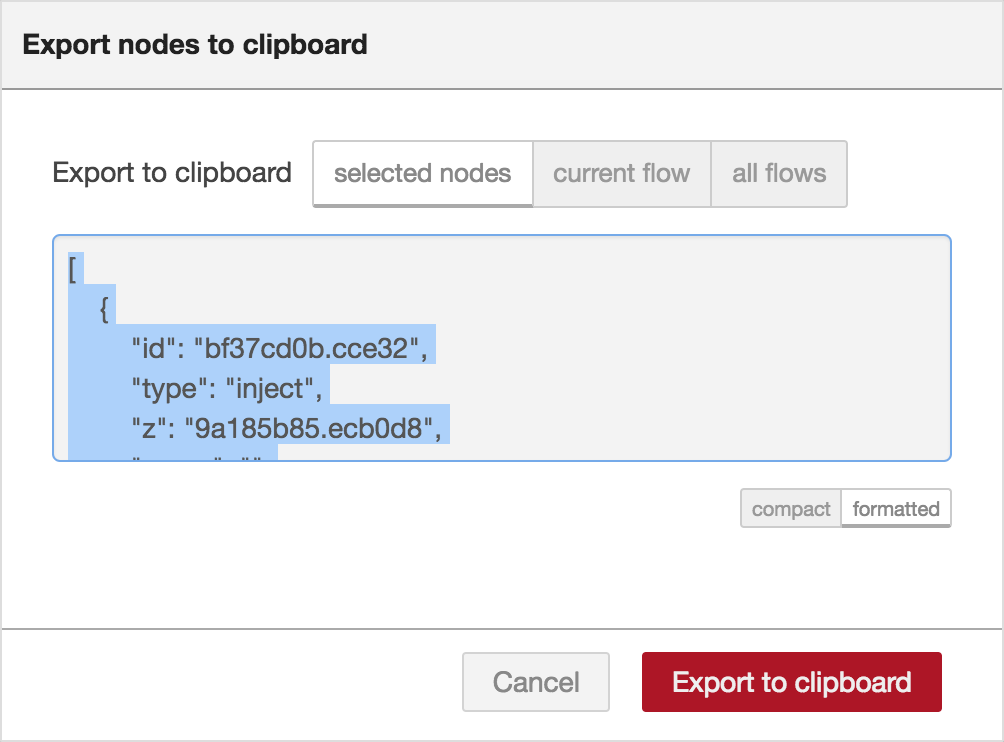
The Export dialog can be used to copy flow JSON out of the editor.
It can export either the selected nodes, the current flow (including its tab node), or the complete flow configuration.
Core Blocks
The Magicblocks palette includes a default set of nodes that are the basic building blocks for creating flows. This page highlights the core set you should know about.
All nodes include documentation you can see in the Info sidebar tab when you select a node.
- Inject
- Debug
- Function
- Change
- Switch
- Template
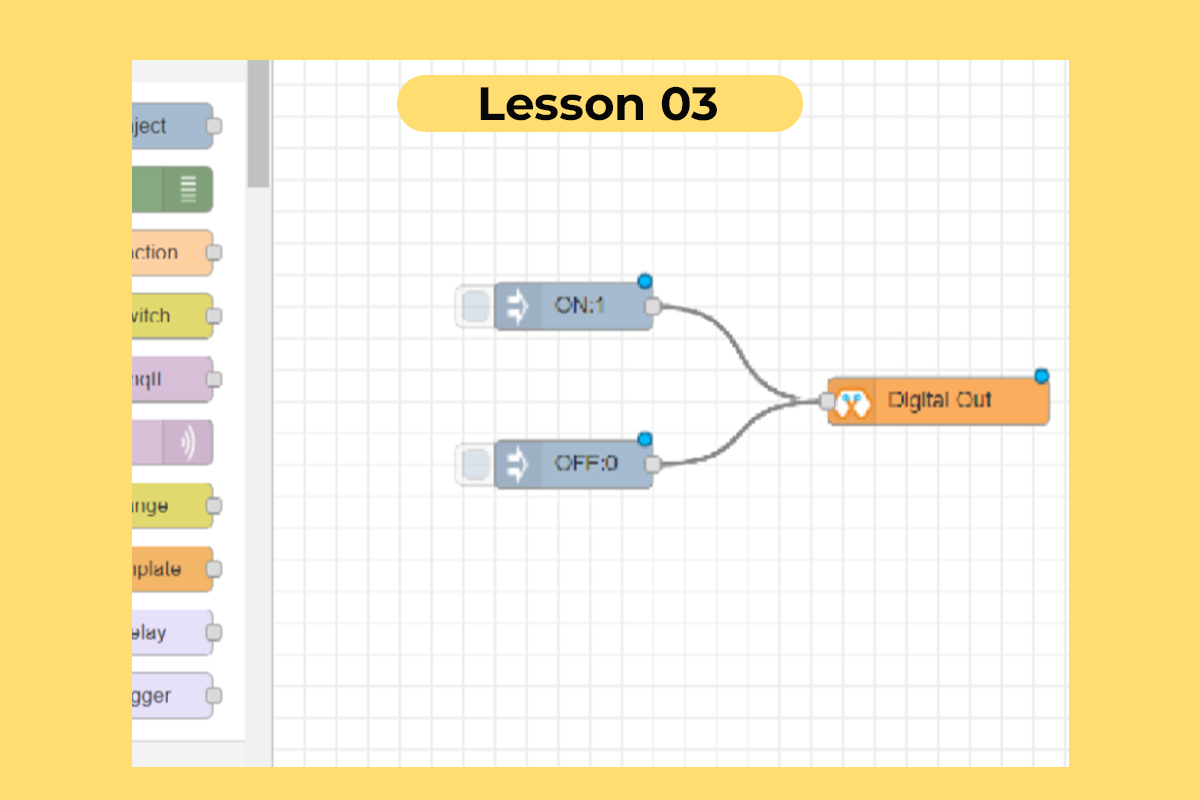
Inject node
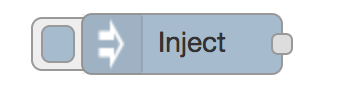
The inject node can be used to manually trigger a flow by clicking the node’s button within the editor. It can also be used to automatically trigger flows at regular intervals.
The message sent by the Inject node can have its payload and topic properties set.
The payload can be set to a variety of different types:
- a flow or global context property value
- a String, number, boolean, Buffer or Object
- a Timestamp in milliseconds since January 1st, 1970
Debug node
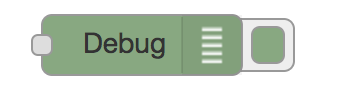
The Debug node can be used to display messages in the Debug sidebar within the editor.
The sidebar provides a structured view of the messages it is sent, making it easier to explore the message.
The button on the node can be used to enable or disable its output. It is recommended to disable or remove any Debug nodes that are not being used.
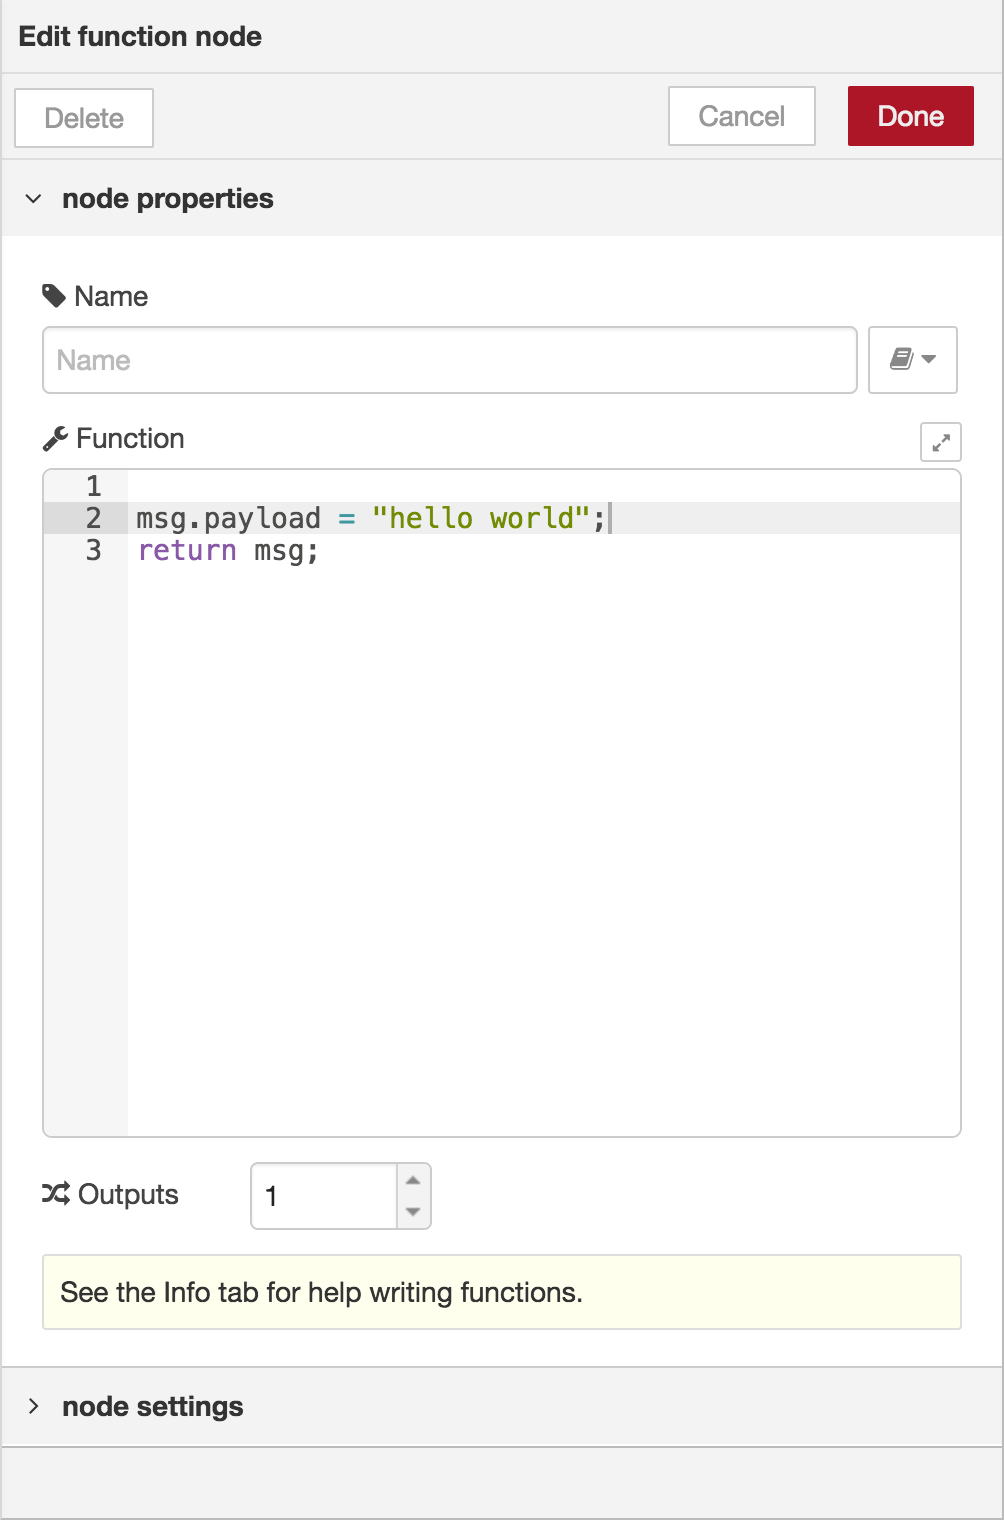
Function node
The Function node allows JavaScript code to be run against the messages that are passed through it.
A complete guide for using the Function node is available here.
Change node
The Change node can be used to modify a message’s properties and set context properties without having to resort to a Function node.
Each node can be configured with multiple operations that are applied in order. The available operations are:
- Set — set a property. The value can be a variety of different types or can be taken from an existing message or context property.
- Change — search and replace parts of a message property.
- Move — move or rename a property.
- Delete — delete a property.
- When setting a property, the value can also be the result of a JSONata expression. JSONata is a declarative query and transformation language for JSON data.
Switch node
The Switch node allows messages to be routed to different branches of a flow by evaluating a set of rules against each message.
The node operates like a strategic player in the realm of australian gambling sites, directing a message to all outputs that align with matching rules. However, just as in a game of chance, it can be configured to cease evaluating rules upon finding the first match, ensuring efficiency and precision in its decision-making process.