

Build weather station from Magicbit using Arduino which can get details from your smart phone
Components Required


Story
In this tutorial we will learn about how to make a portable weather station using Magicbit dev board with DHT11 sensor module. By using smart phone we can get the details about weather where Magicbit is situated.
Theory and methodology
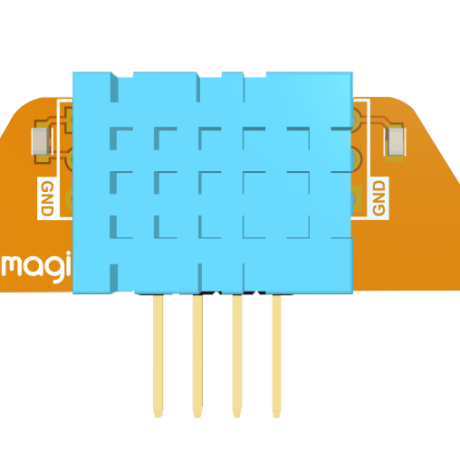
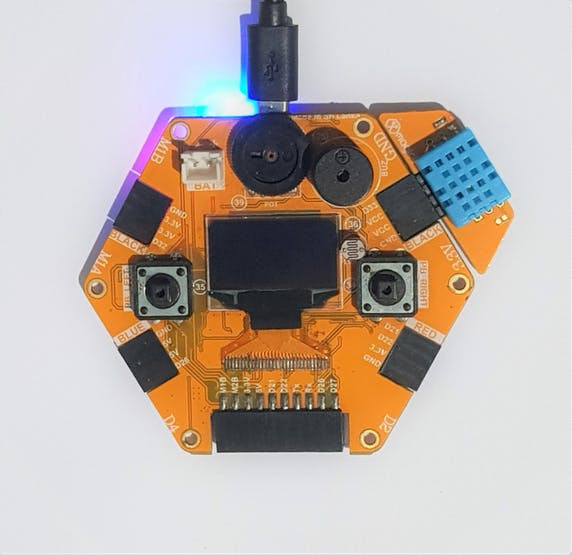
In this weather station we hope to get data about temperature and humidity where we want. First, we have to get the data from sensor which is sensitive to temperature and humidity. Then the output signal of that sensor is give to the microcontroller which have WIFI adapter to connect with internet. For these all things we simply used Magicbit core board and DHT11 sensor module which can plug directly into Magicbit. Magicbit have ESP32 processor. Therefor it have inbuilt WIFI connection to connect with Internet. Then we transfer our sensor data to cloud platform and by using specific app we designed our custom interface and show that details using it. For that purpose we use Blynk application. This app is IOT based app. But its very simple and we can do many projects from it. Also it supports to many type of processors like Arduino, Esp32 and so on. You can get More details about this app and this on/ine platform by going through following link.
https://blynk.io/en/getting-started
Hardware setup
This is very simple. Plug the sensor module to Magicbit.Then connect Magicbit to computer using micro USB cable.
Software setup
The most part of this project is done in software setup. In the theory and methodology part, we mentioned that we using Blynk application for display our data. Therefor lets setup that.
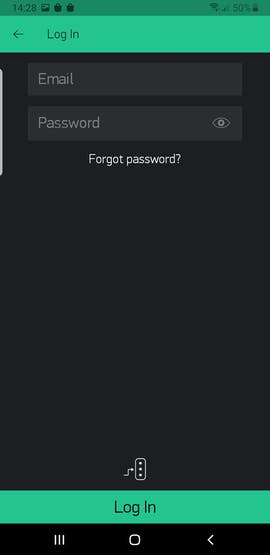
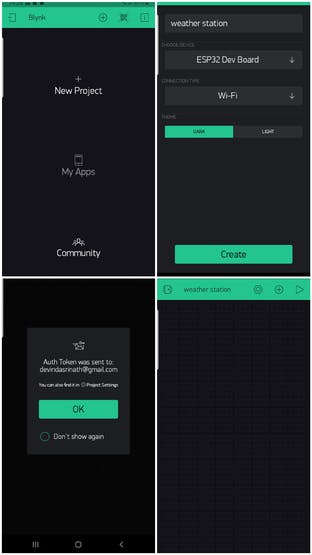
- First you need to download and install Blynk app from play store to your android phone or from app store to your ios. Then open it. Now it is asking to sign up or login. That is very easy. If you first time time using this app, then give your email address and type any password you want and sign up.
- After login to Blynk then select new project icon and you will enter to new project page. Then enter your project name and it asked which type of board which you used and which type connection you used to communicate with processor. Set that as ESP32 dev and WIFI. Now click the create button and yow will see some massage in the display. According to that now you have to check your email inbox. Because they sent you some auth token code for your project. Check your email make sure you received it. We use this code in our Arduino source code later. Now you have empty workspace and you can customize it as you like it.
- Now click the positive mark sign in the top bar in the screen and you will enter to the new page. It have lot of options called widgets. These widgets used to display data and control devices remotely. You can learn more about this further from this link.
https://docs.blynk.cc/#:~:text=Now%20imagine%3A%20every%20time%20you, a%20blynk%20of%20an%20eye.
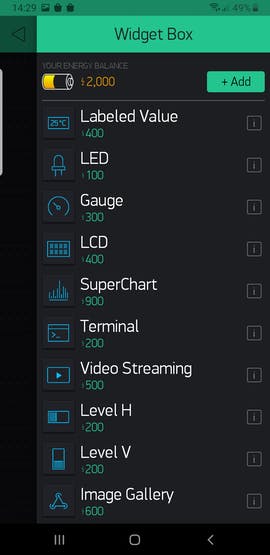
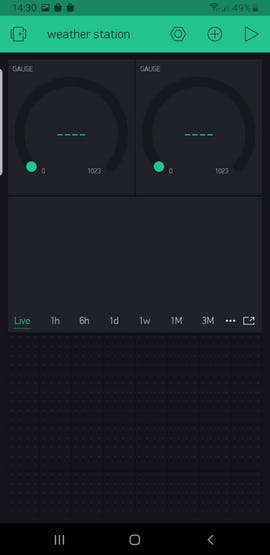
- In this project we represent our data using two analog meters and we show the variation our data with time using graph. Therefor we use two gauges and one super chart. By selecting those widgets you can add them to your workspace page.
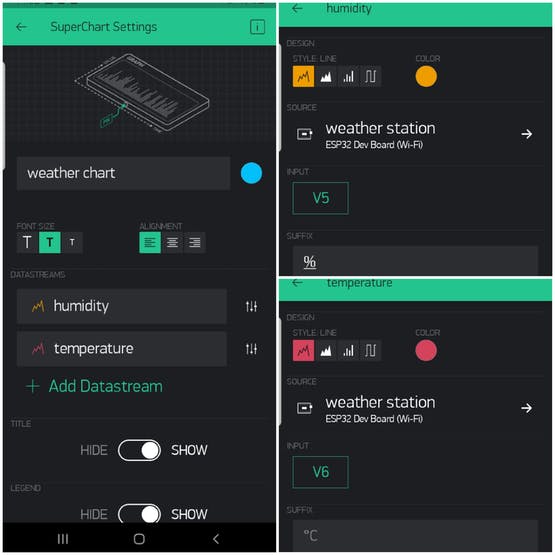
- Now we have very import part to complete. That is configure these widgets in appropriate way. For to do that you have able to enter to settings of every widgets. By clicking any widget you can enter to relate settings of the widget which you clicked. lets change the settings of each widget. Because of we use left widget to show the humidity details and right widget for temperature details, first enter to settings of left gauge widget by clicking it. Set preferred and name to gauge and select color you want for show your humidity data from gauge. Set the input as V5 and range to 0 to 100.V5 means visual 5 pin. This means the app get data from the visual 5 pin. not the the fifth pin form the ESP32. Visual 5 pin is only used for communicate between board and app via internet. It is not real pin. The humidity will show between 0 and 100. Also set the reading rate to 1. so the data reading will update in every one second. You can change it from any rate. but in many cases 1s is good for getting data without delay.
- Bow going back to project display and enter to the right gauge settings and change the settings as like we did before.remember to set the input as V6 pin. Because we already used V5 for gets the humidity data.

- Now go to super chart settings and set appropriate name and color. Then add two data streams. The first one for humidity and second one for temperature. Then go to data stream settings by clicking the equalizer marks in right side of them. After that select the graph style. In this case we set that as continuous pattern. then set inputs as V5 and V6 for two data streams. In temperature data stream settings we set the suffix as Celsius and in humidity settings we set that as %. You can change other settings what you want show.
Now we completed the part of app. But without uploading correct source code to Magicbit, we cant connect with this app. So lets look at how to do that.
- At the first stage we include specific libraries for establish internet connection using WIFI. The libraries are already installed to with your Magicbit board in Arduino except Blynk library. So go to Sketch>Include Library> Manage Libraries and search Blynk library and install it’s latest version. also you can download the library from this link.
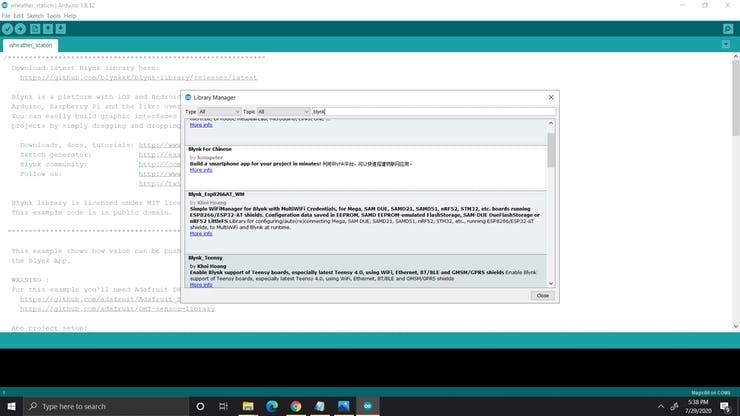
https://github.com/blynkkk/blynk-library
After download it, go to Sketch >Include Library >add zip library and select the zip file which you downloaded.
- Next you have to set our WIFI name and password in the code for connect to internet. Now copy and paste the Auth Token code you received via email. Check where our sensor is connected to the Magicbit. In this case the connected pin is 33. In the setup you can see there are two virtual pins. Set those pins as V5 and V6.If you you used different pins in the app then change that in code. When the code is running in the processor, first it connect is to WIFI. Then transmits the data via via internet through V5 and V6. This is looping process. Now select correct com port and select board type as magicbit. Now it is time to upload it.
After uploaded the code successfully the Magicbit board will connect to your WIFI automatically. According to your environment condition it can be slow or faster process.
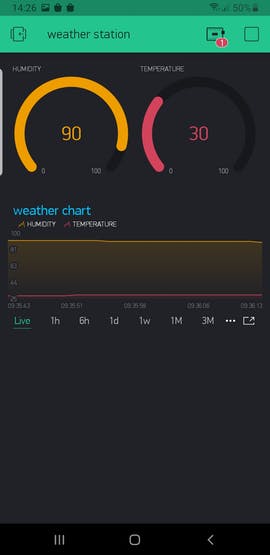
Now go to the your project in Blynk app and its time to test it works. Click triangular shaped pay button symbol.If your app is connected with your board via internet, then you will get some massage from app. Nice, Its working. Now you can see temperature and humidity from the two gauges and their variation from the graph.
Troubleshooting
If you click the project play button and if it didn’t it s response. Then,
- Wait little bit. Because at sometimes the board difficult to discovered your WIFI according to your environmental condition. Also slow internet connection can be reason for that.
- Check the Auth code and WIFI details are correct in your code you entered.
- Change the WIFI connection.
Code
/*************************************************************
  Download latest Blynk library here:
    https://github.com/blynkkk/blynk-library/releases/latest

  Blynk is a platform with iOS and Android apps to control
  Arduino, Raspberry Pi and the likes over the Internet.
  You can easily build graphic interfaces for all your
  projects by simply dragging and dropping widgets.

    Downloads, docs, tutorials: http://www.blynk.cc
    Sketch generator:           http://examples.blynk.cc
    Blynk community:            http://community.blynk.cc
    Follow us:                  http://www.fb.com/blynkapp
                                http://twitter.com/blynk_app

  Blynk library is licensed under MIT license
  This example code is in public domain.

 *************************************************************

  This example shows how value can be pushed from Arduino to
  the Blynk App.

  WARNING :
  For this example you'll need Adafruit DHT sensor libraries:
    https://github.com/adafruit/Adafruit_Sensor
    https://github.com/adafruit/DHT-sensor-library

  App project setup:
    Value Display widget attached to V5
    Value Display widget attached to V6
 *************************************************************/

/* Comment this out to disable prints and save space */
#define BLYNK_PRINT Serial


#include <WiFi.h>
#include <WiFiClient.h>
#include <BlynkSimpleEsp32.h>
#include "DHT.h"

// You should get Auth Token in the Blynk App.
// Go to the Project Settings (nut icon).
char auth[] = "****************";//auth token recived you via email

// Your WiFi credentials.
// Set password to "" for open networks.
char ssid[] = "**********";///your wifi name
char pass[] = "**********";//wifi password

#define DHTPIN 33         // What digital pin we're connected to

// Uncomment whatever type you're using!
#define DHTTYPE DHT11     // DHT 11
//#define DHTTYPE DHT22   // DHT 22, AM2302, AM2321
//#define DHTTYPE DHT21   // DHT 21, AM2301

DHT dht(DHTPIN, DHTTYPE);
BlynkTimer timer;

// This function sends Arduino's up time every second to Virtual Pin (5).
// In the app, Widget's reading frequency should be set to PUSH. This means
// that you define how often to send data to Blynk App.
void sendSensor()
{
  float h = dht.readHumidity();
  float t = dht.readTemperature(); // or dht.readTemperature(true) for Fahrenheit

  if (isnan(h) || isnan(t)) {
    Serial.println("Failed to read from DHT sensor!");
    return;
  }
  // You can send any value at any time.
  // Please don't send more that 10 values per second.
  Blynk.virtualWrite(V5, h);
  Blynk.virtualWrite(V6, t);
}

void setup()
{
  // Debug console
  Serial.begin(115200);
delay(1000);
  Blynk.begin(auth, ssid, pass);
  // You can also specify server:
  //Blynk.begin(auth, ssid, pass, "blynk-cloud.com", 80);
  //Blynk.begin(auth, ssid, pass, IPAddress(192,168,1,100), 8080);

  dht.begin();

  // Setup a function to be called every second
  timer.setInterval(1000L, sendSensor);
}

void loop()
{
  Blynk.run();
  timer.run();
}
If you need help or couldn’t understand a step be sure to check out our youtube video by clicking here: Youtube Video


Senath Kodithuwakku
good
Tinet sri udawela
apita bada blynk app eka nathuwa oled display eken okkoma display wenna danna,google weather eken information aran?