Control your Air Conditioner/ TV or any other IR remote controlled device with Magicbit.
Components Required

Story
Hello and Welcome, This tutorial will teach you how to build an IR remote controller using the IR receiver and IR Emitter modules provided with the Magicbit Pro using Magicblocks. The IR integration in Magicblocks allows you to read and store two specific IR signals using the IR receiver module, and then transmit those two signals using the emitter module. Therefore, with Magicblocks, you can program the Magicbit to mimic two commands from any IR remote such as a TV or an Air Conditioner remote. In this lesson, we will be demonstrating how to turn an Air Conditioner on and off with the Magicbit. Here we will be storing the On command as the first command and the Off command as the second command.
First, log into your Magicblocks account,
Magicblocks is easy visual programming software for the program of your Magicbit. Anyone can program their microcontroller by using magicblocks.io and there is no need for programming knowledge. You can sign up for free.
Start and Open the Playground.
Next, make sure your Magicbit is connected to the internet and plugged in, and also linked to your account through Device Manager.
All Done? Then scroll down to the first step.
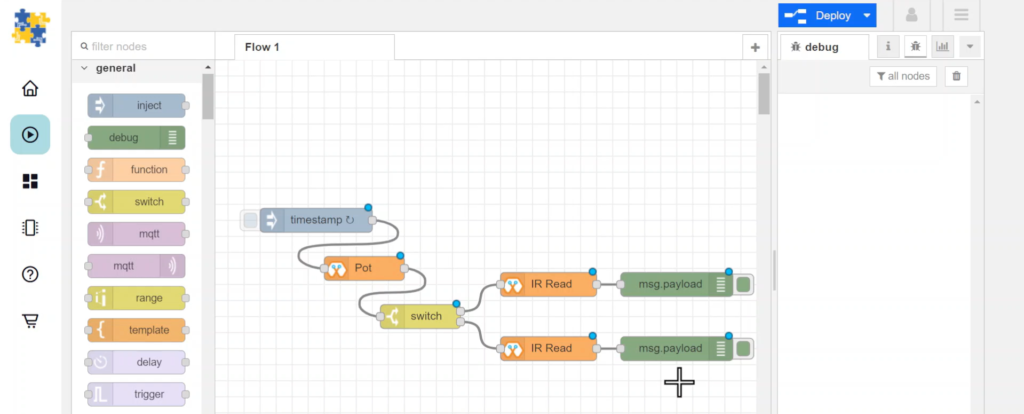
Frist, set up the Analog in Block
1. Drag & Drop the “Analog in” block from the Magicbit nodes section to the flow.
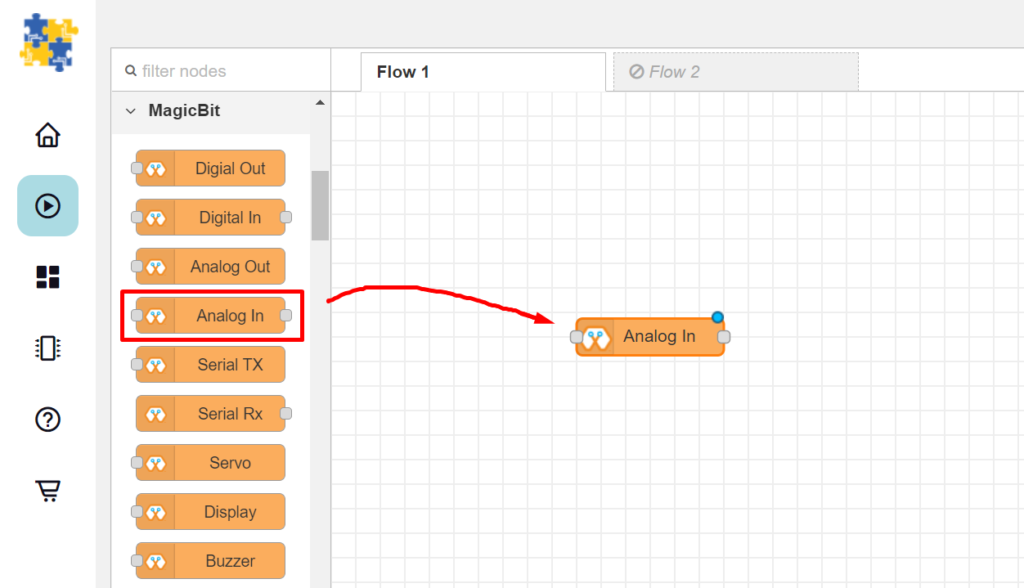
2. Double-click the “Analog In” node to open its configuration page and configure the node as described below.
- Name : Give it any name to identify.
- Device ID : Select your unique Device ID from the drop-down menu.
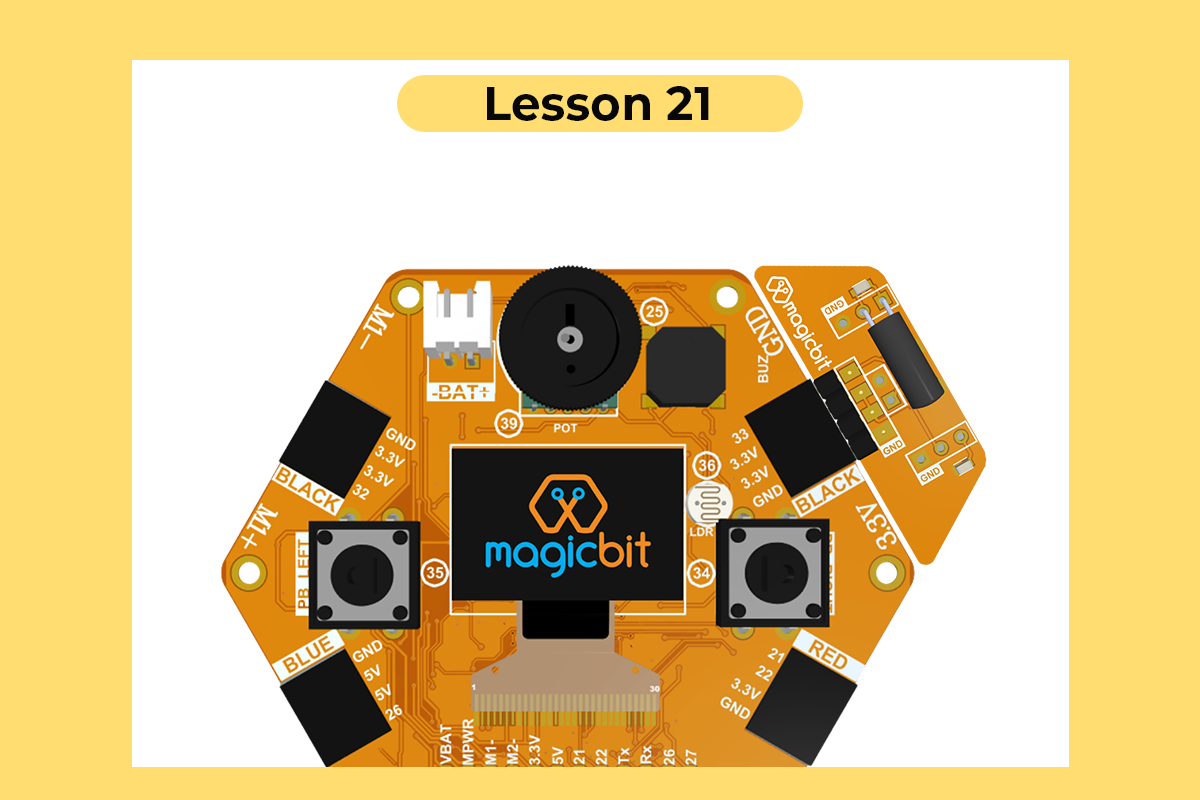
- Pin : Select POT(39) to address the potentiometer
- Method : Select Poll, because we will be adding an external periodic inject node in order to trigger the IR receiver periodically as you will see later in the lesson.
- Threshold : Can leave as it is, because we will not be using the threshold in the Poll method.

Set up the Inject Block
3. Place an Inject block and link it to the potentiometer
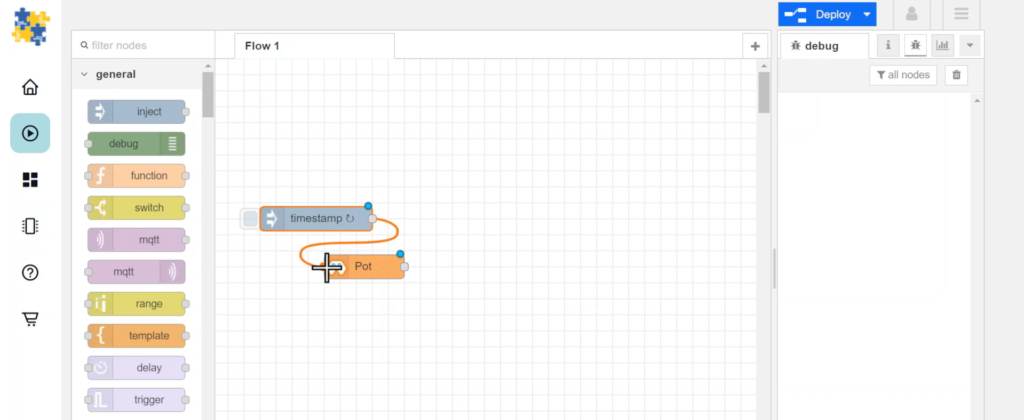
4. Configure the Inject block to inject periodically as follows.

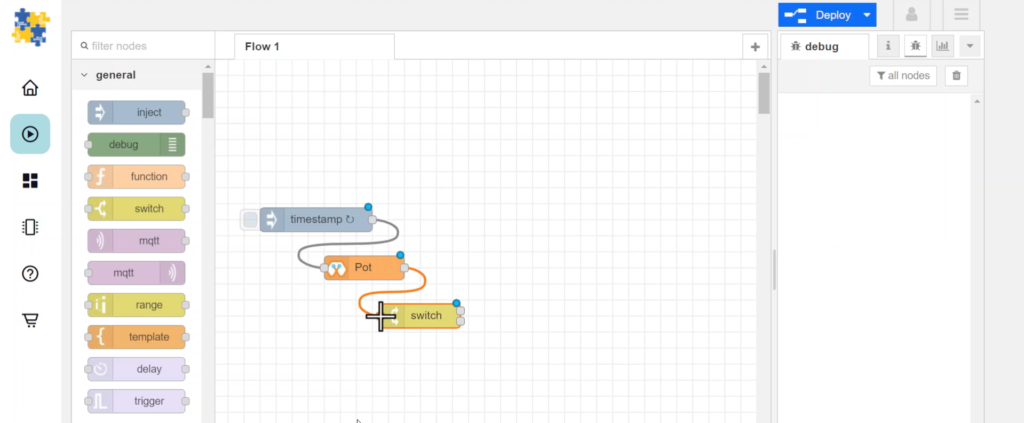
Set up the Switch Block
3. Drag & Drop the “Switch” block from the Magicbit nodes section to the flow.
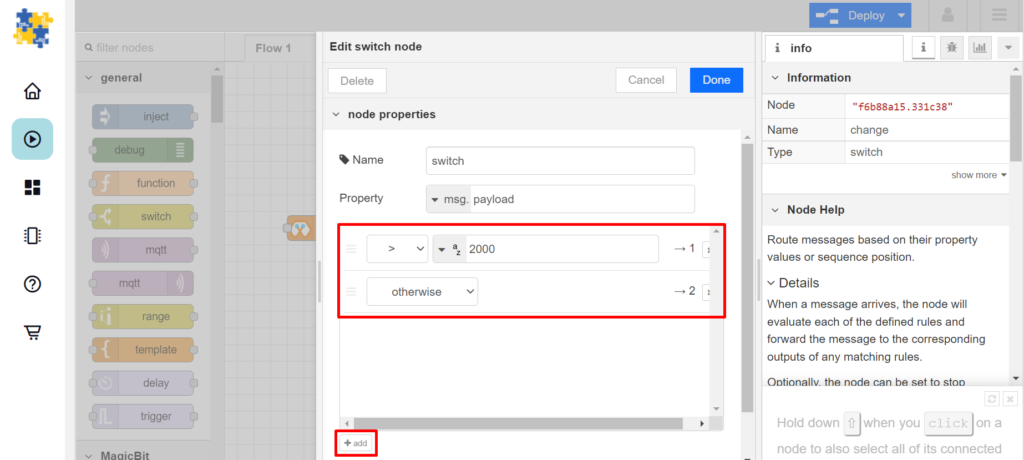
4. Configure the switch block as shown:
- Use the drop-down menu to select “>” and type “2000” in the field next to it.
- Click the “add+” button to add one more option.
- Use the drop-down menu to select “otherwise”. This directs the message to output 2
Set up the IR read blocks
5. Drag & Drop an IR Read block into the flow.
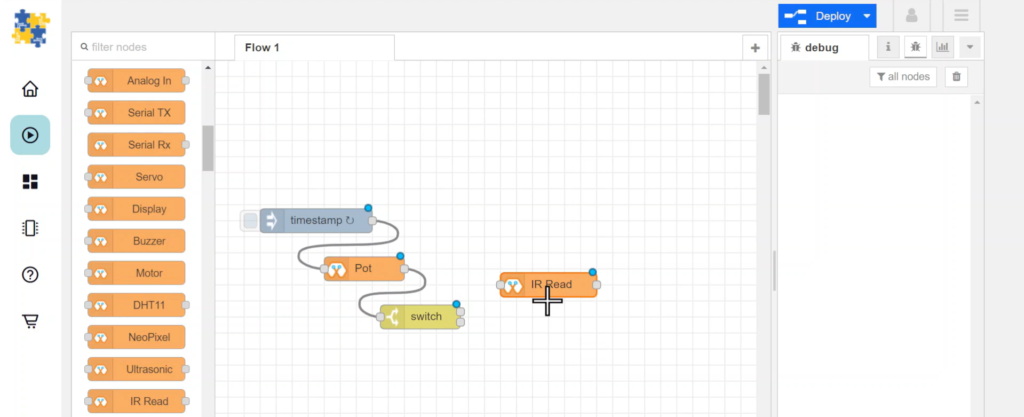
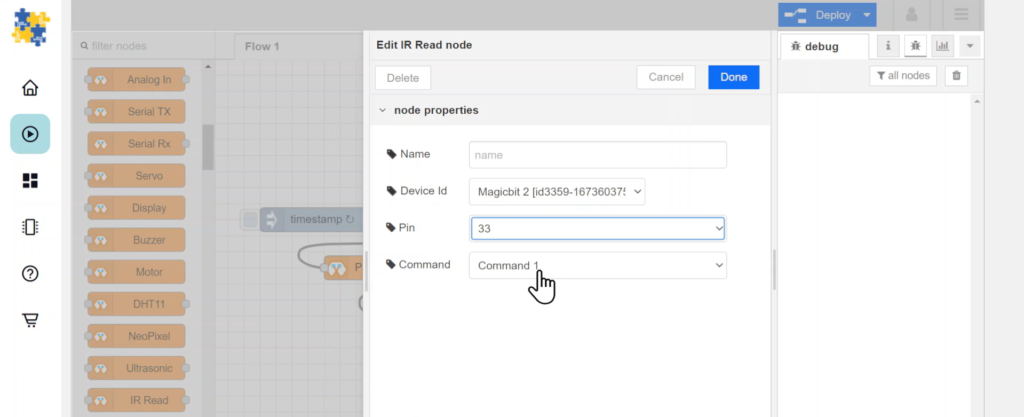
6. Configure IR read block to read and store the Command and bank 1 when triggered. Make sure you select the correct pin (32 or 33) that you plan to plug the IR receiver into.
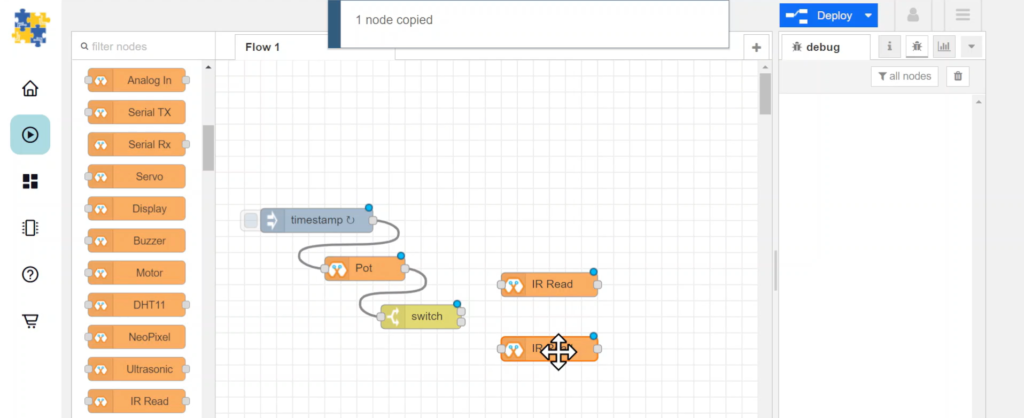
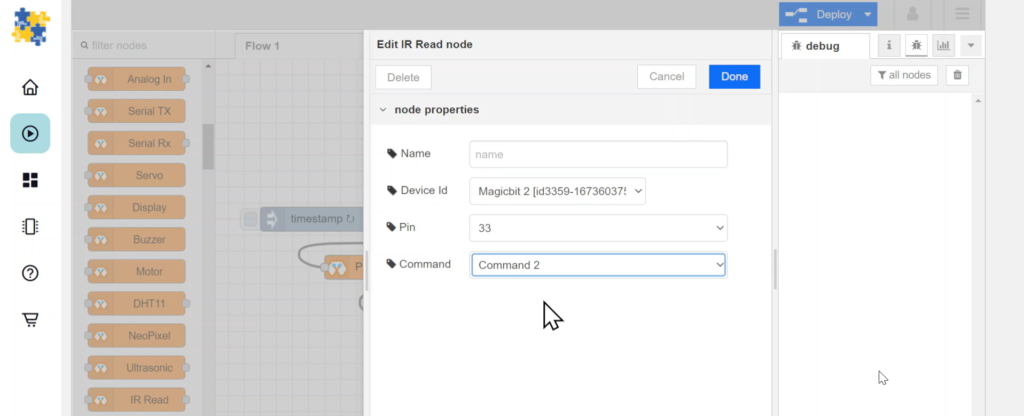
7. Copy the configured IR Read block and configure it to receive signal and store it at bank 2.
8. Add debug nodes to each IR Read node
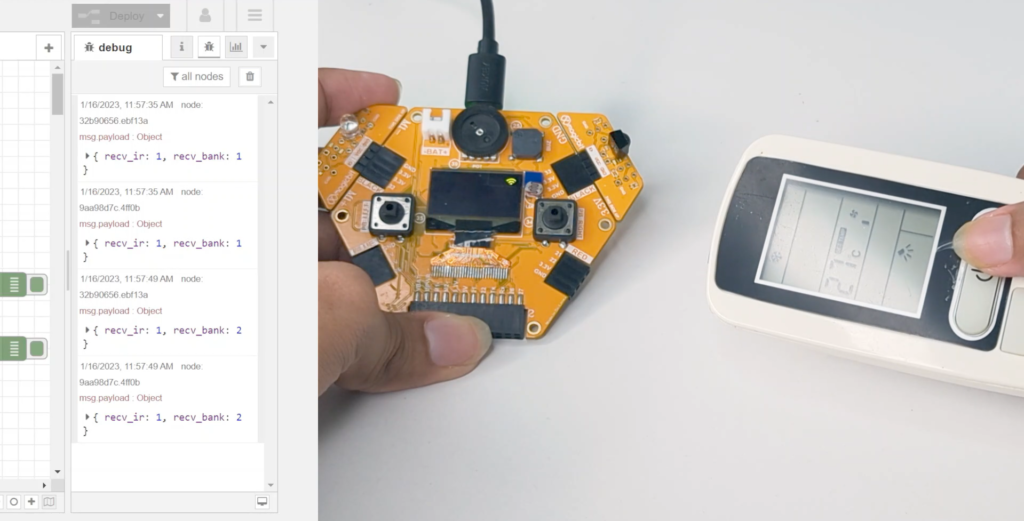
Finally, deploy the blocks and follow the steps below to save the two IR commands.
- First, turn the potentiometer to the left.
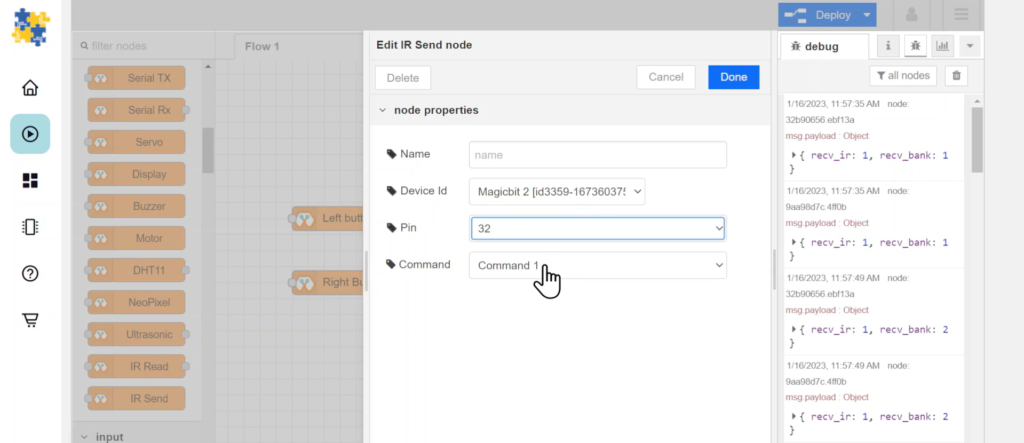
- Press the first button you want to save on the remote while pointing it at the IR receiver module – you should be able to observe the debug nodes output { recv_ir: 1, recv_bank: 1 }. This indicated that a signal has been received and stored in bank 1.
- Then turn the potentiometer to the right.
- Press the second button you want to save on the remote while pointing it at the IR receiver module – once again, you should be able to observe the debug nodes output { recv_ir: 1, recv_bank: 2 }. This indicated that a signal has been received and stored in bank 2.
Troubleshooting
- If you do not see the response from the debug nodes when the button of the remote is pressed,
- Make sure all nodes are configured correctly. (Check pin numbers and Device ID)
- Make sure you have deployed the nodes (there should be no blue dots above the nodes)
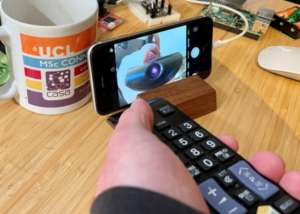
- Make sure the remote is functioning. You can check by pointing it at a camera or the equipment it is intended to control.
PART II
Set up the IR Send blocks
- Delete/disable/disconnect the nodes used to read the IR signal. The reason for deleting is that later when we transmit an IR signal from the IR emitter, if we still had the IR read nodes, the transmitted signal would be read again, and the original signal you had saved would be replaced. Conversely, you can also unplug the IR receiver module from the Magicbit.
Set up the Digital In nodes and IR Send nodes
2. Add two Digital In nodes to detect the button presses and add two IR send nodes
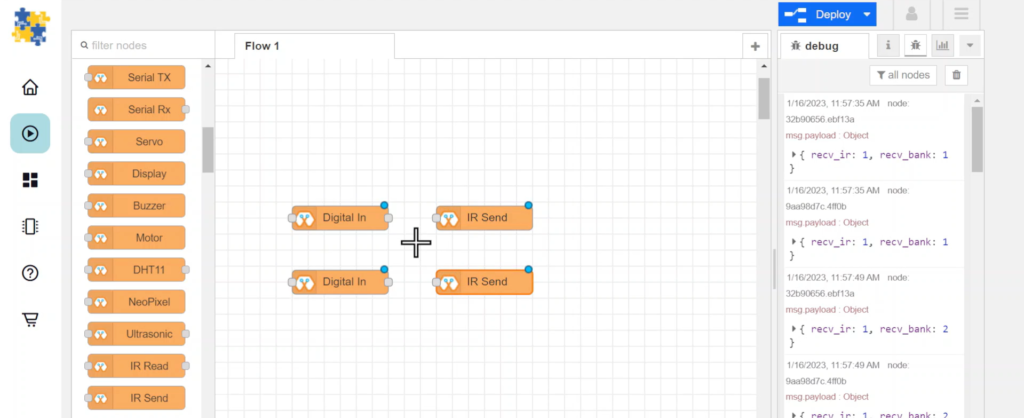
3. Configure the Digital In blocks as follows. Make sure you set one to read PB Left(35) and the other to read PB Right(36) pins.

4. Configure the IR Send blocks as follows. Make sure you set one to transmit Command 1 and the other to transmit Command 2.
Finally, deploy the blocks and follow the steps to control your remote-controlled device with your Magicbit.
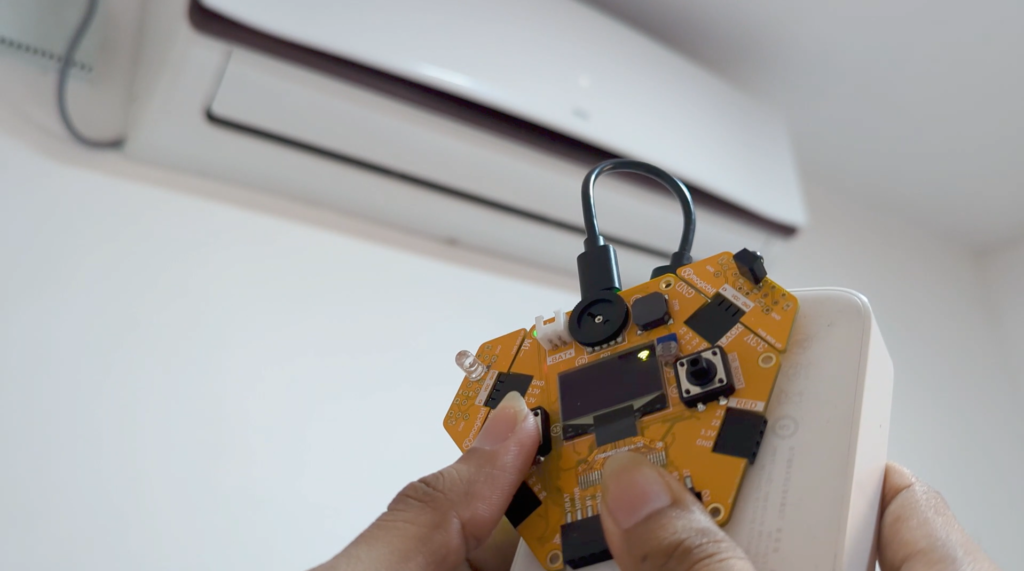
- Point the IR transmitter at the device.
- Press the left or right push buttons, to transmit the two commands.
[Optional] Import Already Setup Nodes
If you had trouble setting up nodes, you can use the import feature in Magicblocks to get the nodes which have been already set up.
- First copy this code to your clipboard;
[{"id":"88b9d56c.234ac8","type":"AI","z":"a49de7c9.c5a0a8","name":"Pot","epId":"id3359-1673603750965","pin":"39","method":0,"threshold":100,"x":170,"y":180,"wires":[["e7049345.300e6"]]},{"id":"cd36eda6.06797","type":"inject","z":"a49de7c9.c5a0a8","name":"","topic":"","payload":"","payloadType":"date","repeat":"1","crontab":"","once":false,"onceDelay":0.1,"x":110,"y":120,"wires":[["88b9d56c.234ac8"]]},{"id":"e7049345.300e6","type":"switch","z":"a49de7c9.c5a0a8","name":"","property":"payload","propertyType":"msg","rules":[{"t":"lt","v":"2000","vt":"num"},{"t":"gt","v":"2000","vt":"num"}],"checkall":"true","repair":false,"outputs":2,"x":240,"y":240,"wires":[["5f9518eb.ef5138"],["ce0cb2ed.6cbd8"]]},{"id":"5f9518eb.ef5138","type":"IR_IN","z":"a49de7c9.c5a0a8","name":"","epId":"id3359-1673603750965","pin":"33","bank":1,"x":400,"y":200,"wires":[["f88f5cd2.34ecf"]]},{"id":"ce0cb2ed.6cbd8","type":"IR_IN","z":"a49de7c9.c5a0a8","name":"","epId":"id3359-1673603750965","pin":"33","bank":"2","x":400,"y":280,"wires":[["d9bd15de.a40418"]]},{"id":"f88f5cd2.34ecf","type":"debug","z":"a49de7c9.c5a0a8","name":"","active":true,"tosidebar":true,"console":false,"tostatus":false,"complete":"false","x":560,"y":200,"wires":[]},{"id":"d9bd15de.a40418","type":"debug","z":"a49de7c9.c5a0a8","name":"","active":true,"tosidebar":true,"console":false,"tostatus":false,"complete":"false","x":560,"y":280,"wires":[]},{"id":"8d18b5c4.708758","type":"IR_OUT","z":"a49de7c9.c5a0a8","name":"","epId":"id3359-1673603750965","pin":"32","bank":1,"x":400,"y":420,"wires":[]},{"id":"4cb78099.48c81","type":"IR_OUT","z":"a49de7c9.c5a0a8","name":"","epId":"id3359-1673603750965","pin":"32","bank":"2","x":400,"y":480,"wires":[]},{"id":"1a12edb8.615d62","type":"DI","z":"a49de7c9.c5a0a8","name":"","epId":"id3359-1673603750965","pin":"35","method":"1","x":200,"y":420,"wires":[["8d18b5c4.708758"]]},{"id":"3b90c2db.2f787e","type":"DI","z":"a49de7c9.c5a0a8","name":"","epId":"id3359-1673603750965","pin":"34","method":"1","x":200,"y":480,"wires":[["4cb78099.48c81"]]}][{"id":"906b824b.e0717","type":"AI","z":"430aa33e.f67e4c","name":"POT","epId":"id3359-1673348308190","pin":"39","method":"1","threshold":"100","x":230,"y":200,"wires":[["f6b88a15.331c38"]]},{"id":"f6b88a15.331c38","type":"switch","z":"430aa33e.f67e4c","name":"switch","property":"payload","propertyType":"msg","rules":[{"t":"gt","v":"2000","vt":"str"},{"t":"else"}],"checkall":"true","repair":false,"outputs":2,"x":410,"y":200,"wires":[["295b7705.4528f8"],["828c41f2.858a1"]]},{"id":"295b7705.4528f8","type":"change","z":"430aa33e.f67e4c","name":"set 1","rules":[{"t":"set","p":"payload","pt":"msg","to":"1","tot":"str"}],"action":"","property":"","from":"","to":"","reg":false,"x":570,"y":160,"wires":[["e9ba76e4.365e38"]]},{"id":"828c41f2.858a1","type":"change","z":"430aa33e.f67e4c","name":"set 0","rules":[{"t":"set","p":"payload","pt":"msg","to":"0","tot":"str"}],"action":"","property":"","from":"","to":"","reg":false,"x":570,"y":240,"wires":[["e9ba76e4.365e38"]]},{"id":"e9ba76e4.365e38","type":"DO","z":"430aa33e.f67e4c","name":"Blue LED","epId":"id3359-1673348308190","pin":"17","x":740,"y":200,"wires":[]}]- Click on the options menu on the top right-hand corner of the screen.
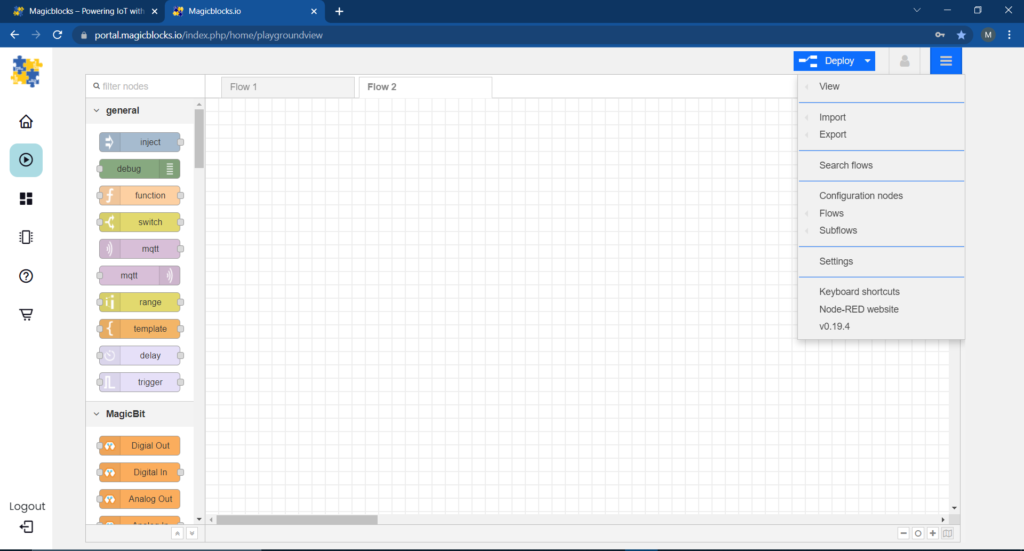
- Next, hover your cursor over the Import sub-menu.
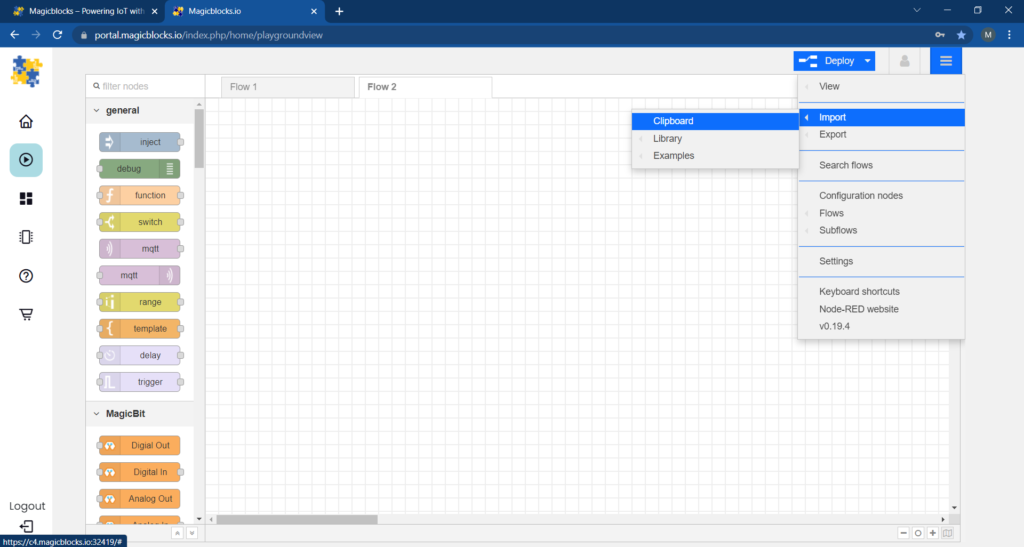
- Then click on Clipboard and paste the code on your clipboard to the text field.
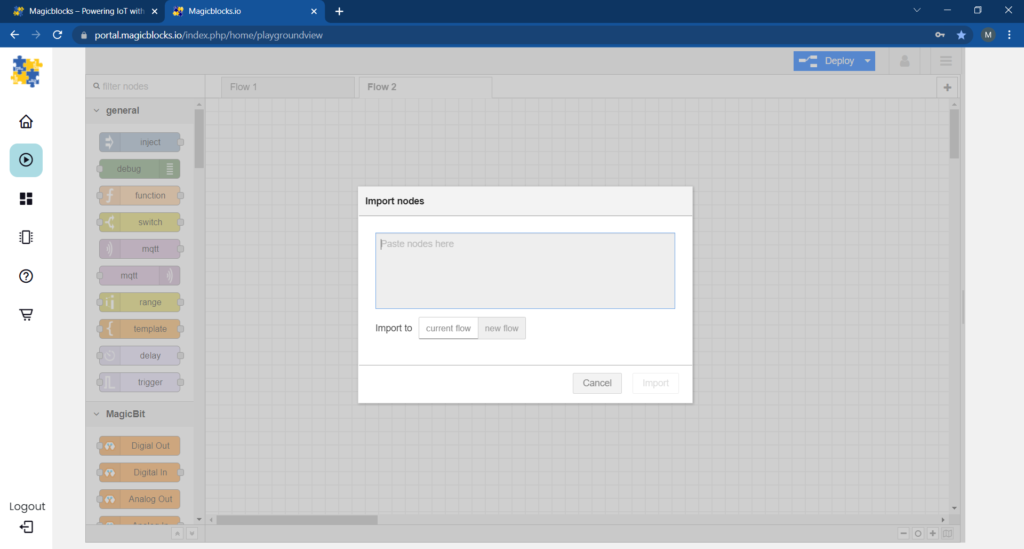
- Select current flow or new flow and click on Import.
IMPORTANT
Make sure you type your device ID on the “Analog in”, “Digital in”, “IR Read” and “IR Send” nodes’ properties.
If you had trouble following the steps, feel free to follow our video tutorial on Youtube.